Attaching the roll to the take-up reel – HP Designjet 5100 Printer series User Manual
Page 33
2-9
Load and unload material
HP Designjet 5100 printer Customer Reference Guide
This list includes only a selection of the available printing materials. The
Using Your Printer CD has a more complete list.
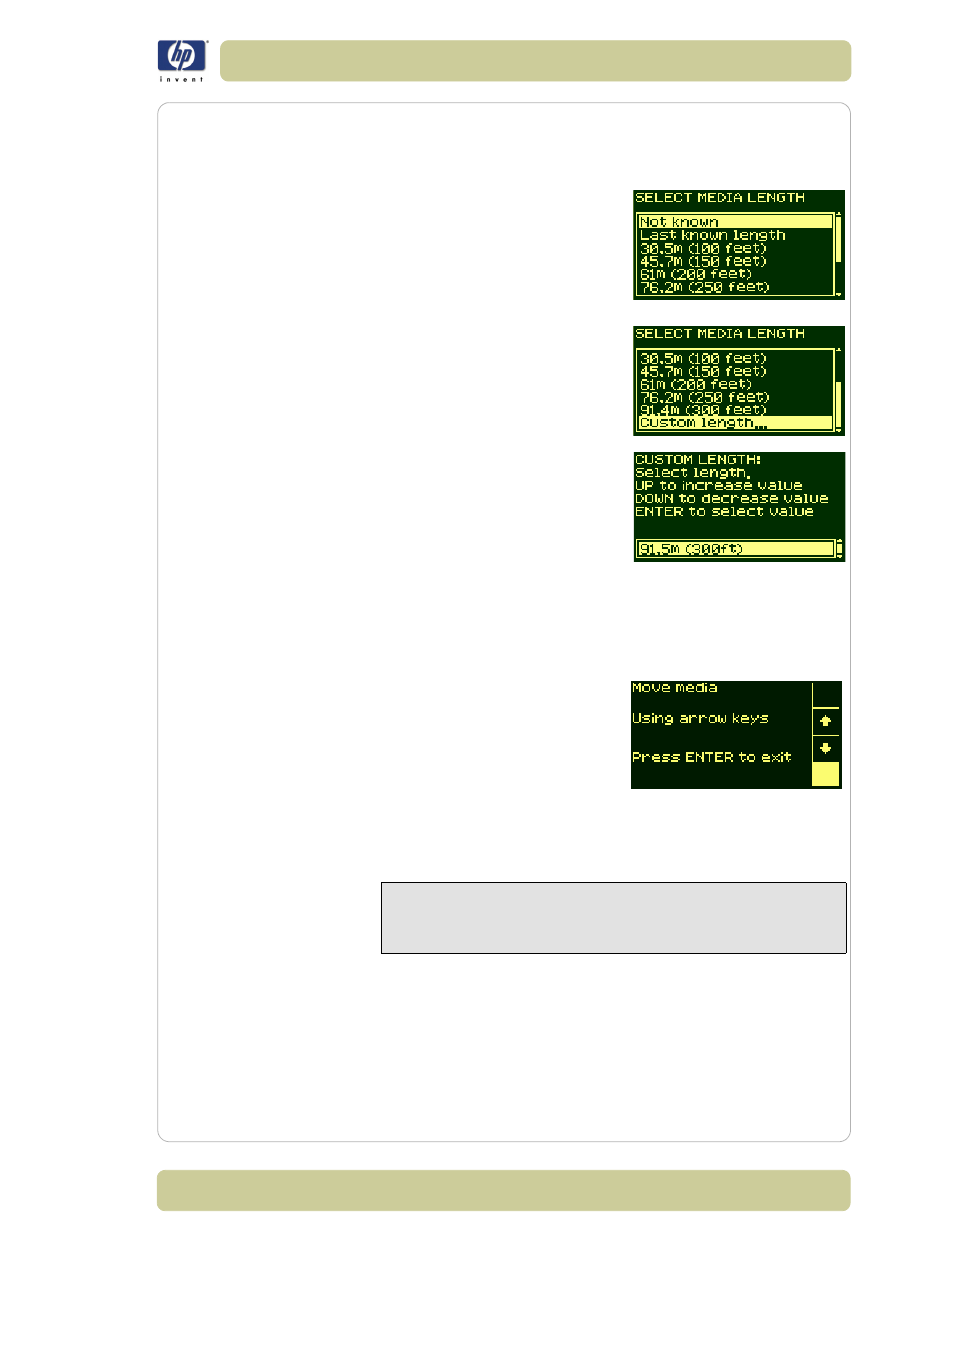
22 Select the printing material you are using and press the Enter key.
23 The front panel displays various lengths of
material.
If you have been using the roll previously, it
is unlikely to be a standard length of roll.
The remaining length should be printed on
the end of the roll (if you have not trimmed
it). In this case select Custom Media.
24 Change the screen using the
↑
and
↓
keys
to the amount printed on the end of the roll.
Press the Enter key.
NOTE: To turn on and off the media length tracking function see
Media
length tracking, on page 19
.
The printer is ready. You can now load the roll onto the take-up reel. Follow
the procedure in the next section.
Attaching the roll to the take-up reel
The first part of attaching a roll to the take-up reel is attaching the end of the
roll (by tape) to the core tube supplied with the take-up reel. You can also
use an empty cardboard tube to replace the plastic core tube. Both types of
The following procedure is applicable to your printer only if you
have a take-up reel. If you do not have one, you can order it as
an optional accessory; see the ‘Using Your Printer CD’.