Replacing the library robotics controller, 46 removing the library robotics controller – HP EML E-series Tape Libraries User Manual
Page 82
10482
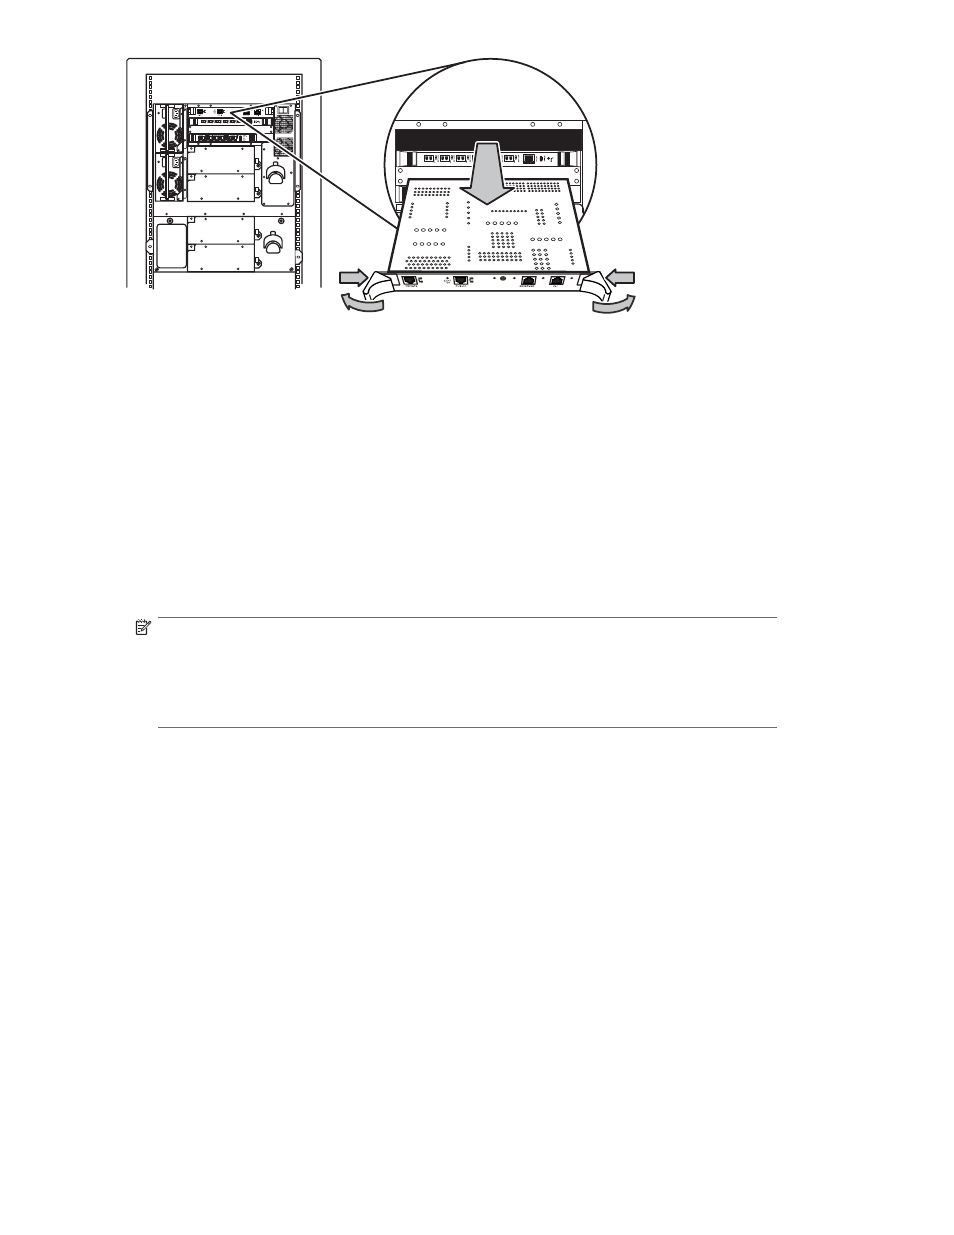
Figure 46 Removing the library robotics controller
Replacing the library robotics controller
1.
Orient the library robotics controller as shown in
on page 82. Align the library robotics
controller with the guides in the top slot in the card cage in the base module and slide the library
robotics controller into the library.
2.
Push the ejector handles to the inside to fully engage the library robotics controller into the backplane.
3.
Tighten the captive screws in both ejector handles. Use a #1 Phillips screwdriver.
4.
Plug the cables into the library robotics controller exactly as they were plugged into the original
library robotics controller (see the labels on the cables or the note that you wrote).
5.
Turn on the power to the library.
NOTE:
The settings for the library robotics controller are stored in the 8U base module backplane
and are transferred to a new library robotics controller when installed. If you have to
replace a library robotics controller and the 8U base module backplane together, contact
HP service.
6.
Wait 10 minutes and then make sure that the library robotics controller ACTIVE indicator is lit
(see “
82
Removing and replacing parts