Figure 51 opening the add path window, 51 opening the add path window – HP StorageWorks XP Remote Web Console Software User Manual
Page 99
Hitachi TrueCopy for z/OS user guide
99
3.
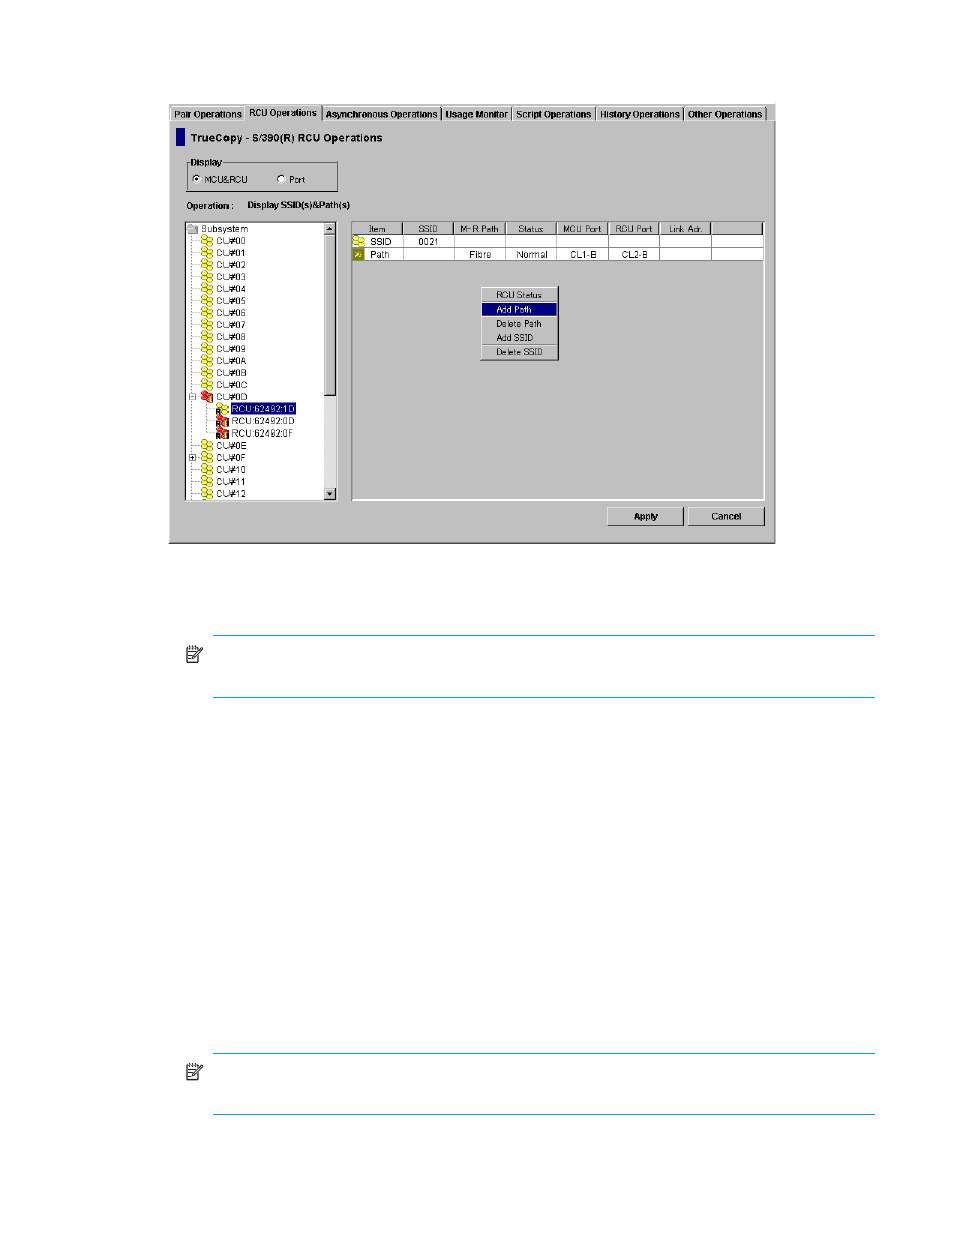
Right-click to display the pop-up menu, click Edit SSID(s) & Path(s), and then click Add Path (see
). The Add Path window is displayed.
Figure 51
Opening the Add Path window
4.
From the Add Path window, enter the new path(s).
5.
Click Set in the Add Path window to set the paths. The list changes to the Path Settings Parameter list.
NOTE:
The options can be modified and/or canceled after you have set them. See ”
parameters and omitting selected settings
6.
Click Apply on the TrueCopy main window. The MCU will automatically begin using the new logical
path for TC390 activities.
Before deleting a path to an RCU, verify that the remaining number of paths will be equal to or greater
than the minimum number of paths setting (selected on the RCU Option window). The delete path
operation will fail if the number of remaining paths is less than the minimum number of paths.
To delete a path from the connected MCU to an existing RCU:
1.
Open the RCU Option window and check the minimum number of paths setting. If the remaining
number of paths will be less than this value, the delete path operation will fail. If needed, change the
minimum number of paths so that you can delete the appropriate path.
2.
From the CU Number/Port tree on the RCU Operations window, verify the correct CU image is
selected.
3.
From the MCU/RCU list on the RCU Operations window, select the RCU with the path you want to
delete.
4.
Right-click to display the pop-up menu, click Edit SSID(s) & Path(s), and then click Delete Path. The list
changes to the Path Settings Parameter list. Only the selected RCUs are listed.
NOTE:
The options can be modified and/or canceled after you have set them. See ”
parameters and omitting selected settings
5.
Click Apply on the TrueCopy main window.