RIDGID Hydraulic Pipe Bender User Manual
Page 12
10
Hydraulic Pipe Bender
5. Place the pipe to be bent in front of the former and
if needed place supports under the pipe to hold it
in the correct position for bending. The former in-
cludes a mark at the center for alignment. Properly
support the pipe to prevent tipping of the pipe and
the bender throughout use.
6. Apply grease to the side of the corner support that
contacts the pipe. Place the supports over the ap-
propriate holes as marked on the bending frame.
The corner supports must be located in the correct,
symmetrical holes or the bender can be damaged
during use.
Figure 9 – Loading the Pipe
7. Close the upper wing and fully insert the pins
through both wings of the bending frame and the
corner supports. Align the corner supports so that
the zero marks on the angle indicators line up with
the mark on the upper wing (See Figure 12).
8. Confirm that the bender and pipe is stable.
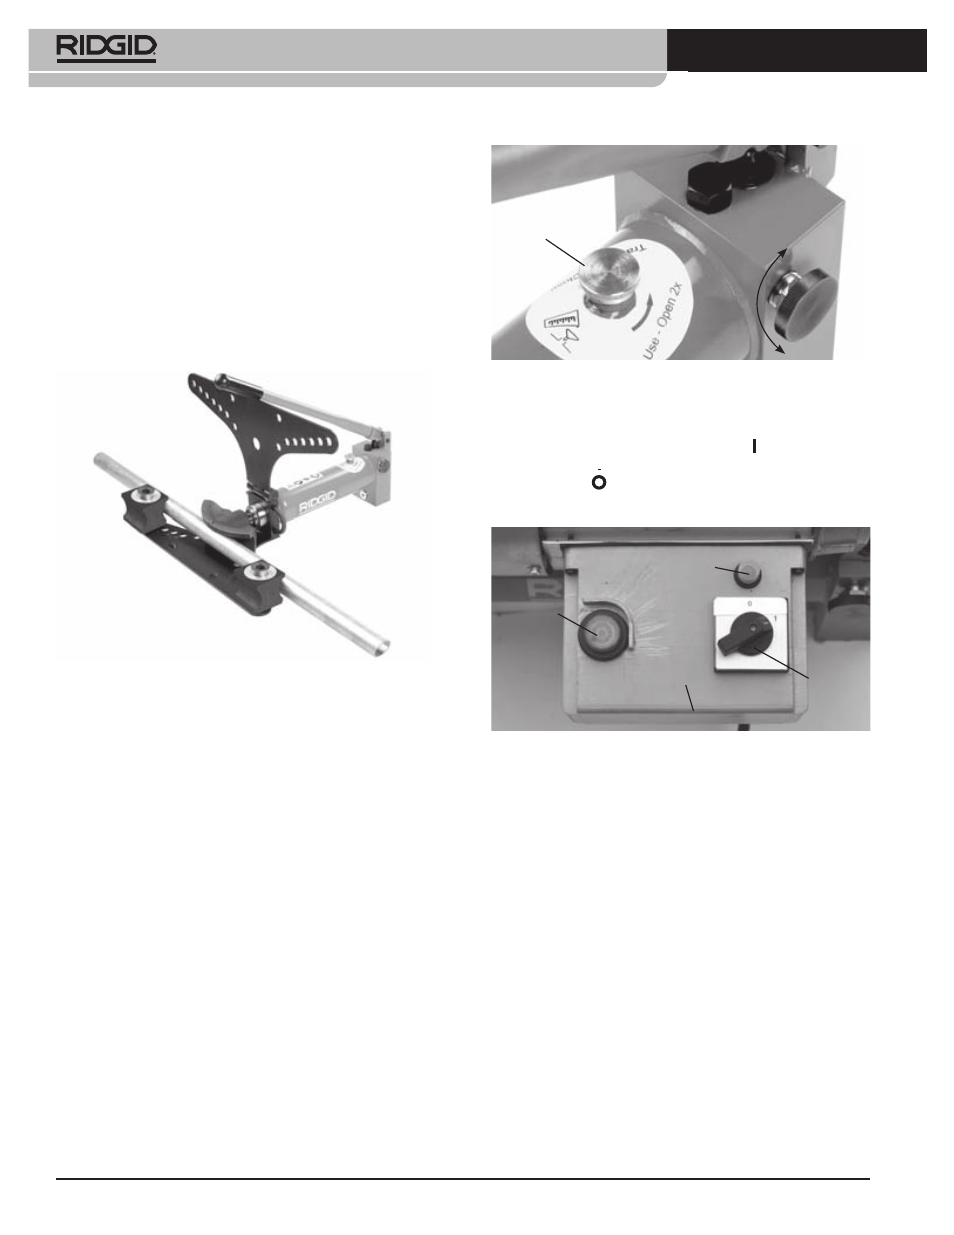
Advancing/Retracting The Ram
Turn the release knob clockwise on the hydraulic pump
to the closed (advance ram) position (See Figure 10.) To
retract ram, turn release knob counter clockwise to re-
tract position. An internal spring will retract the ram.
Manual Pump
Move the pump handle up and down to advance the
ram. Do not use handle extensions. This can damage the
handle or slip during use and cause injury.
Figure 10 – Release Knob Positions (Advance/Retract)
Advance
Oil Fil Port
Retract
Electric Pump
Move the ON/OFF switch to the ON ( ) position. Press
the RUN switch to ADVANCE the ram. Place ON/OFF
switch in OFF ( ) position when not in use or retracting
the ram.
Figure 11 – Motor Controls
Run
Switch
Circuit
Breaker
Motor
ON/OFF
Switch
Bending the Pipe
1. Stand next to the cylinder on the same side as the
Release knob. Do not reach over the machine to op-
erate. Advance the ram. When the bending former
touches the pipe, slowly and carefully advance the
ram while aligning the bend location with the for-
mer. Continue advancing the ram until the pipe is
just against the corner supports. Do not place your
fingers, hands or other body parts in a position that
would allow them to be trapped or crushed.
2. Confirm that the corner supports are in the cor-
rect position (as marked on the frame) for the pipe
to be bent and the pins are fully inserted through
both sides of the frame (See Figure 12). If not, the
bender can be damaged during use. Make sure
that the ends of the pipe extend past the corner
supports enough to prevent the pipe from slipping
off during bending. See Chart 1.