Matrox Electronic Systems Matrox RT.X2 User Manual
Page 72
64
Chapter 4, Setting Up Realtime Effects with Adobe Premiere Pro
Click the
R
,
G
, or
B
button to select the curve corresponding to the color channel
you want to adjust, or click the
Master
button for the master curve, and then drag
the curve to obtain your desired effect. For example, click the
R
button and drag
the top right end point towards the top left of the grid to increase the slope of the
curve and add red to the clip. Drag that same point towards the bottom right of
the grid to decrease the slope of the curve and remove red from the clip. Clicking
the
Enable
button will show/hide any adjustments you have made to the RGB
channels at any time (you do not need to click
Enable
to start adjusting the
curves).
¥ Tip
For increased precision, hold down the
ALT
key while you drag the curve,
or the
CRTL
key to change your cursor into a crosshair that will help you align
your curve to the grid.
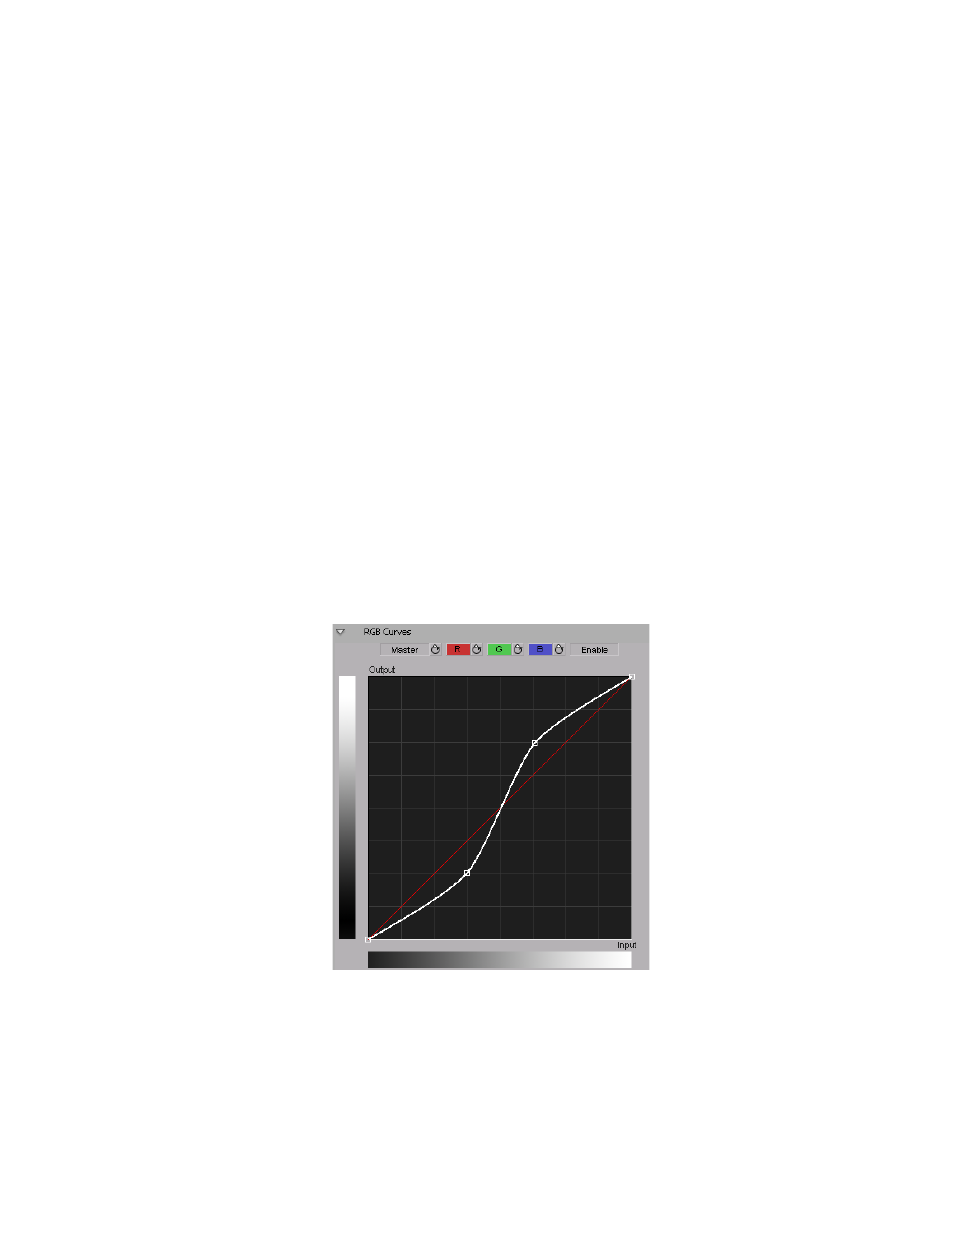
You can add up to 14 control points to each curve in addition to the two default
end points. These control points act as anchors that allow you to lock your curve
so adjustments can be applied only to specific tonal ranges. Click on a curve to
add control points, and hold the
SHIFT
key while clicking a control point to
delete it (end points cannot be deleted). Adjusting the points in the top right area
of the grid affects highlights, the middle area affects midtones, and the bottom
left area affects shadows. For example, the following S-shaped master curve adds
contrast in the midtones range, without creating any completely black or white
areas.