2 installing/removing the system unit, Installing/removing the system unit, 50 operating manual – FUJITSU PRIMERGY BX400 S1 User Manual
Page 50: Installing the hardware, Caution, Bx400 s1, Figure 4: position of the cage nuts
50
Operating Manual
BX400
S1
Installing the hardware
©
c
o
gni
ta
s.
Ge
se
lls
ch
ft f
ür T
ec
hn
ik
-Do
ku
m
ent
at
io
n
m
b
H 20
12
P
fa
d:
C
:\P
rogr
am
m
e
\F
CT
\t
im
_ap
p\
tim
_l
oc
al
\w
ork
\W
A
LT
E
R
\O
B
J_
DO
K
U
-9
24
5-0
04
.fm
Ê
Fasten the carrier rail at the lower end of the support bracket using three
centering screws (2).
Ê
Position the carrier rail in the front left support upright.
Ê
Fasten the carrier rail to the front support upright (3) using three M5 screws
including plugwashers.
Ê
Repeat the operation for the right carrier rail. This rail does not require a
support bracket.
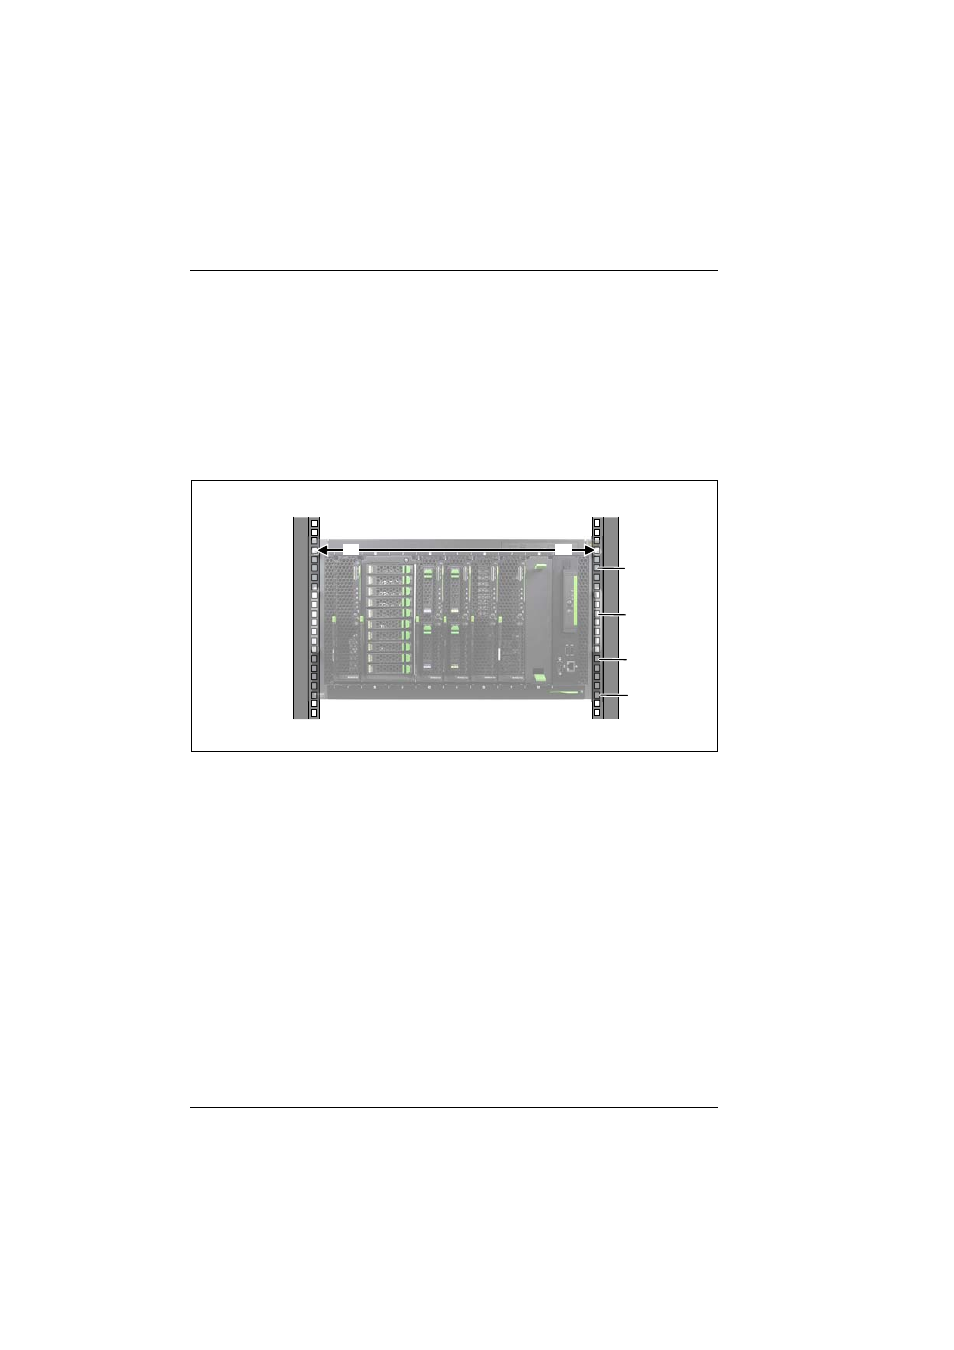
Figure 4: Position of the cage nuts
Ê
Fit the cage nuts for securing the system unit in the corresponding catches
on the right and left support uprights.
4.4.2
Installing/removing the system unit
V
CAUTION!
●
Because the PRIMERGY BX400 S1 system unit is large and
heavy, at least two people are needed to safely mount it in the
rack or remove it from the rack.
●
Please observe the safety information and notes on rack installation
in the
1
5
10
15
17
17