RISCO Group ACUS User Manual
Page 497
User Manual for ACUS
Uncontrolled
when
printed
©
RISCO
Group
469
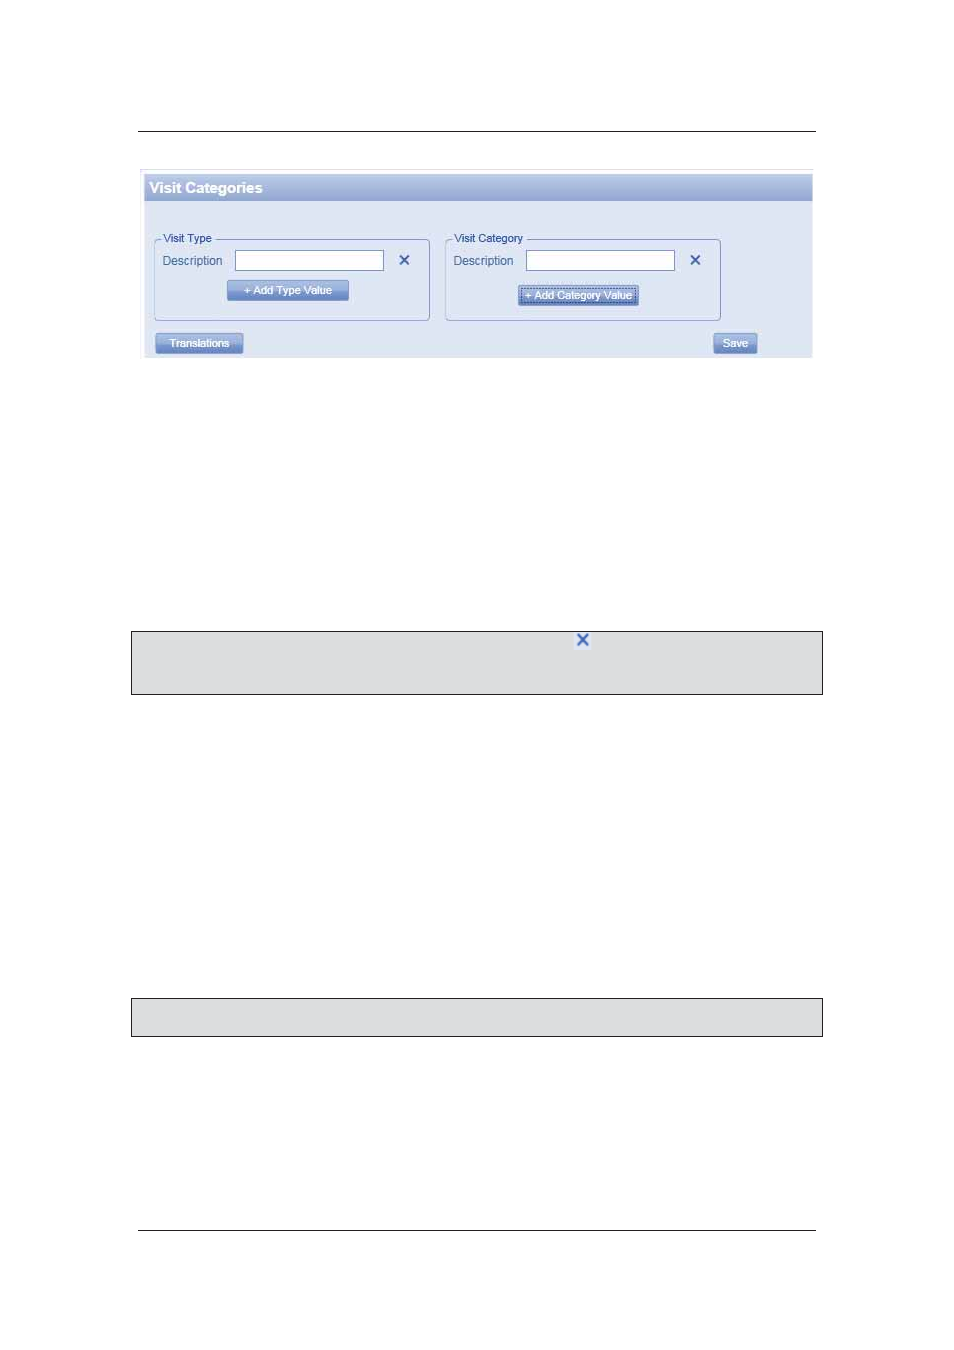
Figure 494: Visit Categories
2. Click
+ Add Type Value. One new row for the type appears.
3. Enter the description of the Type in the Description field.
4. Click
Save. The system displays a message, “Layout updated successfully”.
To add a Category:
5. Click
+ Add Category Value. A new row appears.
6. Enter the description of the category in the Description field.
7. Click
Save. The system displays a message, “Layout updated successfully”
Note: You can delete Visit Type and Visit Category by clicking
(Delete). You may click
Translation to translate the types and category values in any language of your selection.
For more details on how to translate, refer to
5.13
Add Translation for Terms
.
24.11 Users
You can create new ACUS users and assign roles to them using this tab. There are three types of
user roles in ACUS namely, Receptionist, Security Guard and Security Manager.
For details on how to add users and customize roles, refer to section
18
Managing ACUS Users
and User Roles
.
24.12 Event and Alarm Configuration
All Events and Alarms are configured through this screen. In these screen, you can define the
system response, in case of any event. For more details on how to configure Alarms and Events,
refer to section
10
Configuring Alarms and Events
.
After making configurations as per your requirement, click Skip Wizard to return to ACUS home.
Note: All fields marked with an asterisk (
*
) are mandatory. At any point in the time, you can click
Cancel to quit the action and return to the home page.