RISCO Group ACUS User Manual
Page 494
User Manual for ACUS
Uncontrolled
when
printed
©
RISCO
Group
466
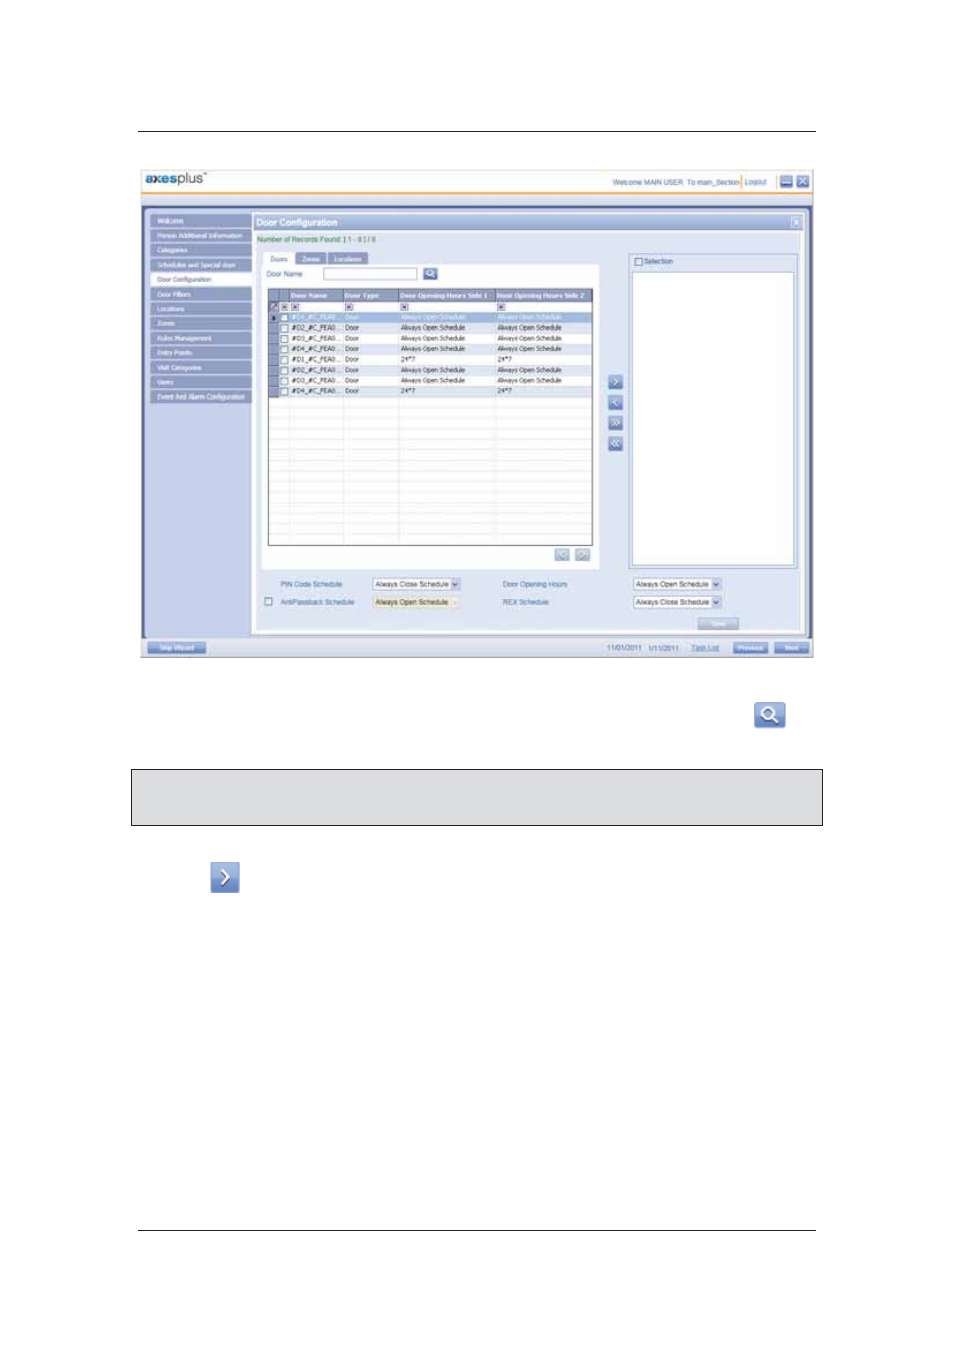
Figure 492: Door Configuration
2. To search doors, enter the search criteria in the Door Name text box and click
(Search). The door names matching the specified criteria appear.
Note: Click the Zones tab and search doors according to the Zones. This allows you to configure
all the doors in a particular zone at the same time. Similarly, click the Locations tab to
view all the doors in a particular location. You may configure the doors together.
3. Select the check boxes against the door names which you want to configure and click
to move the doors to the Selection area.
4. Select the PIN Code schedule that will be assigned to the doors from the PIN Code
Schedule drop-down list.
5. Select
the Anti-Passback Schedule check box to enable anti-pass-back and select a
schedule from the schedule list.
6. Select the door open schedule from the Door Open Schedule drop-down list.
7. Select the door request to exit schedule from the RTX Schedule drop-down list.
8. Select the door request to enter schedule from the RTE Schedule drop-down list.
9. Click
Save. The message appears, “Door updated successfully”.
For more details refer to
7
Configuring Doors
.