RISCO Group ACUS User Manual
Page 353
User Manual for ACUS
Uncontrolled
when
printed
©
RISCO
Group
325
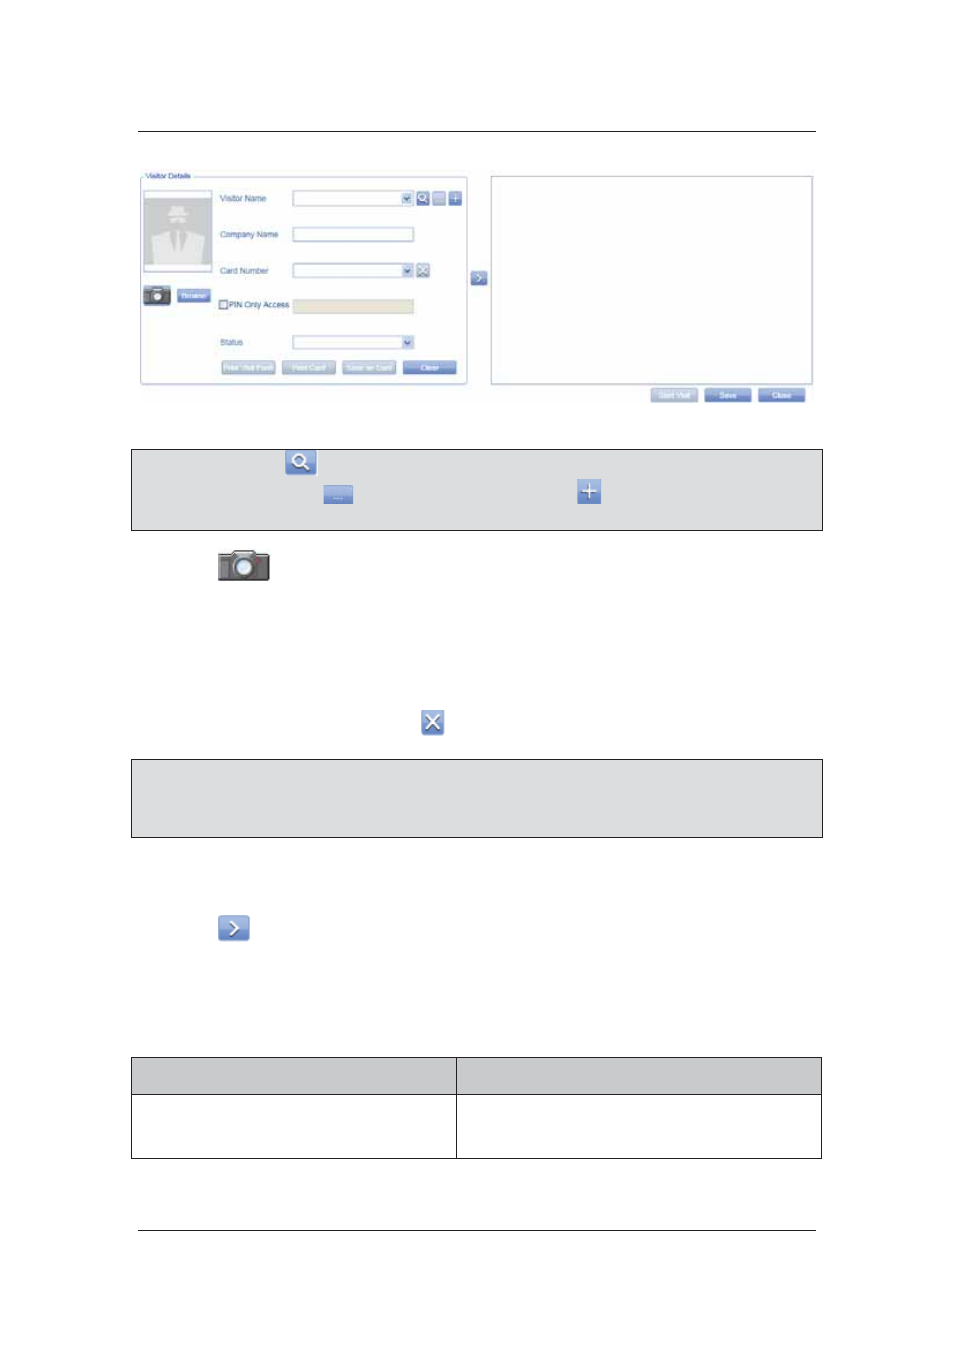
Figure 341: Add Visitor Details
Note: You may click
(Search Names Starting with) to search for names starting with the
entered letter. Click
to edit the visitor details or click
to add new visitor. For details,
refer to
15.3.1
Add a Visitor
.
2. Click
(Webcam). The Capture Image window appears.
3. Click
Capture Image to capture the image of the person using a Webcam.
Or
4. Click
Browse to upload a photograph of the visitor if available.
The Company Name appears as you select the visitor.
5. Enter the card number in the Card Number drop-down list to assign card to the visitor. You
may also delete the card using the
(Card Delete) button.
Note: You can configure your machine level settings so as to encode the Card ID that is read by
the Encoding Reader when a visitor swipes a card against the reader. The card ID is
reflected in the Card Number drop-down list. This can be done if you have selected the
encoding reader as RS232. For more details, refer to
4.1.16 Machine Level Settings
6. Select
the
PIN Only Access check box to ensure that the visitor is provided access only
when a PIN is pressed on the keypad.
7. Select the visitor status from the Status drop-down list.
8. Click
to move the visitor to the selection area.
9. Click
Save. The message appears, “Visit created successfully”
10. You may use the following buttons as per your requirement.
Table 20: Add Visit
Button Name
Description/Action
Print Visit Form
Click Print Visit Form. The Report Viewer
window appears and the Visit Report Form is
displayed.