5 connecting relay 1 and relay 2, Ected (see section 7.5.5 "connecting relay 1 and, See section 7.5.5 – SMA SI 3.0-11 Installation User Manual
Page 55: See section 7.5.5 "connecting relay 1 and relay 2, Relay (see section 7.5.5, Multifunction relay (see
SMA Solar Technology AG
7 Electrical Connection
Installation Manual
SI30M-44M-60H-80H-IA-en-30
55
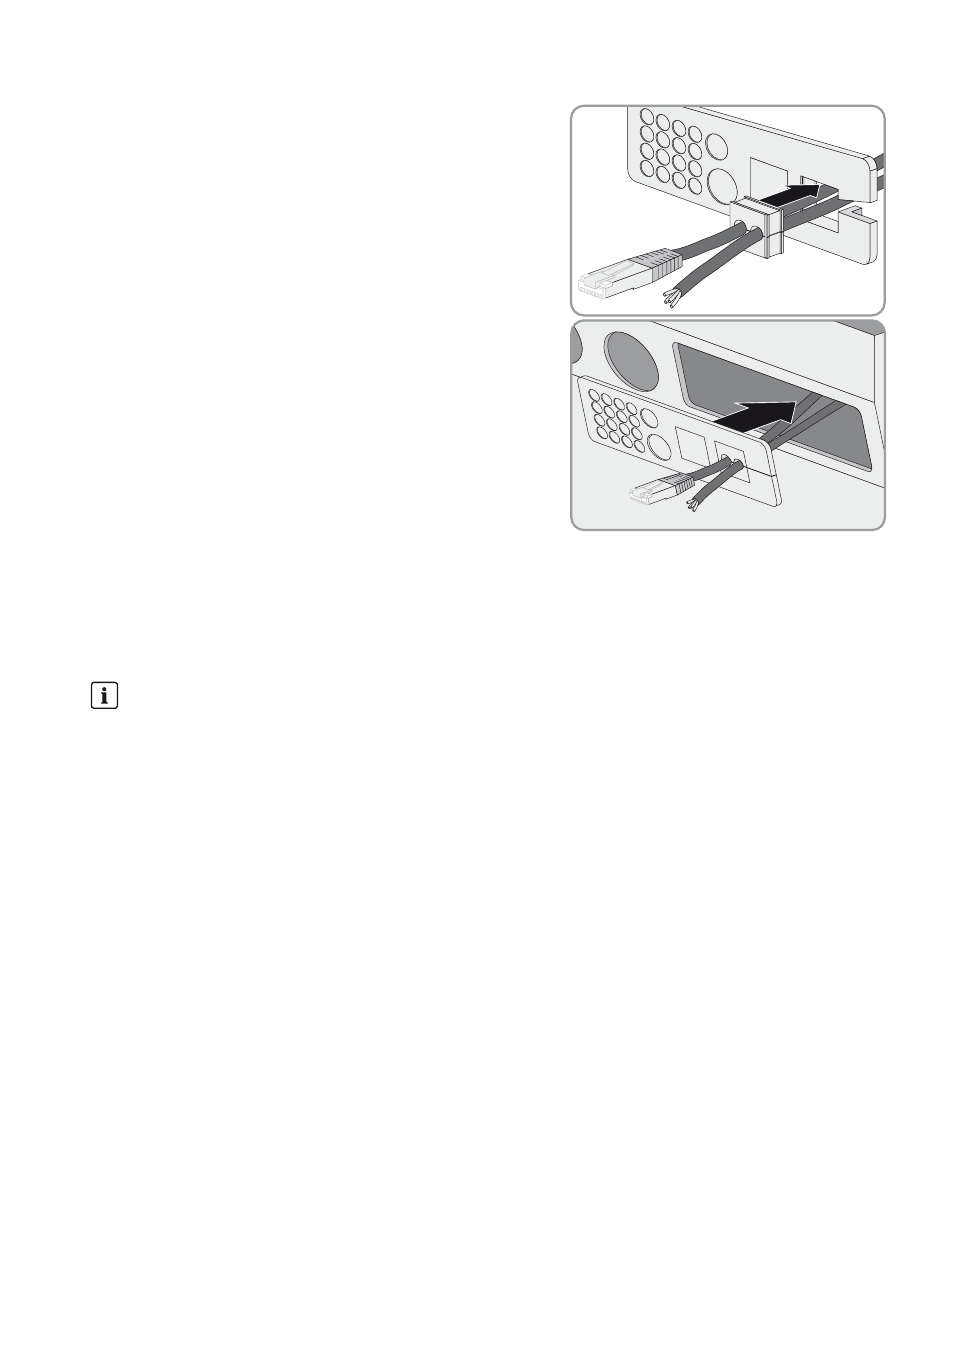
7. Open the cable feed-through plate and insert the cable support
sleeves into the cable feed-through plate. Place the flat side of
each cable support sleeve on the flat sides in the cable
feed-through plate.
8. Hold the cables and push the cable feed-through plate to the
enclosure opening of the cable feed-through plate.
9. Hook the cable feed-through plate into the enclosure opening of the cable feed-through plate and press into the
enclosure opening.
7.5.5 Connecting Relay 1 and Relay 2
If you are using a multifunction relay, always connect it as follows:
Additionally required material (not included in the scope of delivery):
☐ Suitable bootlace ferrules if using stranded wire
Requirement:
☐ The technical requirements of the multifunction relay must be met (see Section 10 "Technical Data", page 94).
☐ Copper wire
☐ Conductor cross-section: 0.2 mm² to 2.5 mm²
Procedure:
1. Break through a suitable location in the cable feed-through plate with a sharp object.
2. Strip the insulation from the cable and press bootlace ferrules onto the insulated conductors.
3. Lead the cable through the hole in the cable feed-through plate into the Sunny Island.
Switching behavior of the slaves
In case of a fault, the multifunction relays of the slaves switch less reliably than the multifunction relays of the masters.
In case of a fault, the slaves wait for the master to confirm the fault.