SMA SI 3.0-11 Installation User Manual
Page 22
6 Mounting
SMA Solar Technology AG
22
SI30M-44M-60H-80H-IA-en-30
Installation Manual
Additionally required mounting material (not included in the scope of delivery):
☐ At least two screws that are suitable for the support surface.
☐ At least two washers suitable for the screws.
☐ At least two screw anchors suitable for the support surface and the screws.
☐ If the inverter is to be secured against theft, two security screws that can only be unscrewed with a special tool.
Procedure:
1. At the mounting location, mark the position of the drill holes using the wall mounting bracket. Use at least one hole
on the right side of the wall mounting bracket and one on the left.
2. Ensure that there are no electric lines or other supply lines in the wall behind the marked positions.
3. Drill the holes and insert the screw anchors.
4. Secure the wall mounting bracket horizontally to the wall using screws and washers.
5. If the Sunny Island is to be secured against theft, mark the drill holes for the anti-theft device. Use at least one hole
on the right and one on the left.
Sunny Island with order options "Communication for RS485" or "Multicluster System"
Any ordered communication interfaces are installed in the master ex works. The master can be identified by the
labeling on the packaging.
• For single-cluster systems and multicluster systems, mount the Sunny Island units with integrated communication
interfaces at the planned mounting locations for masters.
6.
&$87,21
Risk of injury due to the heavy weight of the Sunny Island inverter
Improper transport and mounting can result in the Sunny Island falling. Falling may lead to bruising and broken
bones.
• Keep in mind the weight of the Sunny Island inverter (see Section 10 "Technical Data", page 94).
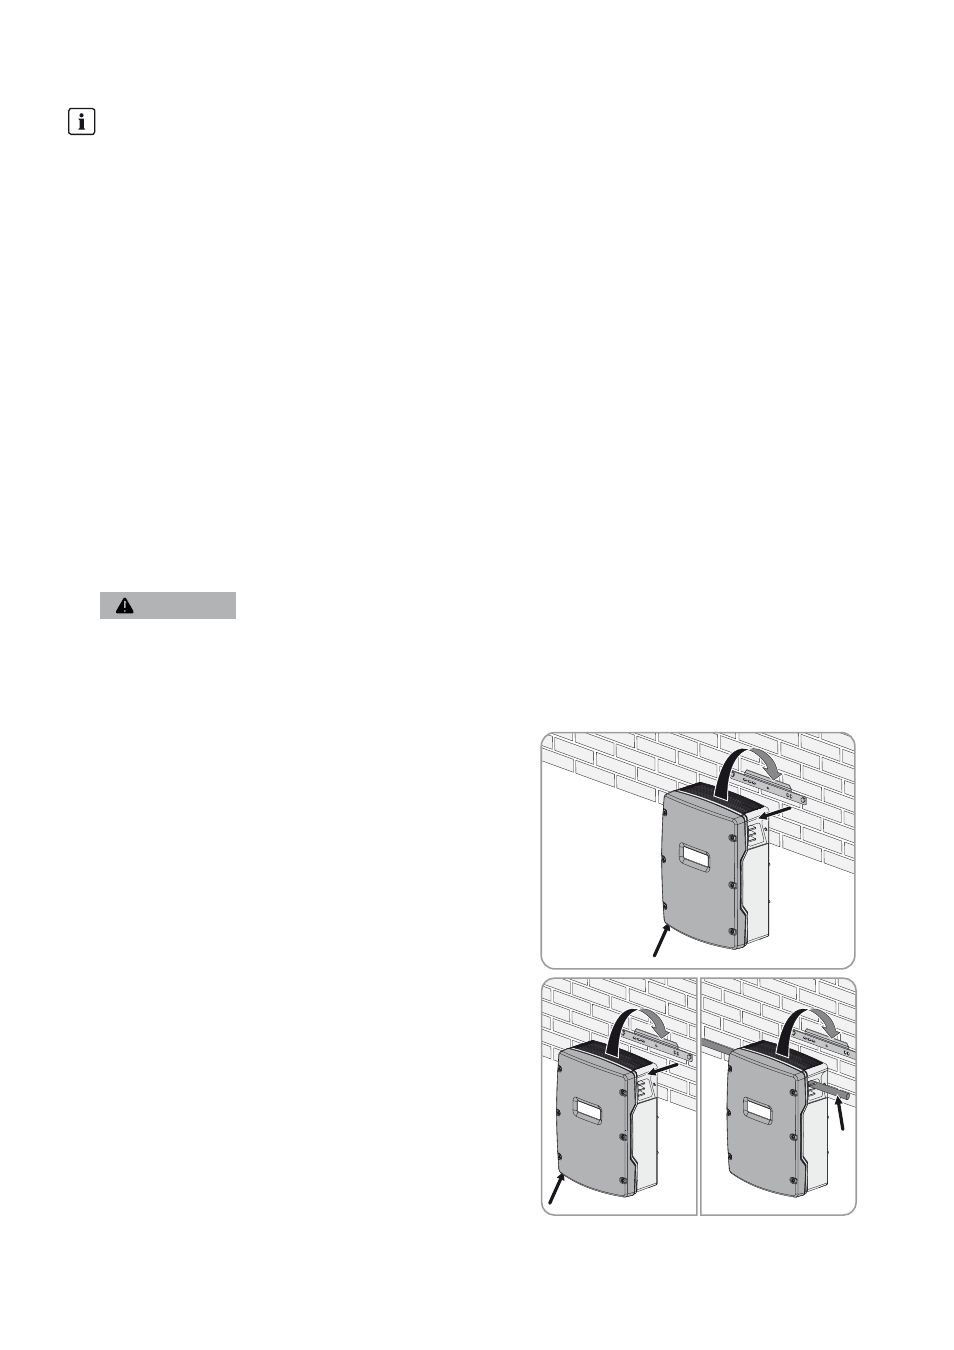
• With the SI3.0M-11 and SI4.4M-11, the Sunny Island should
be mounted to the wall mounting bracket. For this, use the side
recess grips. Keep the Sunny Island in a horizontal position
during transport.
• With the SI6.0H-11 and SI8.0H-11, the Sunny Island should
be mounted to the wall mounting bracket. For this, use the
side recess grips or a steel rod (diameter: maximum 30 mm).
Keep the Sunny Island in a horizontal position during
transport.