Resetting video-clip boundary points – Grass Valley iTX SmartClient v.2.6 User Manual
Page 84
76
Playing Video Clips
Resetting Video-Clip Boundary Points
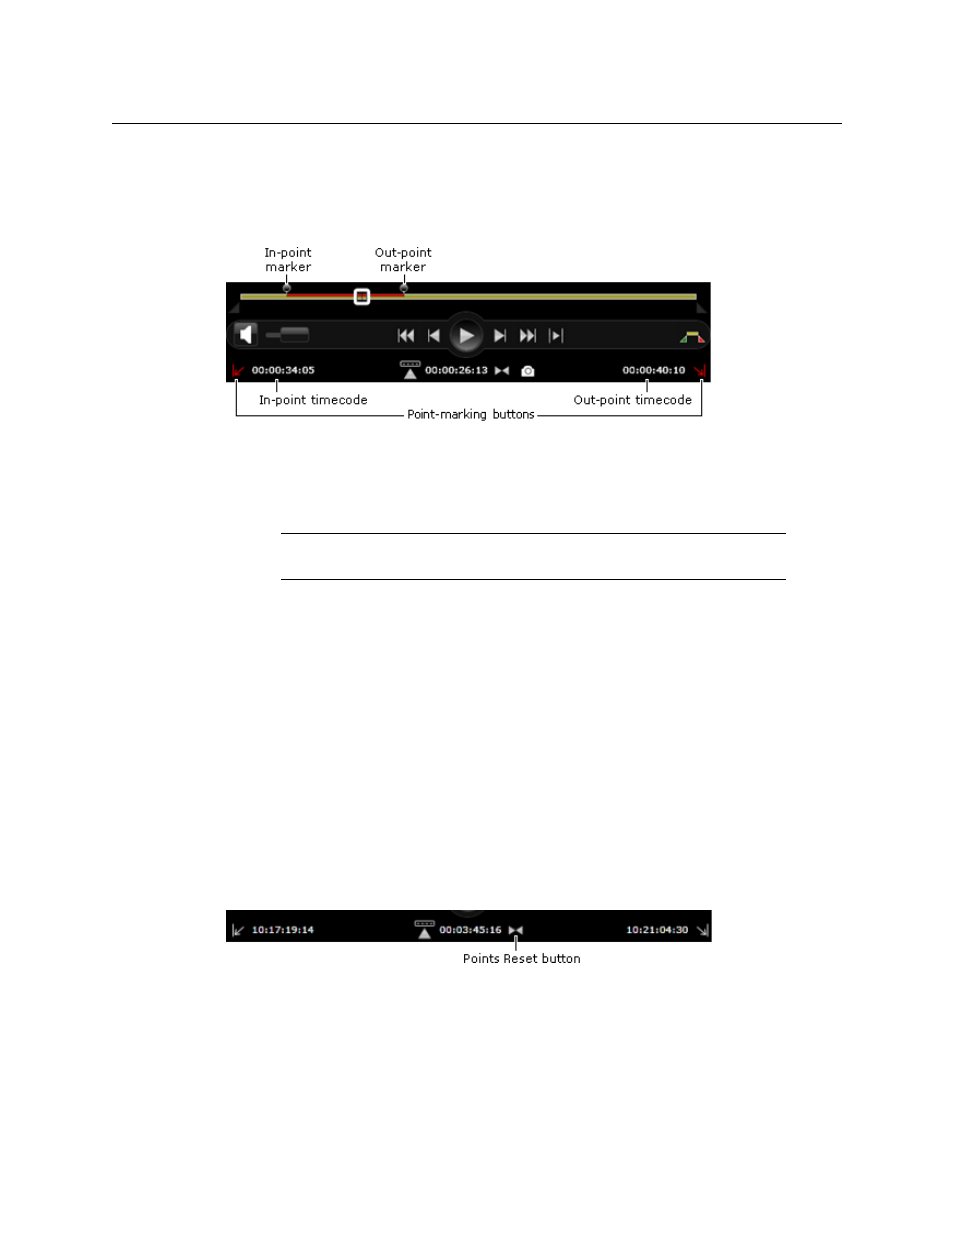
Timecode values for these points and the duration between them appear at the bottom of
the control bar.
For marked events in a video clip, the Media Viewer displays circular in- and out-point
markers above the duration timeline:
The in- and out-point markers for the video clip, below the timeline, are greyed out.
While playing a media file, you can set in- and out-points. You can do this in a number of
ways: by dragging the markers on the timeline; by clicking a timecode display; or by
clicking a point-marking button.
Note:
To be able to edit boundary points in the Browse workspace,
SmartClient must be in the annotating mode.
To mark in- and out-points:
1 Do one of the following to mark the boundary points of a video clip or project-clip shot.
• Drag the in-point and out-point markers to where you want to mark the points.
• Position the clip where you want to mark the in-point; click the in-point timecode
display or the point-marking button next to it. You may mark the points while the
clip is playing.
• Mark the out-point in a similar way, by clicking the out-point timecode or point-
marking button.
2 You need to save a video clip if you want it to keep the new points.
Resetting Video-Clip Boundary Points
When working with MPEG-4 files with the Media Viewer in the clip mode, you can instantly
reset the in- and out-point to their saved values by using the Points Reset Button:
To reset boundary points:
• Click the Points Reset button.
SmartClient returns the in- and out-point markers to the points saved in the video clip.