Automatic switching to the clip level, Clip level – Grass Valley iTX SmartClient v.2.6 User Manual
Page 18
10
The Browse Workspace
Clip Level
The purpose of each section is described below:
1 In the Search Builder, you specify a set of search criteria for the video clips you are
interested in. You then request SmartClient to find video clips that meet these criteria.
2 In the Results Browser, SmartClient displays its findings in one of three views, which you
can switch between: a thumbnails grid, a results table or a scrollable timeline. In any
view, you can select a clip to work with.
3 From the Search History panel, you can quickly repeat previous searches.
Automatic switching to the clip level
When you select a video clip in the Results Browser, SmartClient automatically switches to
the clip level of the workspace, where you can then work with the clip.
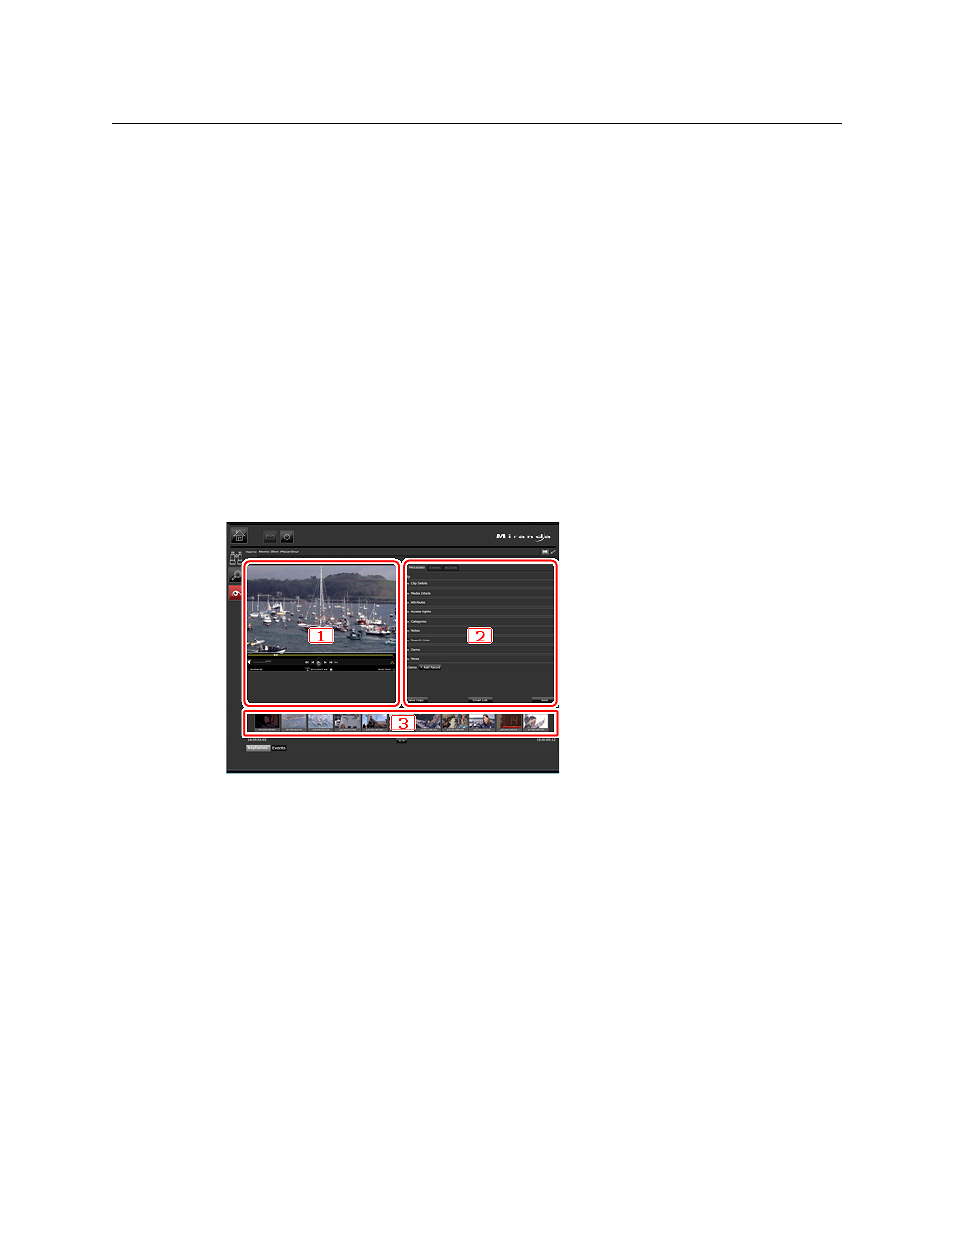
Clip Level
On the clip level, SmartClient has two operating modes: one just for viewing video clips,
their metadata and events; the other for annotating video clips and marking events. For
both modes, it displays the same main features:
The purpose of each section is described below:
1 You can play and watch your chosen video clip in the Media Viewer. When SmartClient
is in the annotating mode, you can edit the clip boundary points (i.e. its in-point and
out-point).
2 You can view video-clip metadata and event details on the Metadata and Events tabs.
When SmartClient is in the annotating mode, you can edit clip metadata; you can add
sections of business metadata (based on metadata records) for the whole clip. On the
Event Logging tab, you can mark events in the clip and attach business metadata to
them.
On the Actions tab, you can set up iTX Workflow jobs to be performed on the video clip.
3 On the Keyframe Timeline, you can view keyframes at various points of a video clip and
use them to position the clip in the Media Viewer.