Connecting to a tn5250 session, Tn5250, Communications setup, tn5250 – Visara 1783 User Manual
Page 93: Connecting to, tn5250, Communications setup
Chapter 8: Using Telnet, TN3270, TN5250 and VT220
707042-002
8-17
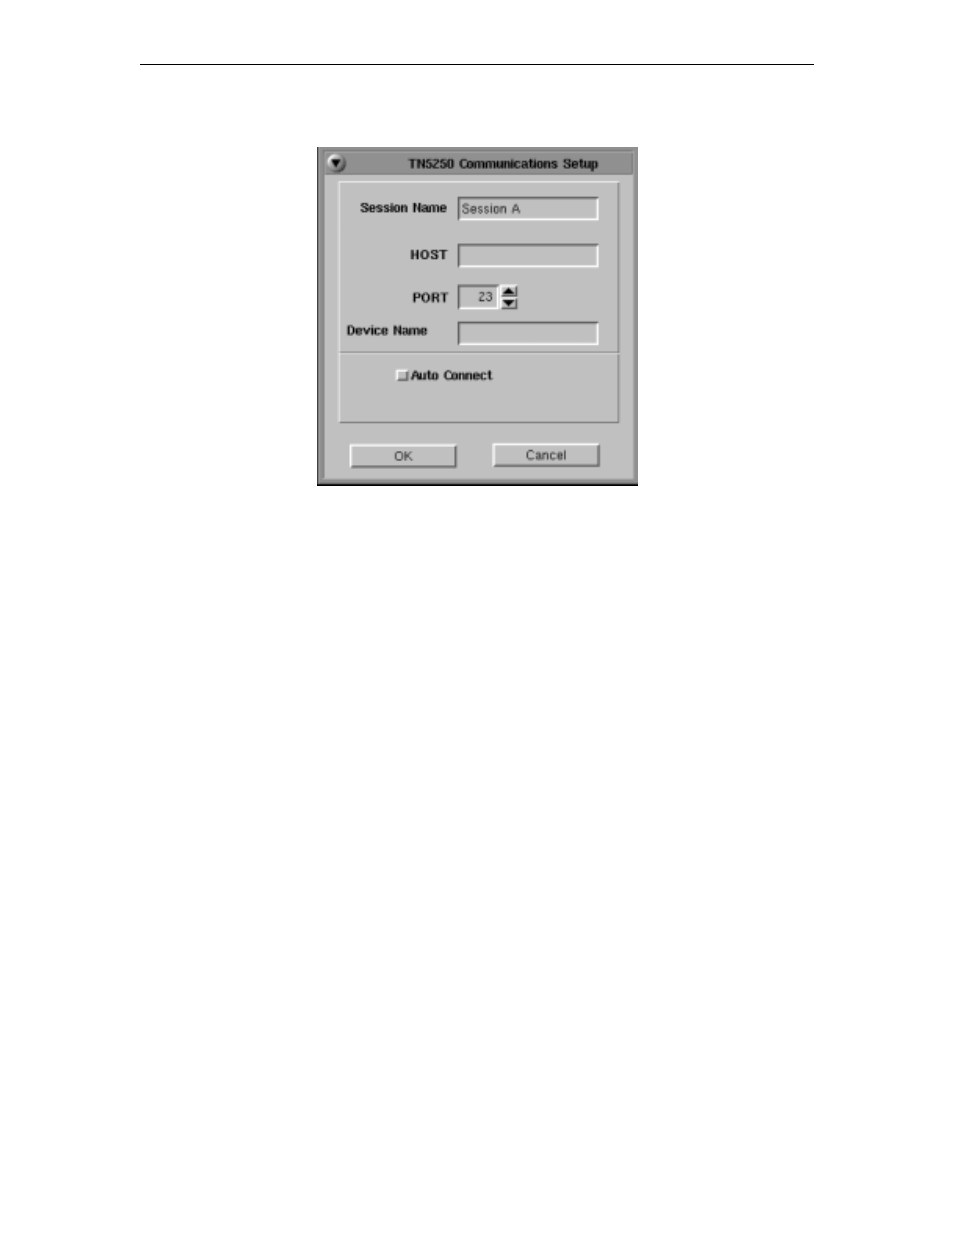
4. Click
Communications
from the Setup menu. This screen will appear:
•
Session Name
– Enter the name to be displayed in the window title.
•
Host
– Enter the Internet address of the TN5250 server to which you wish to connect,
for example, 255.255.XXX.XXX.
•
Port
– If the host requires that a port number (other than port 23) be specified when
connecting, select the port number using the up and down arrows or by typing the port
in directly.
•
Device Name
– Enter a name for the device or LU name.
•
Auto Connect
– Select to auto connect at program start and to reconnect automatically
if disconnected by the server.
Click
OK
to save changes and close Communications Setup, or
Cancel
to close and
discard any changes.
Connecting to a TN5250 session
TN5250 will connect to the remote host. The host then will normally respond with a
welcome and will lead you through its log in process. Log in, employing one of the
following combinations:
• With the userid and password supplied by the administrator of the host
• With just a userid (some hosts do not require passwords)
• Neither, if the remote host has been set up for it.
To connect to a TN5250 remote host from the main TN5250 screen:
1. Click
Session
to open the TN5250 Session menu.
2. Click
Connect
.
Once connected, use the menus, commands and features of the remote host to access and
run 5250 applications.