Lpr menu, 1490 miscellaneous, Miscellaneous – Visara 1783 User Manual
Page 75: 1490 twinax emulator, Lpr menu -13, 1490 miscellaneous -13
Chapter 7: 1490 Twinax Emulator
707042-002
7-13
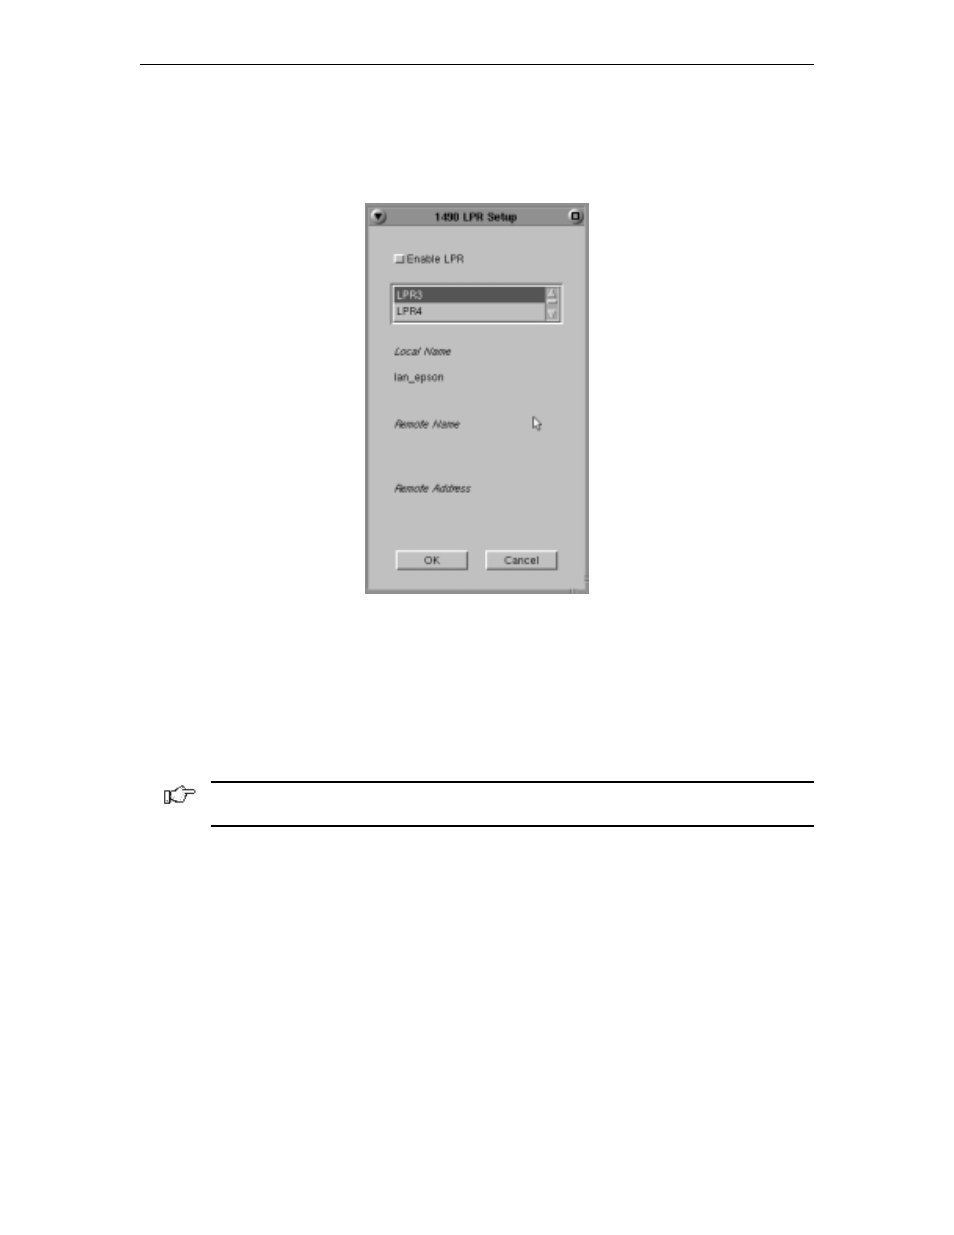
LPR Menu
To configure LPR, select the
LPR Menu
button from within the 1490 Printer Setup
Screen. The LPR Setup panel is shown below:
•
Enable LPR
– Select to enable LPR printing.
•
LPR scroll window
– used to select an LPR printer. A blue background indicates
the printer is selected.
•
Local Name
– User-defined name of the printer.
•
Remote Name
– Queue name that print jobs are sent to from an LPR-enabled device.
•
Remote Address
–IP address of the selected printer. Click
OK
to save the changes
and exit the screen, or
Cancel
to discard the changes and exit.
Note: For changes to the LPR Menu to become effective, the 1490 must be restarted via
the Miscellaneous Menu, or by turning the unit off and back on again.
1490 Miscellaneous
Normally the 1490 emulator is running with the Twinax communications active over the
Twinaxial cable to the mainframe host controller. For instances where the user may want
to change a configuration item such as keyboard type (104 to 122), this screen provides
the ability to make modifications to the emulator without powering off the 1783 NCT and
then powering it back on.
The user may make all the desired menu changes first. Some of the menu items only take
effect during the initial exchange of data with the controller.