Setting up a remote host as a 3270 terminal, Communications setup, tn3270, Setting up, tn3270 – Visara 1783 User Manual
Page 81: Communications setup, Setting up a remote host
Chapter 8: Using Telnet, TN3270, TN5250 and VT220
707042-002
8-5
Setting up a remote host as a 3270 terminal
To setup a remote host:
1. Click the
button in the lower left-hand corner of the screen. The application
menu will appear.
2. Click
TN3270
. The main TN3270 screen will appear with two menu options,
Setup
and
Session
.
3. Click
Setup.
4. Click
Communications
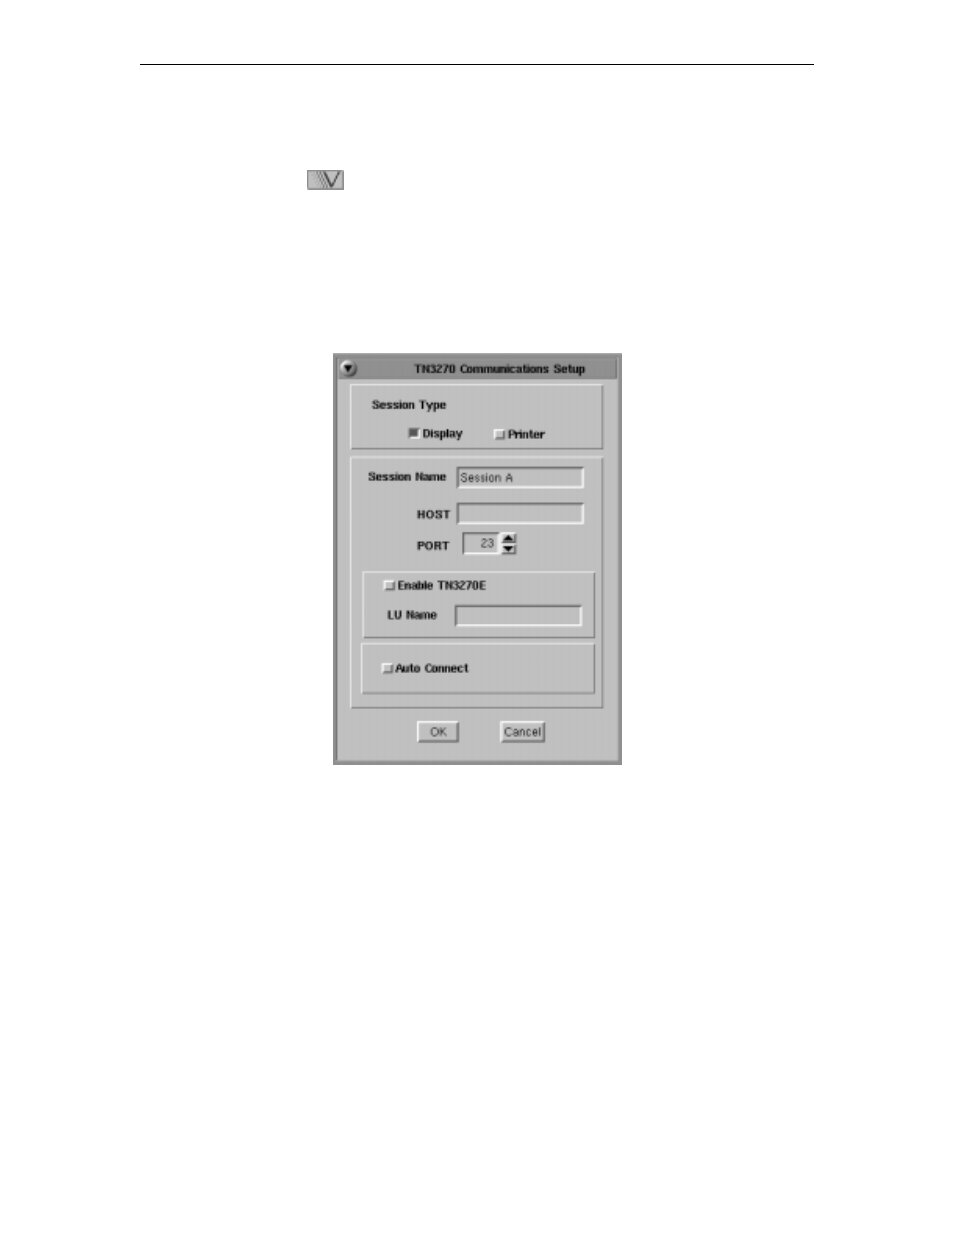
from the Setup menu. This screen will appear:
•
Session Type
– Select
Display
to configure a TN3270 Display session. Select
Printer
to configure a TN3287 Printer session.
•
Session Name
– Enter the name to be displayed in the window title.
•
Host
– Enter the Internet address of the TN3270 server to which you wish to connect,
for example, 255.255.XXX.XXX.
•
Port
– If the host requires that a port number (other than port 23) be specified when
connecting, select the port number using the up and down arrows or by typing the port
in directly.
•
Enable TN3270E
– Select to enable TN3270E support.
•
LU Name
– Enter LU name string (optional, for TN3270E).
•
Auto Connect
– Select to auto connect at program start and to reconnect automatically
if disconnected by the server.
Click
OK
to save changes and close Communications Setup, or
Cancel
to close and
discard any changes.