A.2. expansion card installation, A.2.1 install an expansion card in a 2u fms, Expansion card installation – RLE FMS V.1.13 User Manual
Page 180: Install an expansion card in a 2u fms, Figure a.1, Figure a.2, Apart
180
FMS User Guide
800.518.1519
A
FMS Expansion Cards
A.2. Expansion
Card
Installation
Expansion cards can be installed at the factory at the time of the initial product order, or they
can be ordered at a later date and installed by the customer. If customers order an expansion
card after they have possession of the FMS unit, they must install the expansion card
themselves.
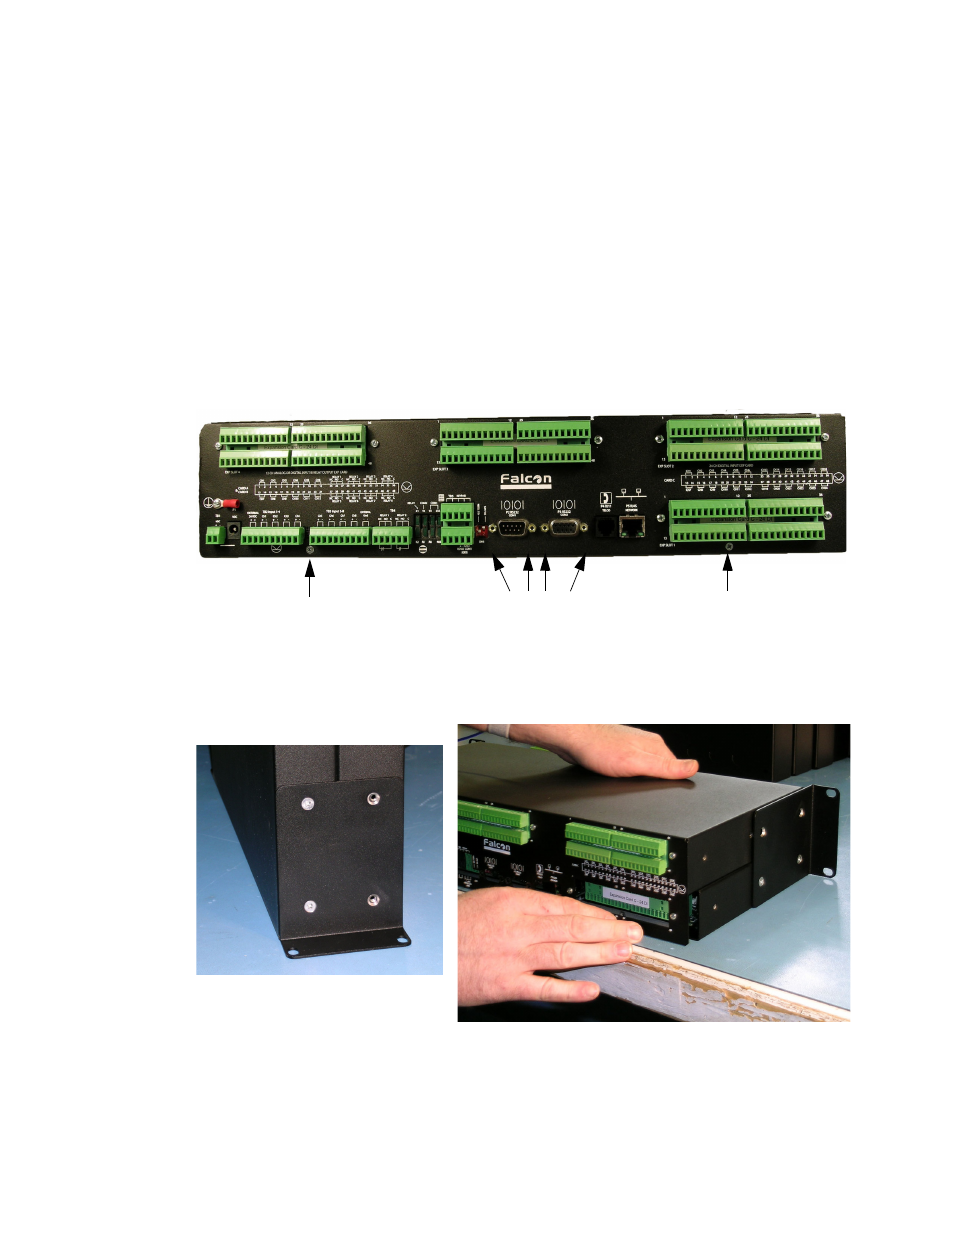
A.2.1 Install an Expansion Card in a 2U FMS
The FMS expansion card is shipped with five screws. Remove the two screws that hold the
expansion card plate from the slot on the FMS where the card will be installed. Place the
screws back into the holes once the plate is removed.
1
Remove the four hex standoffs from the COM1 and COM2 connectors located on the back
panel. Remove the bottom two screws located along the bottom edge of the back of the unit.
Figure A.1
Back of 2U FMS Showing Hex Standoffs and Screws to Remove
2
Remove the two top screws that attach the side plate (rack ears) to the unit from both sides
and slide the base and cover apart.
Figure A.2
Side Plate (“Ear”) with Two Mounting Screws Removed; Slide the Base and Cover
Apart
Hex standoffs
Screw
Screw