3 back up the map data, Figure 3.64 modbus / snmp slave unit detailed view, 2 add a link to the fms home page – RLE FMS V.1.13 User Manual
Page 121
rletech.com
FMS User Guide
121
3
Web Interface Configuration
3
Near the middle of the Configuration screen, you’ll see the same Map Coordinate: X, Y
fields, Graphical Mapping link, and Test Map link you saw on the analog and digital input
configuration screen. Click the Graphical Mapping link and drag and drop the blue
rectangle to pinpoint the location of the slave unit.
4
Once you are satisfied with the point’s location, click the “Submit Changes” link. You’ll
see a brief System Updating message, and then be returned to the Modbus/SNMP/BACnet
Slave Configuration page. The X and Y coordinate boxes will be populated with the
coordinates you designated. If you would like to fine tune the location by adjusting the
coordinates or alter the map box size, please remember to click the Submit Changes button
once your adjustments are complete.
5
Click the Next >> link at the top of the page to map the next device.
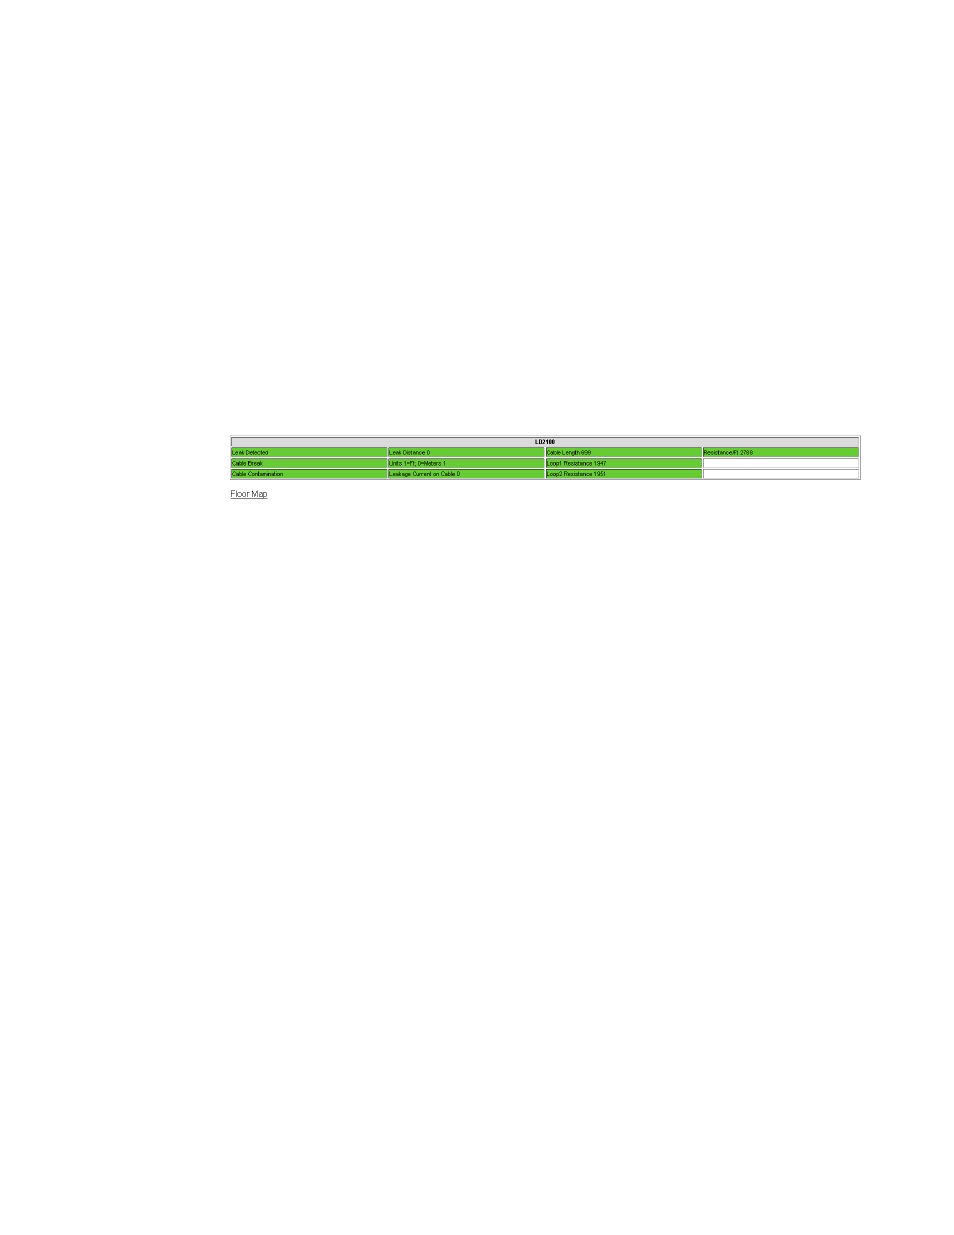
NOTE When you map a slave unit device, you are mapping its physical location. The indicator that
appears at the map location is a clickable link that takes you to a table that details the status of
the points monitored by the device. Click the Floor Map link at the bottom of that page to
return to the floor map.
Figure 3.64
Modbus / SNMP Slave Unit Detailed View
3.4.27.2 Add a Link to the FMS Home Page
You can also add FMS home page link to the map. The link will appear as a round circle with
the letter F in the middle. Clicking on this image on the map will take you to the FMS home
page.
1
From the FFS home page, go to Configuration>System. At the bottom of the System
Configuration page, you’ll see the Map Coordinate: X, Y fields and the Graphical Mapping
link. Click the Graphical Mapping link.
2
Drag and drop the blue circle to designate the location of the link. Once your satisfied with
the location, click the Falcon Unit - Submit Changes link to return to the System
Configuration page.
3
If necessary, fine-tune the map coordinates in the X and Y boxes. If you manually adjust the
coordinates, you must click the Submit Changes button to save the adjusted data.
3.4.27.3 Back Up the Map Data
Once you’ve finished mapping all your devices, return to the FMS home page and click the
Floor Map link. Verify the accuracy of your map. If your map is complete and accurate, it’s
time to back up the data.
1
From the FMS home page, go to Configuration>Flash Program
2
Click the link that says Download FCF Configuration File (.xfg - 128k)
3
If you’re using Internet Explorer, a File Download pop-up will appear. Click the Save
button. Navigate to the location where you’d like to save the file. You can use any file
name, but the file name MAY NOT contain spaces, and must be a .xfg file format.