Printer cable attachment – Fluke Biomedical VT Plus HF User Manual
Page 34
VT Plus HF
Operators Manual
2-6
3. Ensure that the breath detection mode is set to Unidirectional Expiratory.
a. Go into
Setup
b. Choose
Settings
c. Choose
Breath Detect
and modify as needed
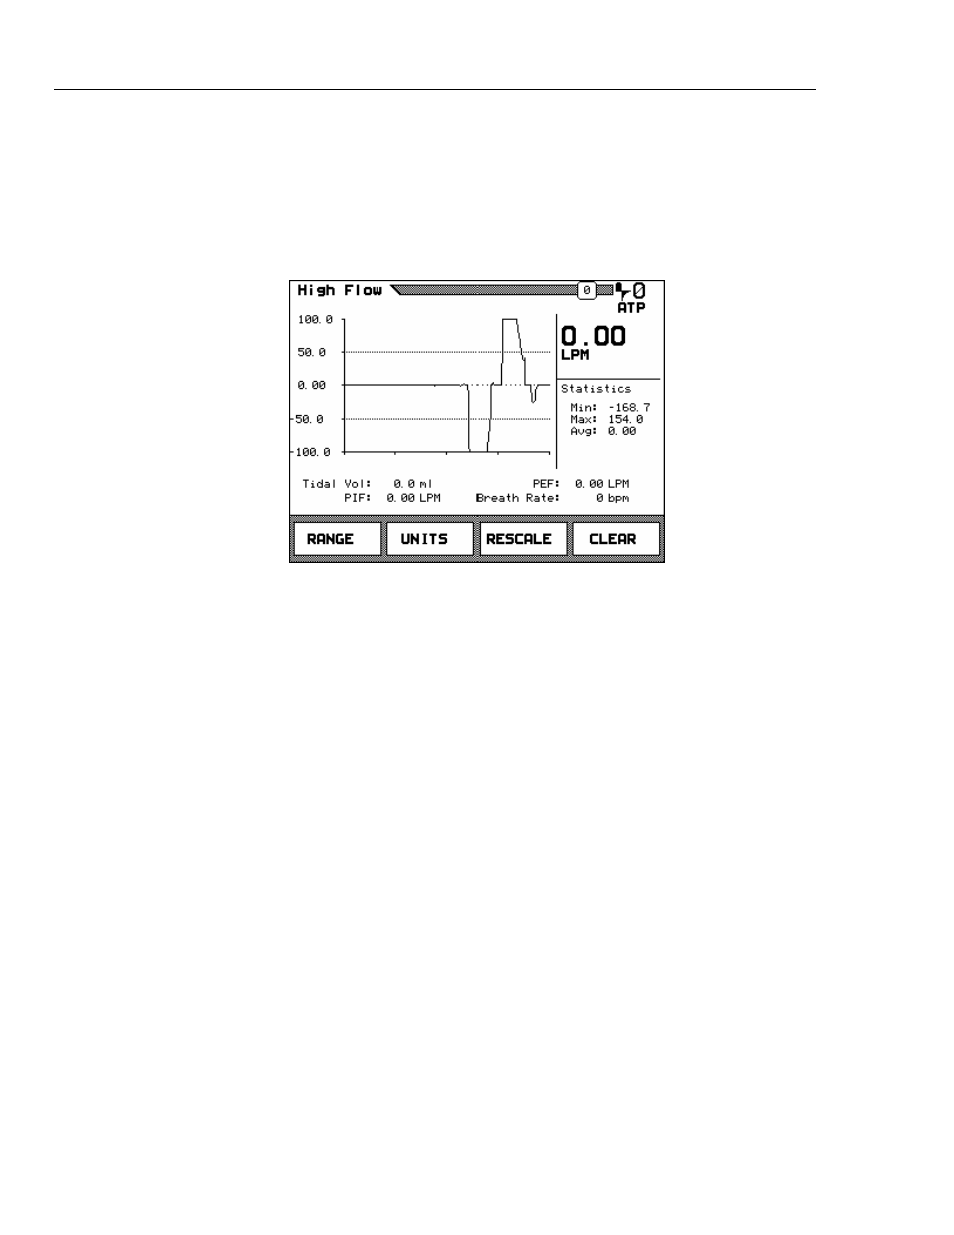
The Analyzer displays a screen showing the flow of gas delivered by the ventilator:
fec049.bmp
The instantaneous flow rate displays in large numbers in the upper right portion of the
screen. The flow statistics (min., max and average) are shown below in the center right
portion of the screen. A subset of the breath parameters is shown below the flow plot.
The following adjustments can be made to the screen:
•
Switch between the high- and low-flow ports – Press the
RANGE
soft key.
•
Change the measurement units (LPM, CFM, LPS) – Press the
UNITS
soft key.
•
Change the plot scaling – Press the
RESCALE
soft key. The new scaling is based on
the minimum and maximum values shown in the statistics area.
•
Erase the plot and re-initialize the statistics and breath parameters – Press the
CLEAR
soft key.
•
See more information in any screen – Press the
HELP
key.
•
Pause and resume the plot screen, respectfully – Press the
PAUSE/RESUME
key.
Printer Cable Attachment
The printer uses a D25 male to Centronics parallel cable for parallel printing. This cable
is available from Fluke (part #2238072) or from most electronic supply outlets.
To attach the parallel cable:
1. Connect the 36-pin end for the Centronics type parallel cable to the printer’s parallel
input connector.
2. Attach the 25-pin male end of the parallel cable to the 25-pin connector on the back
of the Analyzer.