1 removing and replacing the knife assembly – Avery Dennison SNAP 700 User Manual
Page 63

User’s Manual—SNAP™ 700 Printer
63
5.4.1 Removing and Replacing the Knife Assembly
WARNING: When adjusting, removing, or replacing the
knife assembly, you must turn off the power to the printer
to avoid personal injury.
1. Turn off the power to the printer.
2. Using the Feed Roller knob, back the stock out of the knife.
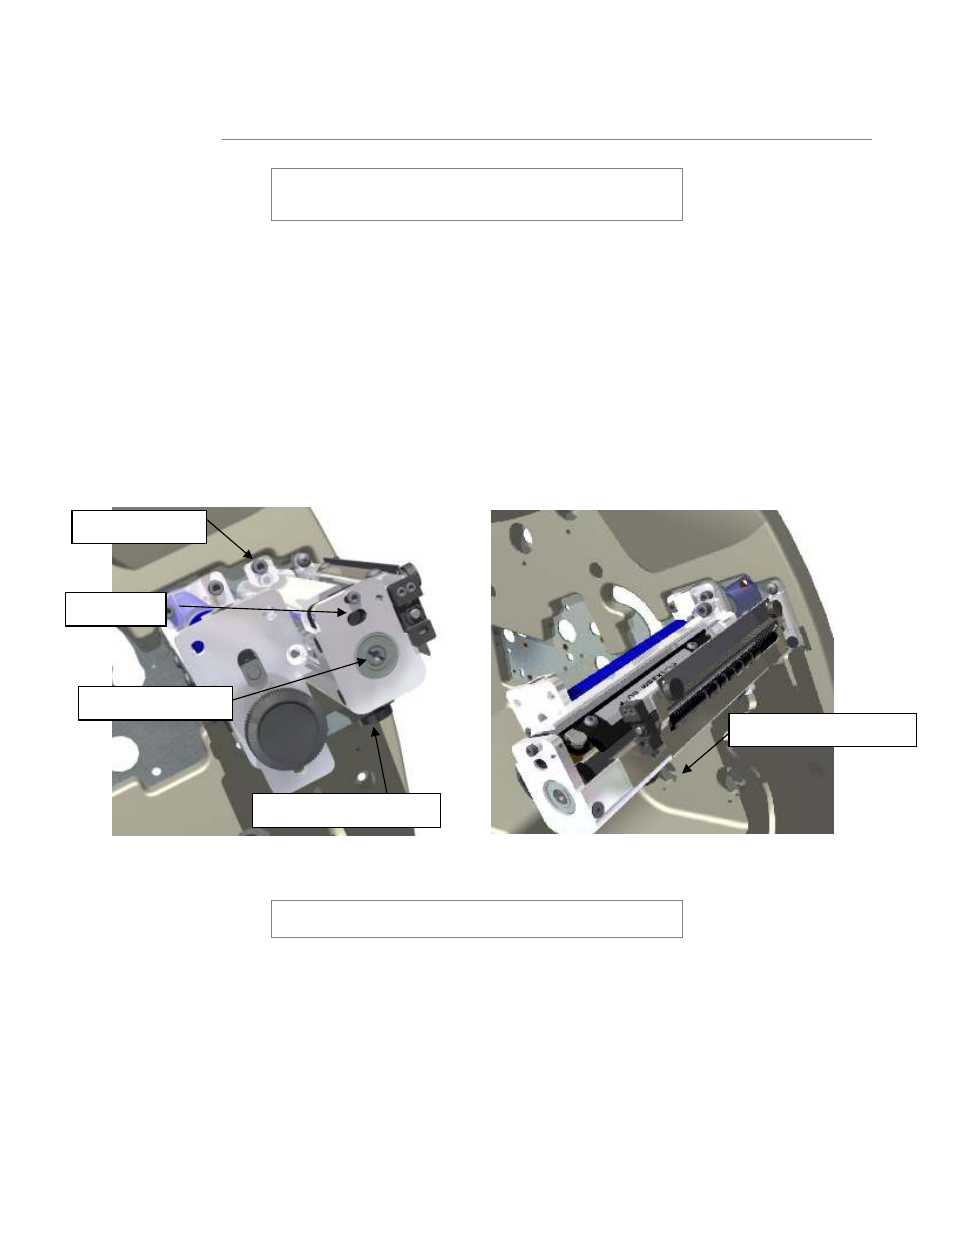
3. Loosen the Retaining Thumb Screw under the outboard end of the knife
assembly. It is not necessary to remove the screw to remove the knife
assembly
4. Using a 3/16” Allen key or hex “T” handle key, remove the two mount screws
that retain the knife to the upright frame (see Fig. 18a).
5. Slide the knife straight out until the rotary knife is out of the motor drive
coupler then lift the knife vertically avoiding damaging the stripper fingers. Lift
the knife assembly vertically from the printer.
Figure 18a. Outboard End View of Knife
Figure 18b. Removing Knife Assembly
WARNING: Keep your fingers out of the knife assembly to
avoid personal injury.
6. Remove the knife oiler/finger guard assembly by removing the two button
head screws using a 3/32” allen key. There is also a static brush mounted
under the oiler/finger guard assembly. Set them aside to be reused.
7. Remove the three flat head screws that retain the outboard retaining cap
using a 3/32” allen key. Do not change the setting of the shear adjustment.
Remove the end cap and used blades by sliding the end cap out of the “U”
shaped holder. Note the location of the pressure spring to reassemble the
Retaining Thumb-Screw
Knife Shaft Rotation
Mounting Screws
Pivot Screw
Retaining Thumb-Screw
