Epson Perfection V500 User Manual
Page 65
Before you scan your document or photo, you need to select these basic settings.
Original settings. These tell Epson Scan the type of document or photo you are scanning.
Destination settings. These tell Epson Scan how you plan to use your scanned image.
Follow these steps to select the basic settings for a document or photo in Epson Scan.
Do one of the following to select your document type.
Home mode:
Click the arrow to open the Document Type list and select the type of original you are
scanning. Then click the Color, Grayscale, or Black&White button to match the colors in
the original.
Professional mode:
Click the arrow to open the Document Type list and select Reflective (for scanning a
photo or document). Then click the arrow in the Auto Exposure Type list and select
Document or Photo.
Do one of the following to select your destination setting(s).
Home mode:
In the Destination box, click the button for the way you plan to use the scanned image.
Screen/Web for images you will view only on a computer screen or post on the
web.
Printer for images you will be printing or converting to editable text with an OCR
(Optical Character Recognition) program.
Other if you want to select a specific resolution for other purposes.
Professional mode:
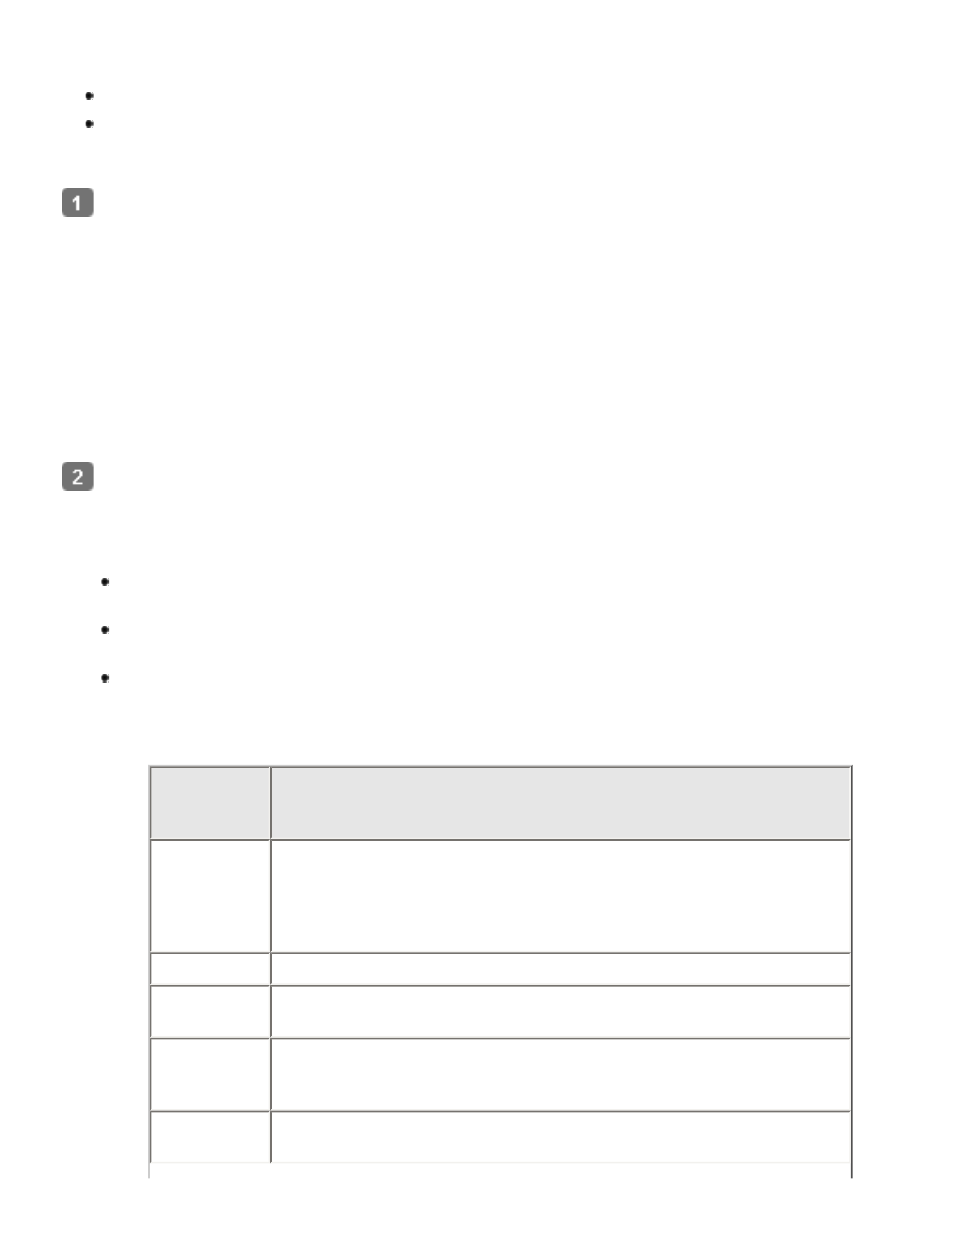
Click the arrow to open the Image Type list and select the image type you are scanning.
Image
Type
setting
Type of image you are scanning
48-bit Color Color photo that you may want to modify in a 48-bit image-
editing program
If you use this setting, your image file size will be significantly
larger than if you use the 24-bit Color or Color Smoothing
settings.
24-bit Color Color photo
Color
Smoothing
Color graphics, such as a chart or graph
16-bit
Grayscale
Black-and-white photo with many shades of gray
If you use this setting, your image file size will be larger than if
you use the 8-bit Grayscale setting.
8-bit
Grayscale
Black-and-white photo with just a few shades of gray