Checkline FH Series User Manual
Page 27

© ElektroPhysik MiniTest 7200 FH / MiniTest 7400 FH
27
Zero calibration standard with target ball put on it
6.3.3 Multi-point calibration (Zero + 1 to 4 point(s) )
For multi-point calibration you must first carry out a zero point calibration. The precision standards
must be used (1 to 4 as requested) to calibrate for the further calibration points. The precision
standards have different thickness values.
1. In most cases a Two-point calibration (Zero + one standard) will be sufficiently good as far
as calibration is made in the range of thickness to be expected.
2. Further calibration points are only necessary if measurement will be made over a larger
thickness range and if accuracy requirements are high.
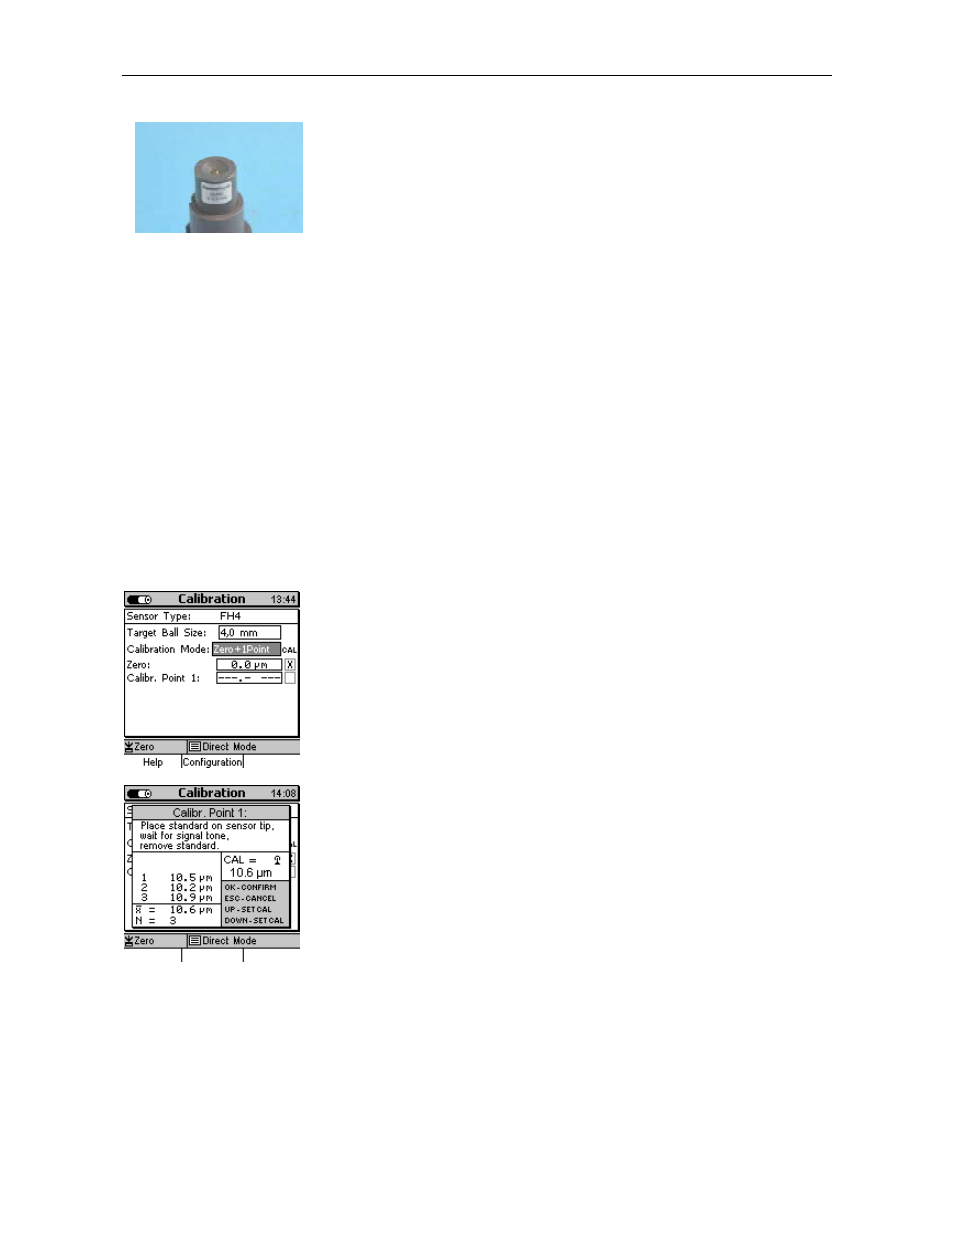
Now use arrow keys to select “Zero + 1 point” calibration. Press OK
to confirm. Carry out zero calibration as described under 6.3.2. Then
use arrow keys to select “Calibr. Point 1”, press OK to confirm.
Please always use one of the precision standards supplied with the
sensor. Make sure first to place the target ball on the precision
standard. Then place the precision standard together with the target
ball onto the sensor. Wait for the signal tone to sound and lift the
precision standard more than 30 mm from the sensor. For calculation
of average repeat several times.
In the “CAL = “ field, the calibration mean value will be shown
which has been calculated form the set of single readings you have
taken. If this value is the same as specified on the precision
standard, press OK to complete the calibration procedure. If not,
please use arrow keys to correct the value as requested.
