Valve on arch frame – Great Plains PTO Kits 2-3-Section User Manual
Page 48
44
2- & 3-Section YP PTO Pumps
Great Plains Manufacturing, Inc.
411-015M
2014-09-10
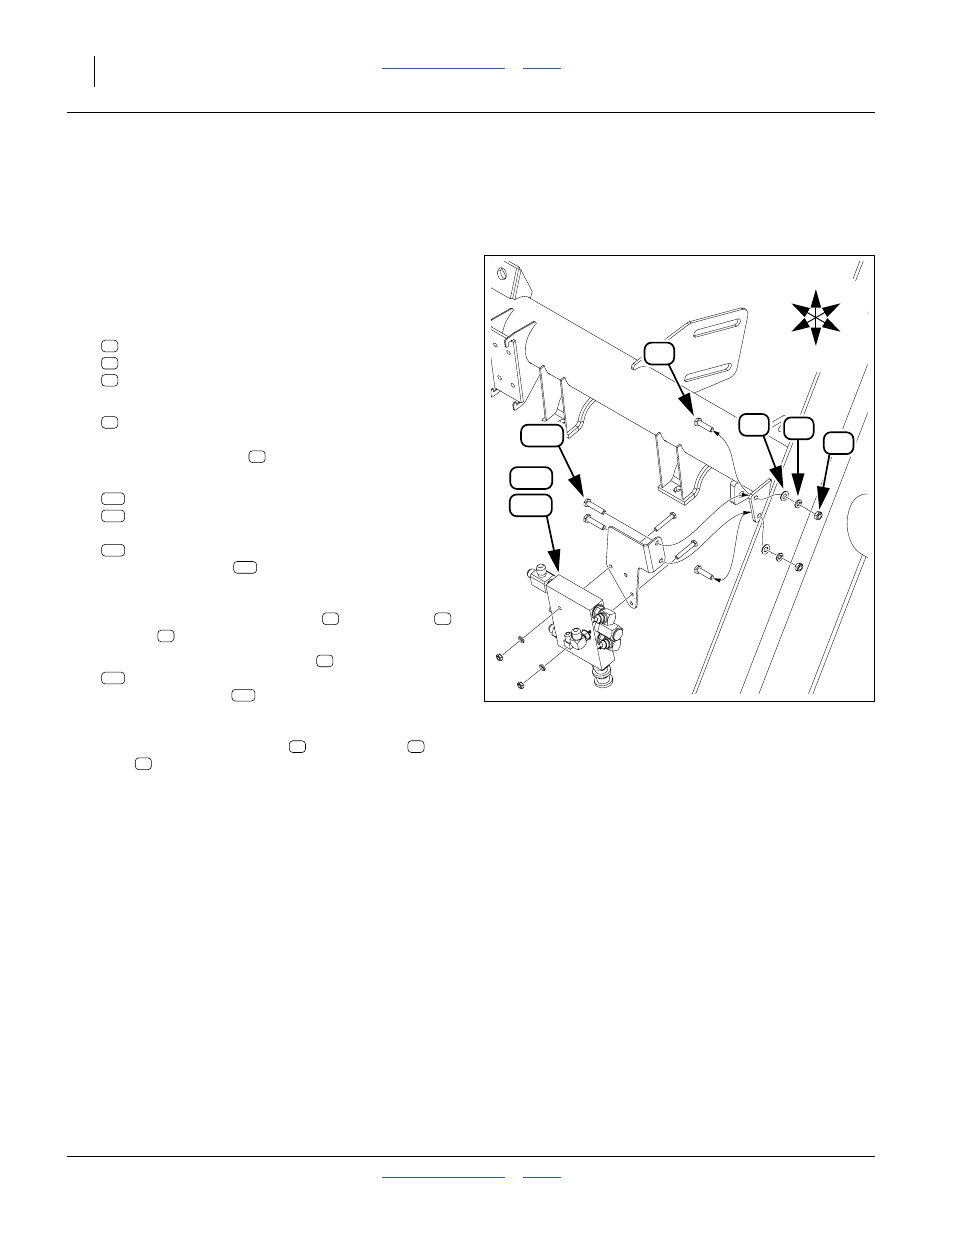
Valve on Arch Frame
This location applies to kits 401-934A and 401-936A, for
models YP1220, YP1225 and YP1625. For other
kits/models, see the page director table on page 43.
Refer to Figure 53 (the valve assembly is shown exploded for
clarity - the valve and mount plate are pre-assembled)
80. On the right end of the rear-most cross tube of the
arch frame, locate the tab supporting the seed tube
support bracket weldment (not shown). Remove
and save two sets:
803-014C NUT HEX 3/8-16 PLT
804-013C WASHER LOCK SPRING 3/8 PLT
804-012C WASHER FLAT 3/8 SAE PLT
81. Remove the upper existing bolt:
802-079C HHCS 3/8-16X1 1/4 GR5
Leave the lower bolt in to support the seed tube
bracket. Existing bolt
is not reused.
82. Select one of new:
401-975L YP12,16 HYD DRV FLOW CNTRL
401-976L YP12,16 GRND DRV FLOW CNTRL
and one new:
802-022C HHCS 3/8-16X1 1/2 GR5
Insert the new bolt
hole of the valve mount plate, and then into the
upper tab hole and support bracket. Loosely secure
with one set of save flat washer
, lock washer
and nut
.
83. Remove the lower existing bolt
. Select one new:
802-022C HHCS 3/8-16X1 1/2 GR5
Insert the new bolt
through the lower break hole
of the valve mount plate, and then into the lower tab
hole and support bracket. Secure both new bolts
with the saved flat washers
, lock washers
and
nuts
.
Continue at “Install Hoses” on page 49.
35
28
23
151
152
U
D
B
F
R
L
Figure 53:
Valve Installation at Arch Frame
36390
28
35
23
23
151
152
35
28
23
35
28