Adjustment steps, Flow adjust: ground drive row-hopper air-pro – Great Plains PTO Kits 2-3-Section User Manual
Page 20
16
2- & 3-Section YP PTO Pumps
Great Plains Manufacturing, Inc.
411-015M
2014-09-10
Flow Adjust: Ground Drive Row-Hopper
Air-Pro
®
(Meter-Only) Planters
On planter models 1625AHL, the PTO system drives the
fan motor, which is used only for seed meter
pressurization.
The seed monitor console reports, but does not control
fan rpm, and the value noted during adjustment can be
useful afield and during later setups.
Adjustment Steps:
Consult your planter Seed Rate manual for the
intended crop, noting:
• Range and Transmission sprockets required,
• correct Air-Pro
®
seed disk (not shown),
• initial inlet shutter setting (not shown), and
• initial meter pressurization.
2.
Install seed disks. Leave rain covers off meters.
3.
Set meter inlet shutters per the Seed Rate manual.
4.
Open any slide gates under hoppers.
5.
Load enough seed to completely fill the meter inlet
tubes, and at least partially fill every hopper.
6.
Set out containers, under row unit seed tubes, to
collect seed metered during setup.
7.
Clear the hitch area of non-essential persons.
Check essential personnel for long hair, scarves,
cords, frays, loose flaps and anything else that
might get entangled. Clear the area of dangling or
loose wires, straps, cord and other lines that might
become entangled and pull someone in.
8.
Configure the meter drive system sprockets for the
rate desired (see Seed Rate Manual).
9.
Per your planter Operator manual, hitch the planter.
Raise the planter. Install lift locks. This is to free the
meter ground drive wheel.
10. • Check that tractor is in Park or Neutral.
• Check parking brake set.
• Set the tractor PTO controls for
1000 rpm gearing (if multi-speed) and
clockwise rotation (if bidirectional).
• Start tractor engine and set throttle to idle.
• Engage the PTO.
• Bring the tractor engine and PTO up to intended
field rpms.
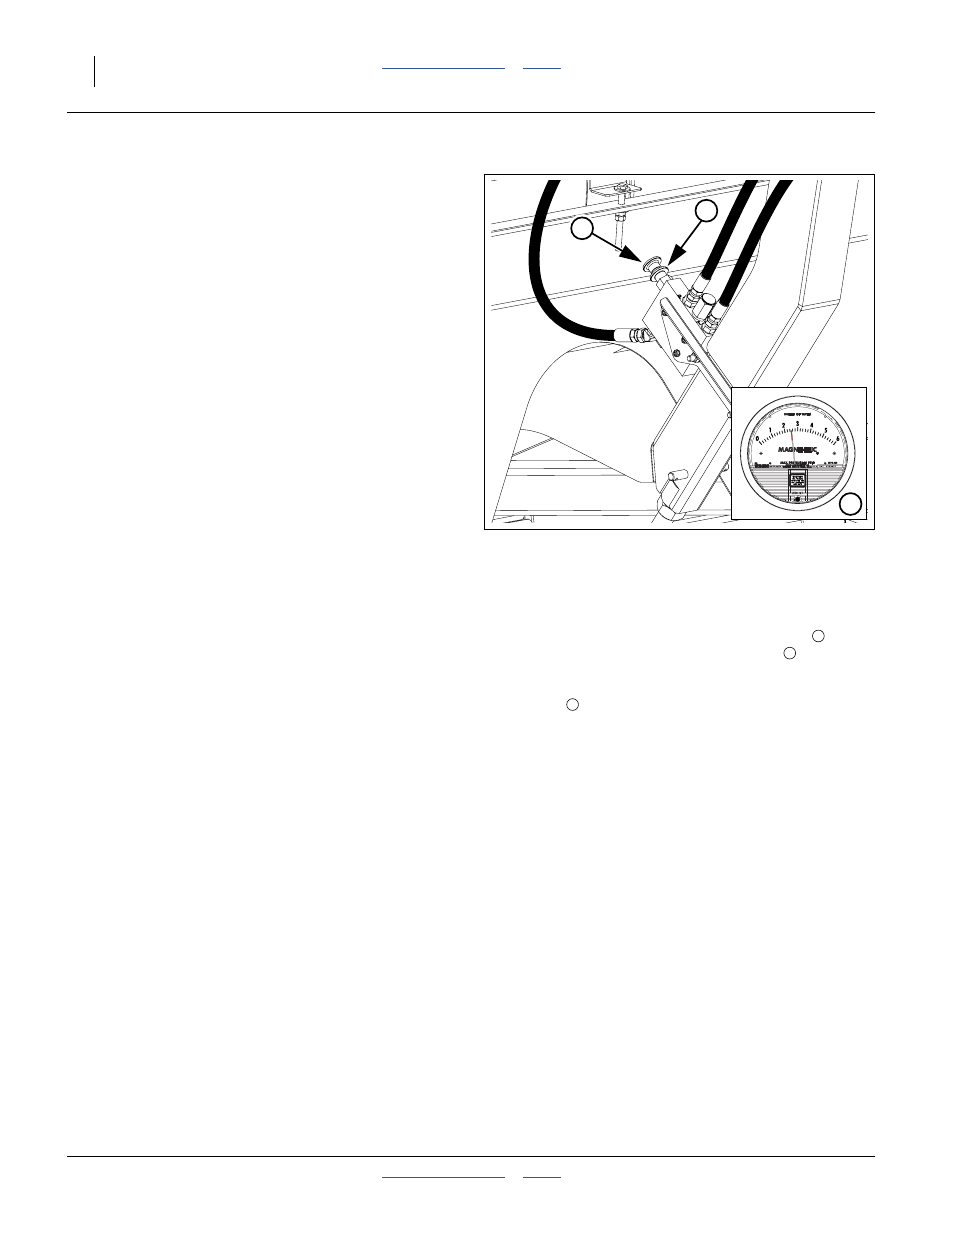
11. At the flow control valve, turn the lock disc
counter-clockwise to release the knob
. Slowly
turn the knob counter-clockwise to start the fan.
Bring the fan speed up until the Magnehelic
®
gauge
displays the suggested pressure for this
crop.
12. Turn the meter ground drive wheel forward several
turns, until all exposed cells in all seed disks contain
seed.
13. Recheck the Magnehelic
®
gauge. The reported
pressure is likely to have increased. Adjust the flow
control knob to bring the pressure reading back to
the recommended value. Tighten the lock disc.
14. Shut down the PTO, and as desired, the tractor.
15. Install rain covers on seed meters.
Figure 11:
Flow Control Valve (1625AHL)
36340
1
2
3
1
2