6in: orient cooler elbows, 6in: re-assemble fan cooler, 6in: modify fan cage – Great Plains PTO Kits 2-3-Section User Manual
Page 38
34
2- & 3-Section YP PTO Pumps
Great Plains Manufacturing, Inc.
411-015M
2014-09-10
6in: Orient Cooler Elbows
This page applies only to 6-inch/6-cage-screw fans.
For 8-inch fans, continue page 36.
Refer to Figure 35
37. Set the fan cooler
horizontally on a work
surface (mounting holes at top and bottom). This is
the orientation of the cooler after final installation.
Loosen the jam nuts of the elbow fittings
. Rotate
the inlet JIC ends to point at the angles shown.
When installed in the fan cage, these orientations
point roughly at top center and bottom center of the
cage.
Tighten the jam nuts (see page 86 for fitting torque).
6in: Re-Assemble Fan Cooler
Refer to Figure 36
38. Select the cooler:
810-804C C12 HYD OIL COOLER
and four sets saved:
802-159C HHCS 5/16-18X1 GR5
With the elbow fittings toward the cap end of the fan,
use the bolts
to re-attach the fan cooler (
or
) to the shroud
at the nut clips
.
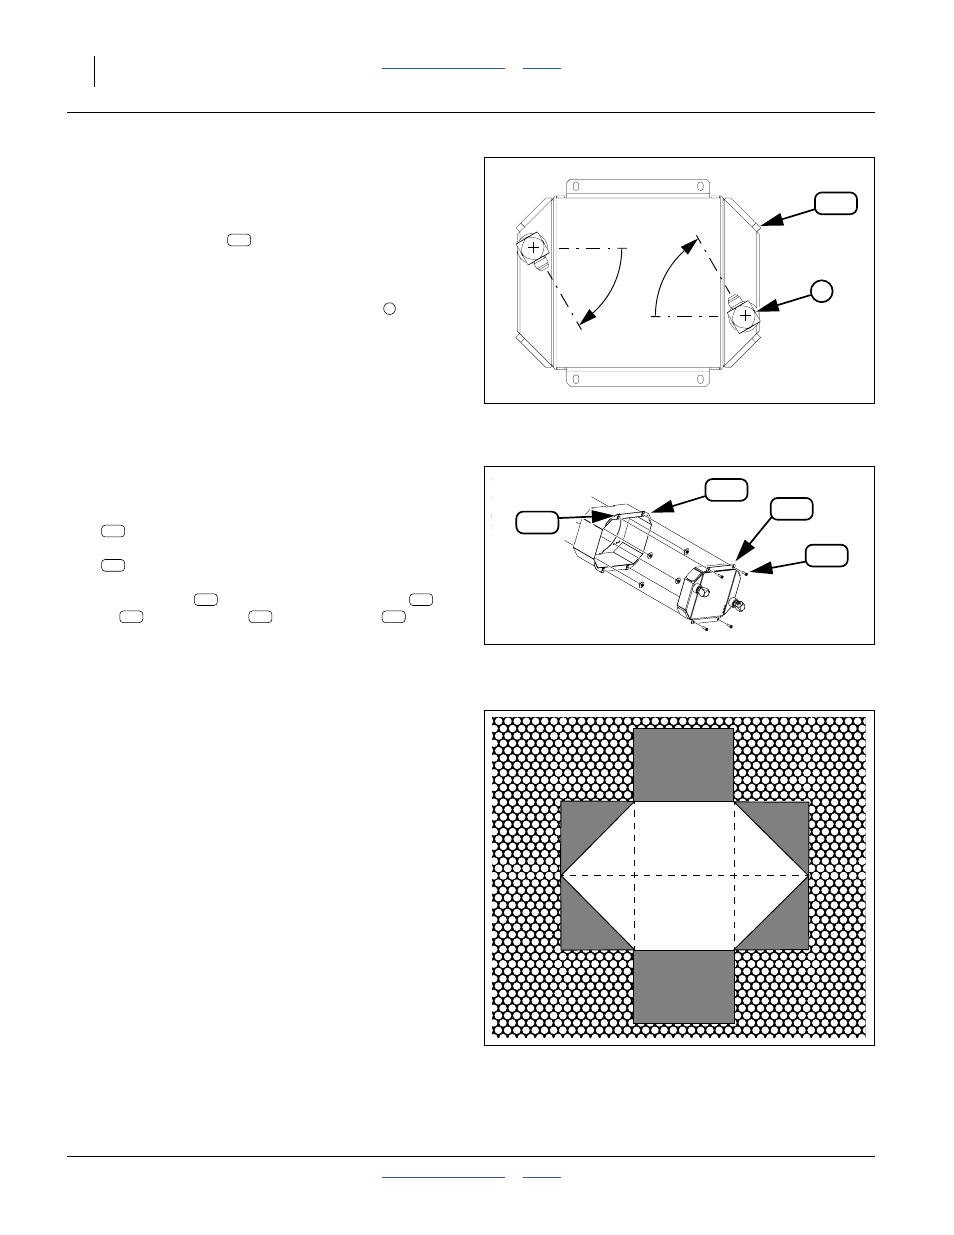
6in: Modify Fan Cage
Refer to Figure 37
39. Prepare an exit opening in the fan cage for the
cooler hoses. The hole needs to be:
Note: If an existing rpm sensor lead hole is present, and
at a suitable location, enlarge it for hose use.
Figure 35:
6in: Orient Elbows
34635
50
°
to
60
°
221
6
221
• located at bottom center of the fan cage,
• on the center-line of the MJIC elbow ports,
• wide enough for a 3/4 FJIC hose fitting, about:
3.2 cm (1
1
⁄
4
inches)
a
• long enough for one hose diameter plus one
3/4 FJIC or 7/8 FJIC hose fitting, about
5.7 cm (2
1
⁄
4
inches)
total, and
• have a smooth edge. Making cuts (- - -) as
shown, and folding back the cage edges, to the
inside, provides an adequately smooth edge.
a. For assembly 401-143L, with 7/8 JIC hose ends, use
3.8 cm (1
1
⁄
2
inches) wide, 6.4 cm (2
1
⁄
2
inches) long
126
201
221
192
Figure 36:
Re-Assemble Cooler
36376
221
201
201
221
223
126
192
Figure 37:
6in: Hose Opening in Cage