Dismount air compressor(s) – Great Plains PTO Kits 2-3-Section User Manual
Page 33
Great Plains Manufacturing, Inc.
Appendix A - Installation
29
2014-09-10
411-015M
Dismount Air Compressor(s)
For models 3PYP and 3PYPA, continue at “Prepare
Fan(s)” on page 31.
For pull-type planters having no compressors, continue
at “Prepare Fan(s)” on page 31.
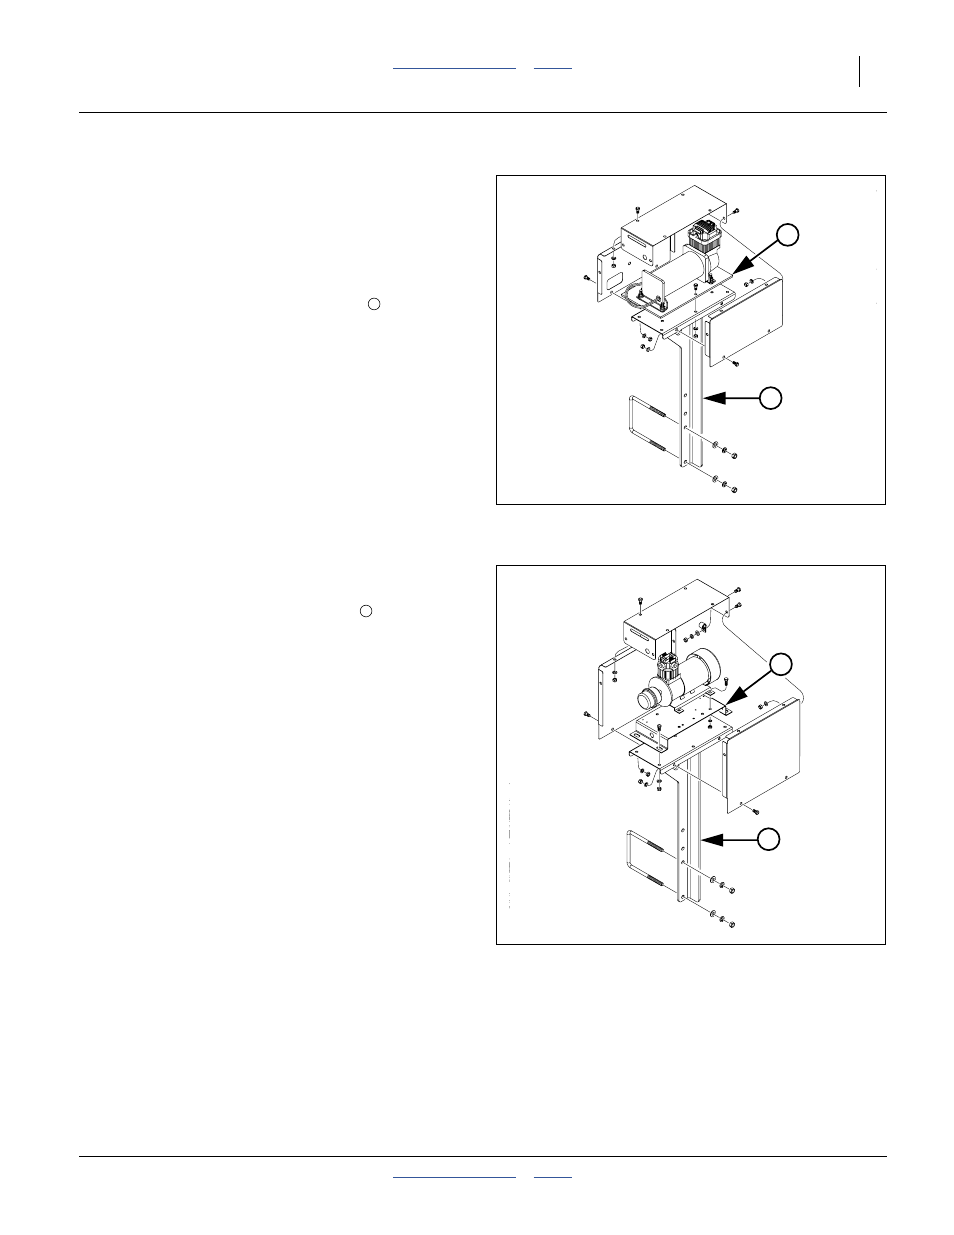
Refer to Figure 23 and Figure 24
Any air compressors at the tongue of a pull-type are
presently installed on their own pedestals
interfere with a PTO reservoir installation. The pedestals
are removed, and the compressors relocated to mounts
on the reservoir.
The needed reservoir mounts are separately purchased.
See page 6 for ordering information.
19. Remove protective housings at each compressor.
Save all parts and fasteners.
20. Locate a suitable disconnection point for each air
and electrical line near each compressor.
21. Label each tractor-side or implement-side hose or
lead as to which compressor it serves.
22. Disconnect the lines. Tape the air hoses or tie them
off to prevent ground contact or contamination.
23. Dismount each compressor assembly by removing
the fasteners that connect the base
pedestal platform. Save the assembly and all
fasteners.
24. At each lower U-bolt, dismount the pedestal from
the tongue. The pedestal, U-bolt, U-bolt washers
and U-bolt nuts are not re-used.
Each compressor is re-installed on a new mount at a
later step.
2
1
Figure 23:
Row-Pro™ Compressor
34090
1
Figure 24:
Swath Command™ Compressor
34090
2