User port installation, C/port installation, Unpacking the c/port – ClearCube R Series Pentium 4 User Manual
Page 87: Installing the c/port on the desktop, Figure 34, Clearcube c/port
ClearCube Product Manual and Installation Guide
User Port Installation • 77
User Port Installation
C/Port Installation
Unpacking the C/Port
When unpacking the C/Port you will find one of each of the following items:
•
C/Port unit
•
C/Port power supply and power cord
A special tuning tool for adjustments is included with the documentation and software
package in your shipment. A mounting adapter is available as an option from
ClearCube to conveniently mount a C/Port underneath a desktop.
Installing the C/Port on the Desktop
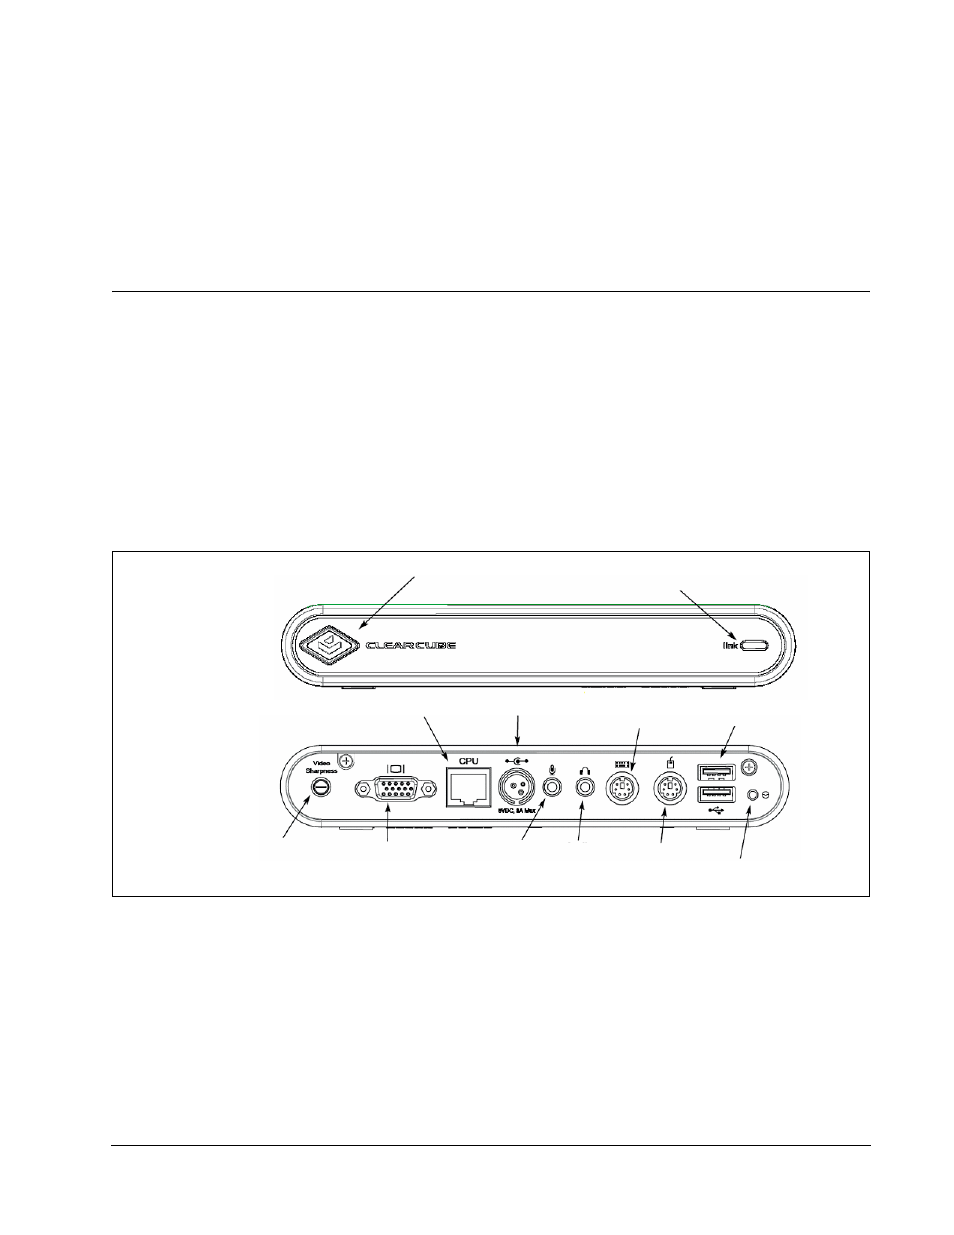
To install a C/Port, do the following:
1. Connect the mouse, monitor, keyboard and any audio devices to the respective
connectors on the C/Port.
Figure 34 ClearCube C/Port
Power Indicator
(Blue Light
Around Badge)
Video Sharpness
Video Output
Blade Connection (RJ-45)
C/Port Link Status
DC Power Input
Keyboard Port
USB (2 Ports)
Blade
Mouse Port
Audio
Microphone
Adjustment Dial
(Green = link, Red = no link)
Input
Output
Reset/Power
Button