Figure 30, Rmm jp1 location – ClearCube R Series Pentium 4 User Manual
Page 73
ClearCube Product Manual and Installation Guide
Cage and Blade Installation • 63
Each RMM in an R4300 series BackPack provides an Ethernet connection, allowing it
to control a chain of as many as 14 Cages. If an RMM is not connected to Ethernet, it
does not auto-negotiate, and provides control and monitoring only for the Cage in
which it is installed.
The RMM has three auto-negotiation modes:
•
Primary (including jumper-strapped Primary)
•
Secondary
•
Standby
The model for auto-negotiation assumes that a given network contains a mix of R4300
BackPacks, and legacy BSBPs and DCBPs.
The R4300 Remote Management Module uses the following auto-negotiation rules:
•
An RMM must be active (i.e., powered up and functioning correctly) to assert its
status as Primary or other.
•
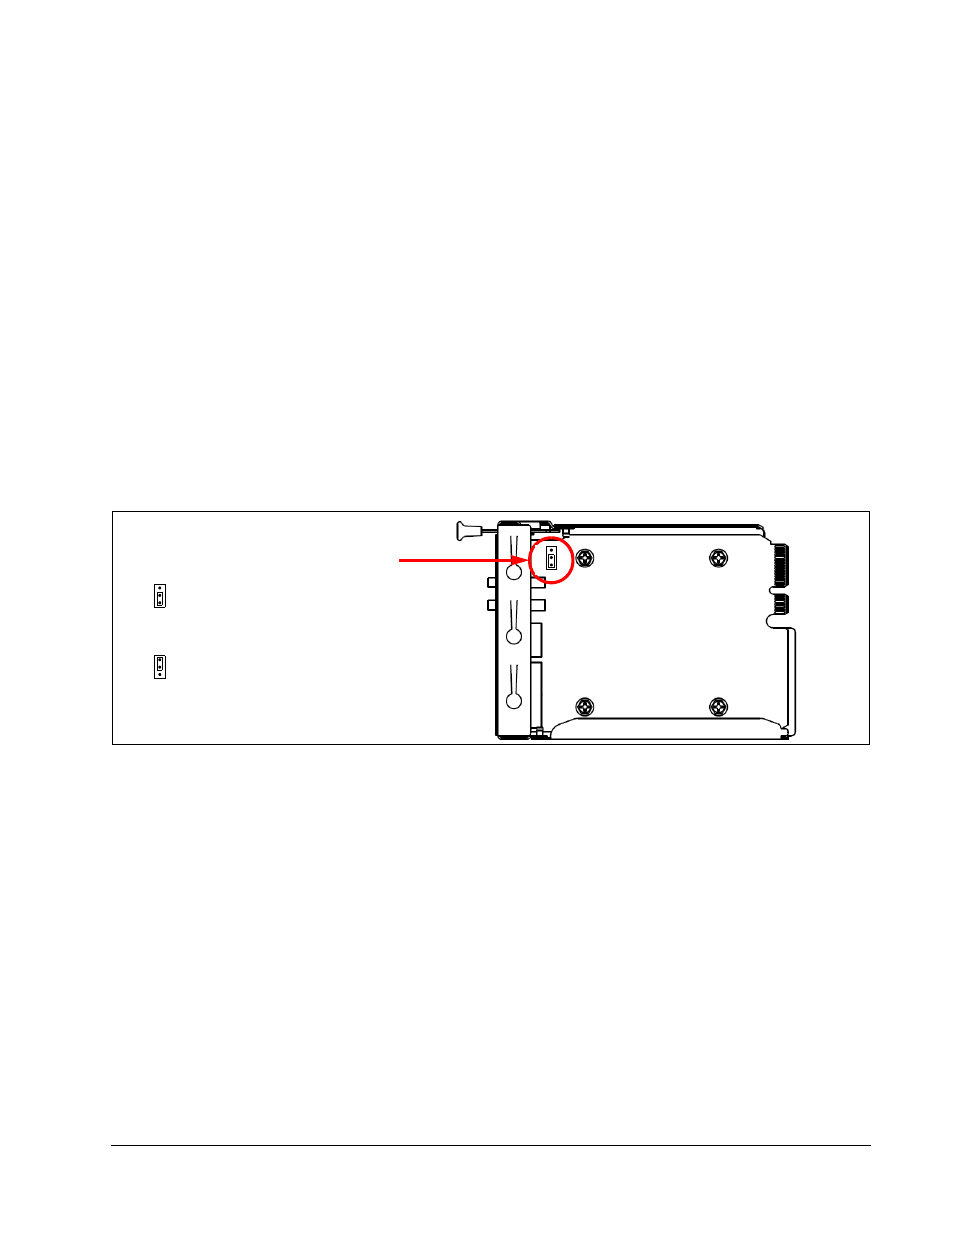
If a jumper-configured RMM is present in a chain, that RMM is always Primary.
See Figure 30.
•
Never jumper-configure an RMM in a Control Chain that also contains an RMC.
The RMC (in a BSBP or DCBP) uses the following rules for auto-negotiating a Primary
RMC in a Control Chain:
•
An RMC must be active (i.e., powered up and functioning correctly) to assert its
status as Primary.
•
If an RMC is present in a chain, that RMC is always the Primary.
For best results, follow these guidelines for configuring your Control Chains:
•
Use an RMC to manage only BSBP- and DCBP-equipped Cages.
•
Configure RMCs using Telnet.
•
Use an RMM to manage new R4300 Cages, and BSBP- and DCBP-equipped
Cages that do not contain an RMC.
•
Configure RMMs using Switch Manager.
Figure 30 RMM JP1 Location
RMM (bottom view)
JP1
– Leave JP1 jumpered on pins 2 and 3
– Jumper Pins 1 and 2 to force Primary
for auto-negotiation (Default shown)
JP1
or remove jumper entirely