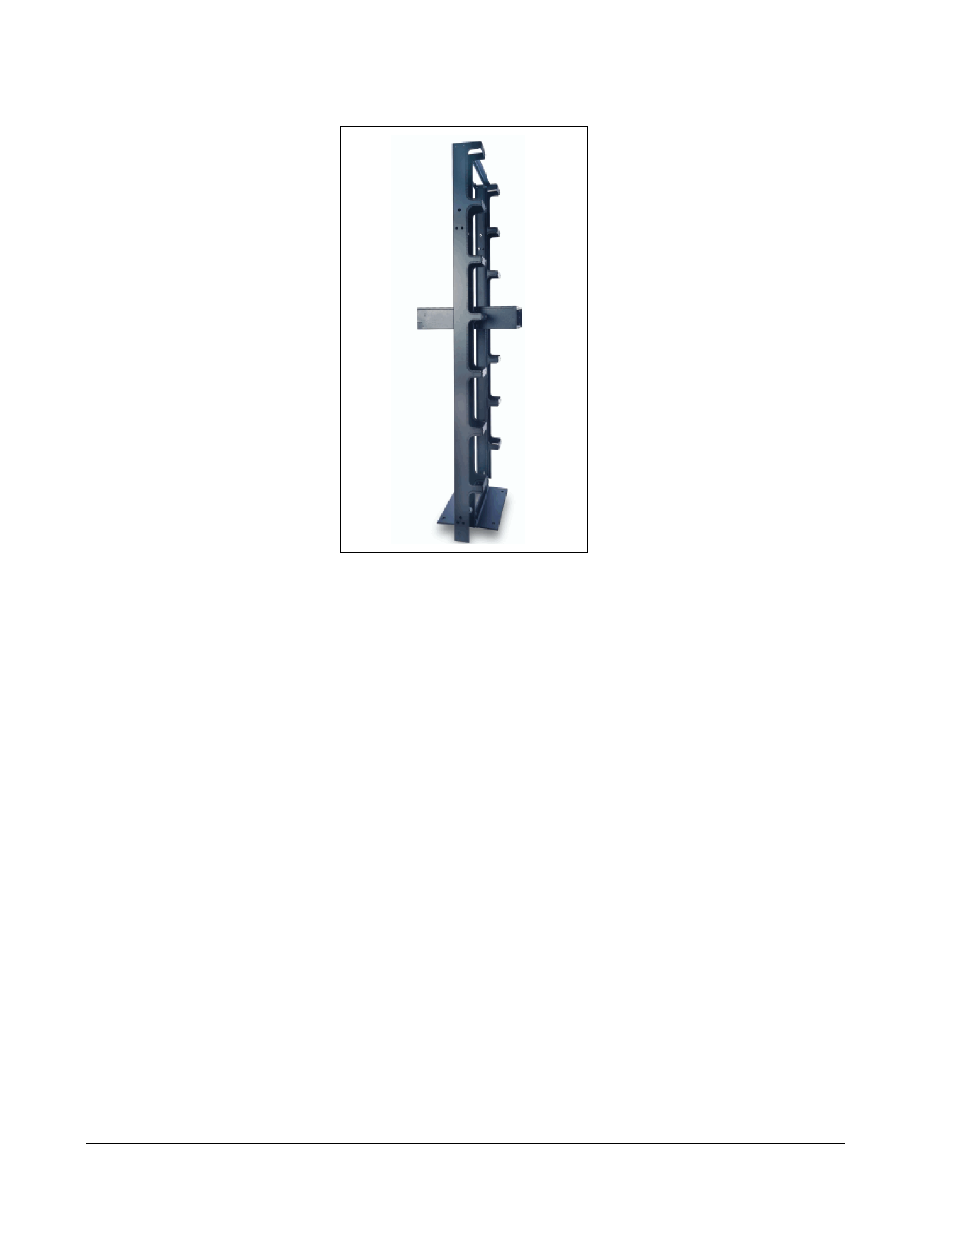
Figure 16, Side view of cage centered in a 2-post rack – ClearCube R Series Pentium 4 User Manual
Page 54
44 • Cage and Blade Installation
ClearCube Product Manual and Installation Guide
6. Attach the AC power cord(s) packaged and supplied with the Cage/BackPack and
route it to the rear panel power connector(s) and then to a surge-protected power
source such as an uninterruptible power supply (UPS) or power strip. Use the
cable retention clamp on the Cage to avoid inadvertently disconnecting the power.
Use the AC power cord packaged and supplied with the Cage/BackPack. For
systems shipped to countries that utilize a 110–130-volt power system, the power
cord is rated at 15 amps. Systems shipped to countries with a 208-volt power
systems are packaged with power cords rated at 10 amps. Older model
BackPacks utilized 10 amp-rated power cords that are NOT approved for use with
current model BackPacks on 110–130-volt power systems. The standard 10 amp
power cords are acceptable for use with the Fiber Transceiver. Refer to the Safety
Guidelines on page 7 for more information.
At this point, if the installation of a ClearCube system is part of a larger office renovation
or build-out, complete the Cage hardware installation and wiring, but delay installation of
the PC Blade computers until the rest of the area has been finished and cleaned.
If installing R4300 series BackPacks, the modules can be installed now, but
installation should be delayed until construction clean-up has been completed.
Modules are required to complete cabling, but preliminary cabling for C/Ports and
I/ports can be completed without the modules being installed.
Figure 16 Side View of Cage Centered in a 2-Post Rack