Seam-loc 24 – Metal Sales Seam-Loc 24 Installation User Manual
Page 65
© Metal Sales Manufacturing Corporation/ Subject to change without notice/ Effective Date 12/03
800.406.7387 (Corporate Office) • www.metalsales.us.com
64
SEAM-LOC 24
®
R
OOF
P
ENETRATION
Size and location of all roof penetrations should be an important consideration. Areas around roof vents or rooftop units may show
that corrosive fumes are emmitted from a process within the building.
Curbs can be obtained from any of the following manufacturers:
KCC International, Inc.
(800)382-2872
Custom Curb
(800)251-3001
ThyCurb
(800)666-2872
LM Curbs
(800)284-1412
NOTE: The following procedures are for vent pipes 6" or less and not transmitting extremely hot or caustic materials.
When installing vent pipes abide by the local plumbing codes.
1. Determine the size and length of the vent pipe to be raised.
2. Take the appropriate measurements for the vent location and mark them on the Seam-Loc 24 panel. The vent pipe must
extend through the flat of the roof panel. If the vent pipe extension cannot be raised directly into the flat of the new roof panel,
elbows should be used to offset the pipe. Cut the panel to fit the vent pipe properly.
3. Use a light gauge angle to secure and plumb the vent pipe to the framing system.
4. Flash the vent pipe with a Rubber Roof Jack or similar pipe flashing.
5. Apply Double Bead Tape Sealant between the panel and the base of the Rubber Roof Jack as well as the top where the
boot meets the pipe.
6. Attach the base of the Rubber Roof Jack to the panel using #
1
/
4
-14 x
7
/
8
" Stitch XL fasteners.
Mini (
1
/
4
" to 1
1
/
8
" O.D. Pipe)
#2 (1
3
/
4
" to 3" O.D. Pipe)
#4 (3" to 6" O.D. Pipe)
#6 (6" to 9" O.D. Pipe)
#8 (7" to 13" O.D. Pipe)
TEMP RANGE: -30° to +250°
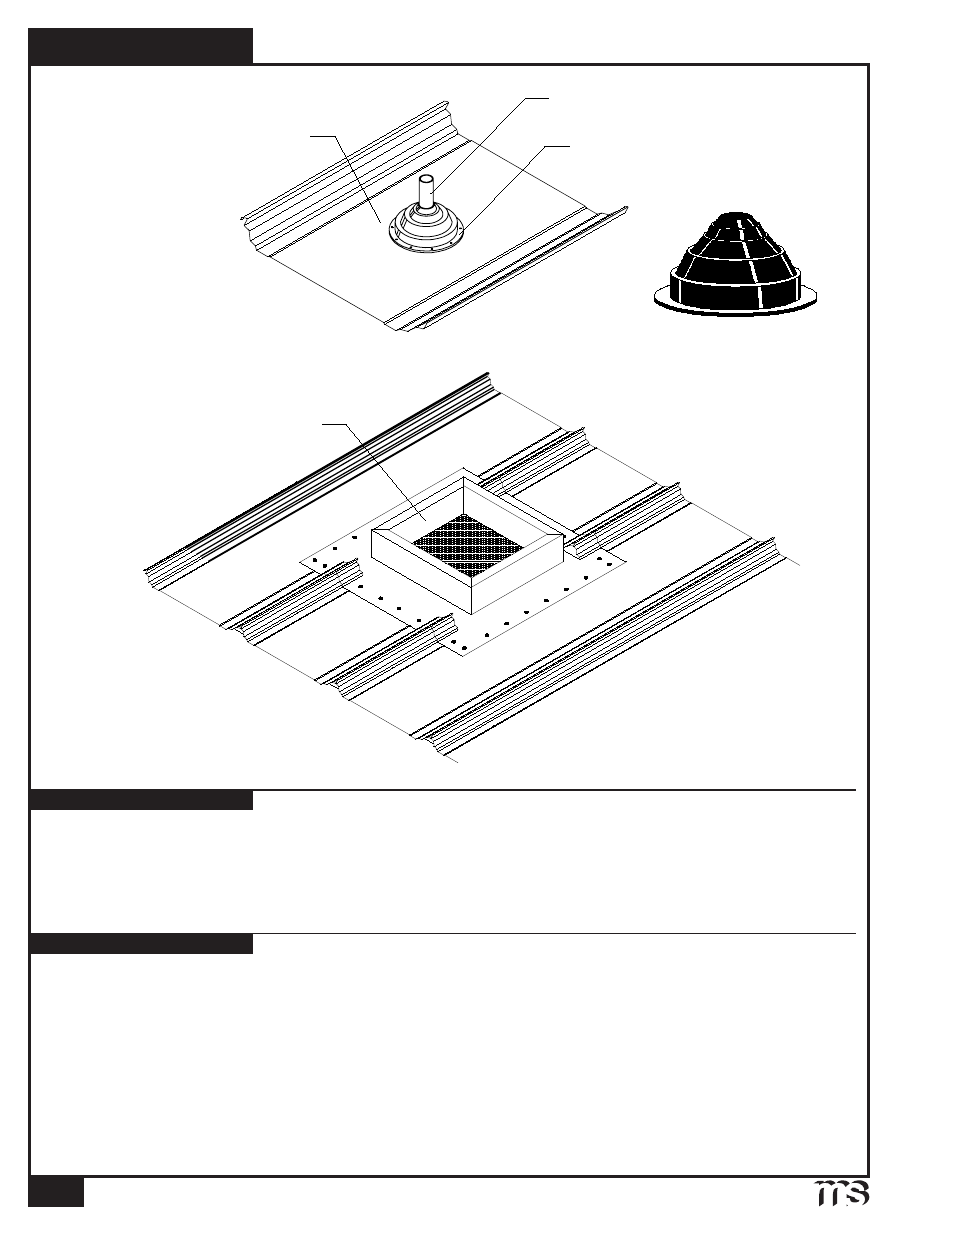
Double Bead Tape Sealant
and #
1
/
4
-14 x
7
/
8
" Stitch XL
Pipe Vent
Seam-Loc 24 Panel
INSTALLATION NOTES
GENERAL NOTES
Roof Curb