Seam-loc 24, Ssr d – Metal Sales Seam-Loc 24 Installation User Manual
Page 54
© Metal Sales Manufacturing Corporation/ Subject to change without notice/ Effective Date 12/03
800.406.7387 (Corporate Office) • www.metalsales.us.com
53
SEAM-LOC 24
®
INSTALLATION NOTES
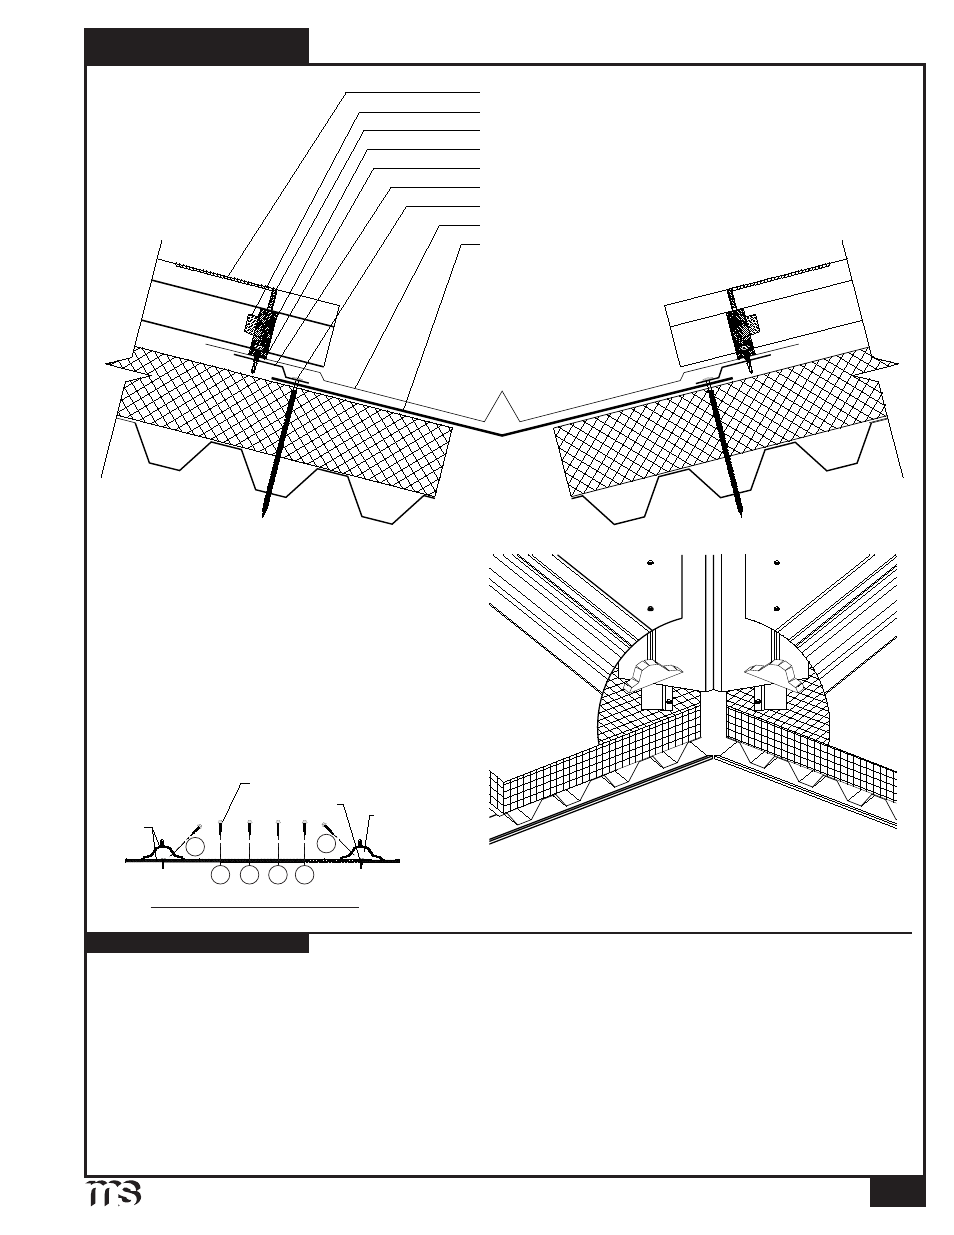
SSR D
ROP
V
ALLEY
O
VER
R
IGID
I
NSULATION
Seam-Loc 24 Fastening Pattern
D. B. T. S.
#12-14 x 1" SD N/W
Metal
Inside
Closure
#12-14 x 1
1
/
4
" SD XL
2
6
5
4
1
3
6:12 Slope
Minimum
Seam-Loc 24 Metal Inside Closure (see below)
Double Bead Tape Sealant
Seam-Loc 24 Panel (field cut for valley)
Tube Sealant (in rib on male leg)
Eave Plate
#14-13 x (X") Dekfast (1'-0" o.c.)
#12-14 x 1" Self Driller N/W (see below)
Seam-Loc 24 SSR Drop Valley
Valley Plate (by others)
Note:
Lengths of Dekfast screws are dependent on the
assembly thickness (see page 17 for lengths).
All Valley flashings must be installed prior to panel installation. If two or more Valley flashings are required, valley
must be installed working from eave to peak. It is recommeneded that ice and water shield be installed under Valley
flashing for added moisture protection.
1. Install Drop Valley flashing back against previously installed Eave Plates. To hold Valley in place fasten to substrate with
#10-16 x 1" Pancake Head fastener, 4'-0"o.c. into top leg of Eave Plate.
2. Apply a row of Double Bead Tape Sealant across both sides of the Drop Valley flashing so that the sealant is centered
over the top leg of the Eave Plate.
3. If two or more flashings are required, lap the flashing over the previously installed flashing by a minimum of 6" placing two
beads of Tube Sealant per side between the flashings.
4. Once panels and inside closures have been installed and properly sealed, (see pages 26-27), fasten through panel, Double Bead
Tape Sealant, and Drop Valley into Eave Plate with #12-14 x 1
1
/
4
" Self Driller XL screws.