Seam-loc 24 – Metal Sales Seam-Loc 24 Installation User Manual
Page 40
© Metal Sales Manufacturing Corporation/ Subject to change without notice/ Effective Date 12/03
800.406.7387 (Corporate Office) • www.metalsales.us.com
39
SEAM-LOC 24
®
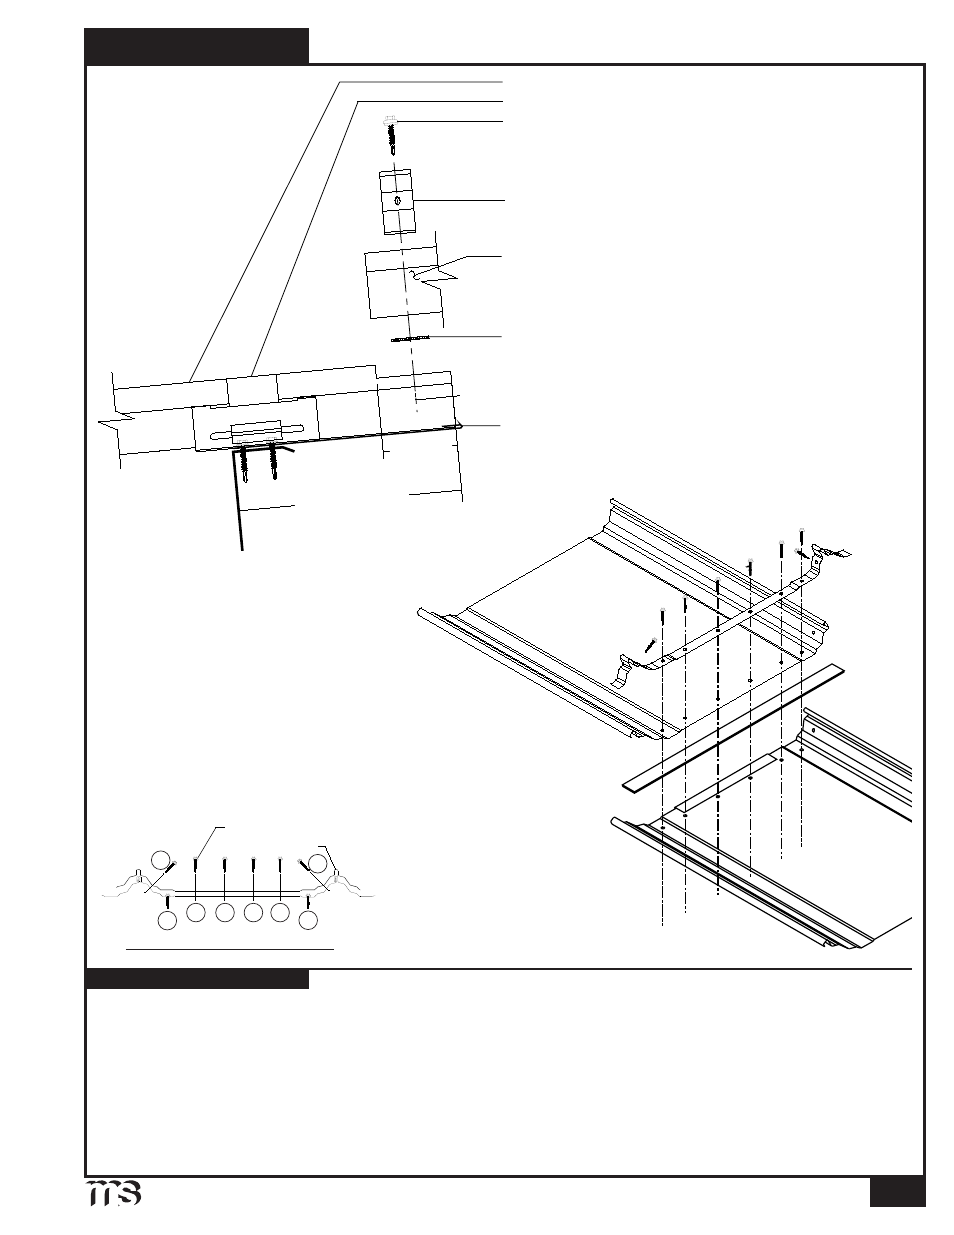
Seam-Loc 24 Panel (factory notched)
Endlap Pad
#12-14 x 1
1
/
4
" SD XL (see below)
Cinch Strap (optional)
Compression Plate
6" for 3" Endlap
9" for 6" Endlap
3" or 6"*
Clip with (2) #
1
/
4
-14 x 1
1
/
2
" SD N/W
Seam-Loc 24 Panel (pre-punched)
1
1
/
2
"
Seam-Loc 24 Fastening Pattern
Cinch Strap
#12-14 x 1
1
/
4
" SD XL
4
8
7
6
3
5
1
2
* 3" Endlap produced at Longmont Branch Only.
E
NDLAP
O
VER
O
PEN
F
RAMING
1
/
4
:12 Slope
Minimum
1. Once eave panel has been installed, (see pages 30-31), slide a Compression Plate under upper edge of panels. Compression Plate
should be flush with edge of Seam-Loc 24 eave panel. Use C-clamps to hold Compression Plate in place.
2. Apply a row of Endlap Pads across flat pans, up and over all ribs of eave panels. Endlap Pad should be flush with edge of
eave panel.
3. Roll Seam-Loc 24 peak panel into place and nest with eave panel so that factory notch is completely covered. (See page
30 for complete details on installing lapped panels.)
4. With peak panel in place, fasten panel endlap with (8) #12-14 x 1
1
/
4
" Self Driller XL fasteners per panel through factory
punched holes and into the Compression Plate.
5. Apply a pig tail of Endlap Pad, approximately 2
1
/
2
", over factory notched section of male legs.
INSTALLATION NOTES