Step 6, Seam-loc 24 – Metal Sales Seam-Loc 24 Installation User Manual
Page 31
© Metal Sales Manufacturing Corporation/ Subject to change without notice/ Effective Date 12/03
800.406.7387 (Corporate Office) • www.metalsales.us.com
30
SEAM-LOC 24
®
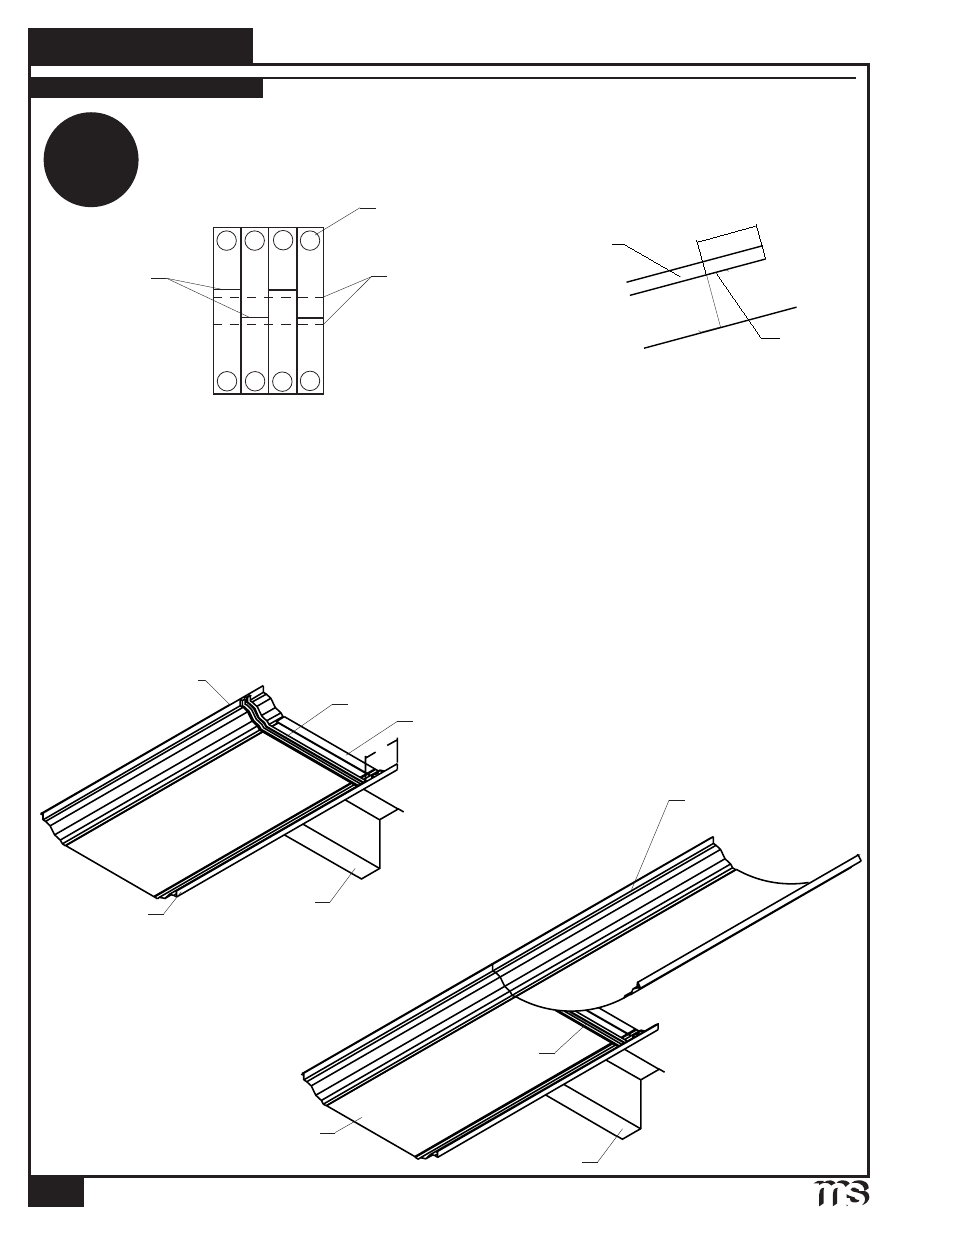
Seam-Loc 24
Peak Panel
Pull up panel
Endlap
Pad
Note: It is critical that purlins at the ridge and endlap be exactly located as detailed on construction
drawings. Panels with endlaps must be fixed at the eave. Endlap splices are to be staggered as shown.
The following procedures also apply to panel runs with multiple laps.
Steps:
ENDLAPPING OF PANEL
6" or 9"
Endlap
Purlin
Seam-Loc 24
Panel
STEP
6
End of factory notch
Seam-Loc 24
Eave Panel
Endlap Sealant
Endlap Purlin
I
NSTALLATION
OF
P
ANEL
(
CONT
.)
1. The installed eave panel should measure 6" or 9" from the web of the endlap purlin to the end of the
eave panel. (6" for panels produced in Longmont, CO / 9" for panels produced at all other
branches) This dimension must be verified. If the panel exceeds this, verify that the eave overhang
dimension is correct.
2. Slide Compression Plate under panel in center of endlap and cee clamp to panel to hold in place for
attachment.
3. The male and female legs of the high end of the eave panel are factory notched to allow the peak panel
to nest inside the eave panel.
4. Apply Endlap Pad on the notched end of the eave panel down male leg, across panel flat, and up the female
leg 1⁄2" to 3⁄4" from the end of the panel.
5. Lap the female leg of the peak panel into the female leg of the eave panel lapping the proper 3" or 6".
Eave
Peak
Staggered Endlapping
Endlap Purlins
Panel Installation Sequence
1
2
4
6
8
3
5
7
Panel Endlaps
Compression Plate
Endlap Purlin
Seam-Loc 24
Eave Panel
3" or 6" Lap