Seam-loc 24 – Metal Sales Seam-Loc 24 Installation User Manual
Page 36
© Metal Sales Manufacturing Corporation/ Subject to change without notice/ Effective Date 12/03
800.406.7387 (Corporate Office) • www.metalsales.us.com
35
SEAM-LOC 24
®
SEAMING PANELS
I
NSTALLATION
OF
P
ANEL
(
CONT
.)
Note: The Seam-Loc 24 panel system requires the use of a mechanical seamer for proper installation. The mechanical
seamer runs from ridge to eave with Seam-Loc 24 panels laid from left to right. This necessary seamer is designed to seam
the panel clips and the vertical legs of the panel together for weathertightness and resistance to wind uplift loads.
n Rental or purchase of the Seam-Loc 24 mechanical seamer and hand crimpers for field seaming are the responsibility
of the installer. Mechanical seamers and hand crimpers can be aquired from Seamer Tools, Inc.
Phone No. (662) 895-1222.
n Read the field manual that is enclosed in the case with the seamer. The operator should adhere to all instructions for
proper use of the seamer. Failure to follow the required instructions may result in damage to the panel and/or seamer.
Metal Sales Manufacturing Corporation will not be responsible for damage incurred by improper use of the seamer.
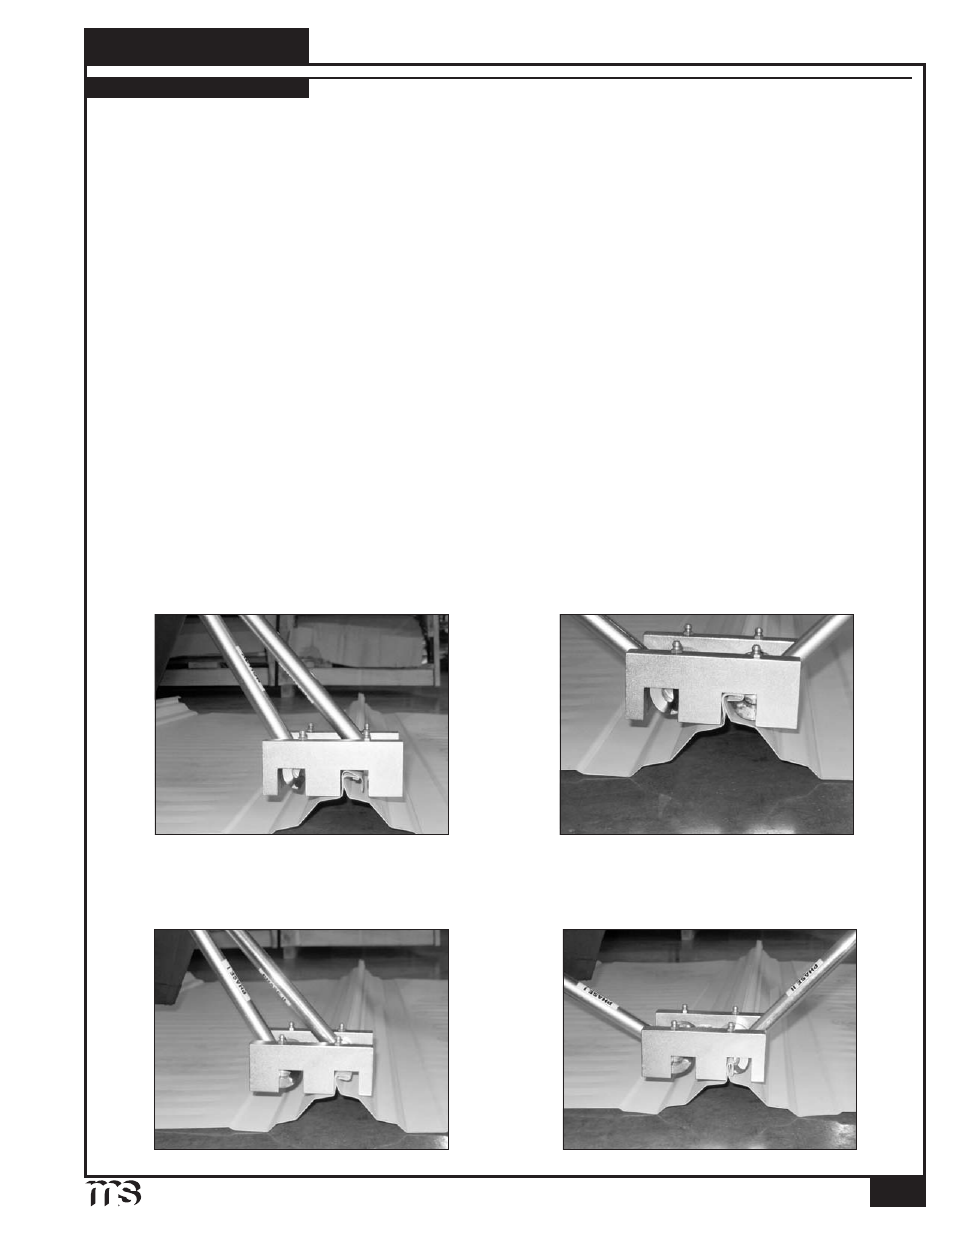
STEP 2 - Required hand Crimping only at the START END of the panel to be seamed:
Place the “Phase 2” slot onto the open side of the panel rib at the very end of the panel to be seamed, and engage the handle
to a fully closed condition as shown. Hand crimp only the first 3-4 inches. Do not use “Phase 2” slot at a clip condition
prior to using the Electric Seamer.
Preparation Notes:
1. Check to insure all components are in the shipping container:
Electric Seamer, Handle Assembly, and Hand Crimper.
2. Read instructions completely and then check roof system for proper installation.
3. Clean and remove all construction debris to avoid damage.
4. Panels MUST be hand crimped 6-8 inches per Step 1 at the start end of each panel row and endlaps. Metal Sales recommends
panels be seamed as soon as possible to prevent wind damage.
5. If panels are installed from left to right (looking from eave to ridge), electric seamer will run down slope from ridge to eave.
6. Panels may be hand crimped per Step 1, only at clips, until electric seamer is used.
STEP 1 - Required Hand Crimping Before Seaming:
Begin at the seaming start end of the panel. Place the “Phase 1” slot of the hand crimper over the panel rib with the “Phase 1”
handle on the open side of the panel rib. Engage the tool to a fully closed position. Hand crimp the first 6-8 inches. In high wind
situations, Step 1 can be done at clip locations to hold panels in place until electric seamer is used. Make sure hand crimper does
not flatten rib of panel. Step 1 should also be applied at all endlap conditions.
NOTE: Step 1 should be applied at each panel clip location if you are NOT going to run the mechanical seamer after you apply
each panel. Metal Sales recommends that panel ribs be mechanically seamed before the end of each working day.