Step 7, Seam-loc 24 – Metal Sales Seam-Loc 24 Installation User Manual
Page 35
© Metal Sales Manufacturing Corporation/ Subject to change without notice/ Effective Date 12/03
800.406.7387 (Corporate Office) • www.metalsales.us.com
34
SEAM-LOC 24
®
I
NSTALLATION
OF
P
ANEL
(
CONT
.)
Note: The following steps are for terminating a panel run when the pan width exceeds the width of
the building.
Steps:
1. When the roof panel installation has reached the opposite end of the roof, the last panel run may need to be
field modified to attach to the Floating Rake Angle previously installed.
2. Measure the distance between the vertical leg of the last full panel run and the vertical leg of the Floating Rake
Angle at the eave, endlap, and peak. See dimension “A”.
3. Determine if a full panel will fit between the last full run and the Floating Rake Angle. In most cases it will
not fit. If the full panel will fit, then continue with the installation of the roof. When the last panel is installed
the vertical leg of the male side must fit flush with the Floating Rake Angle.
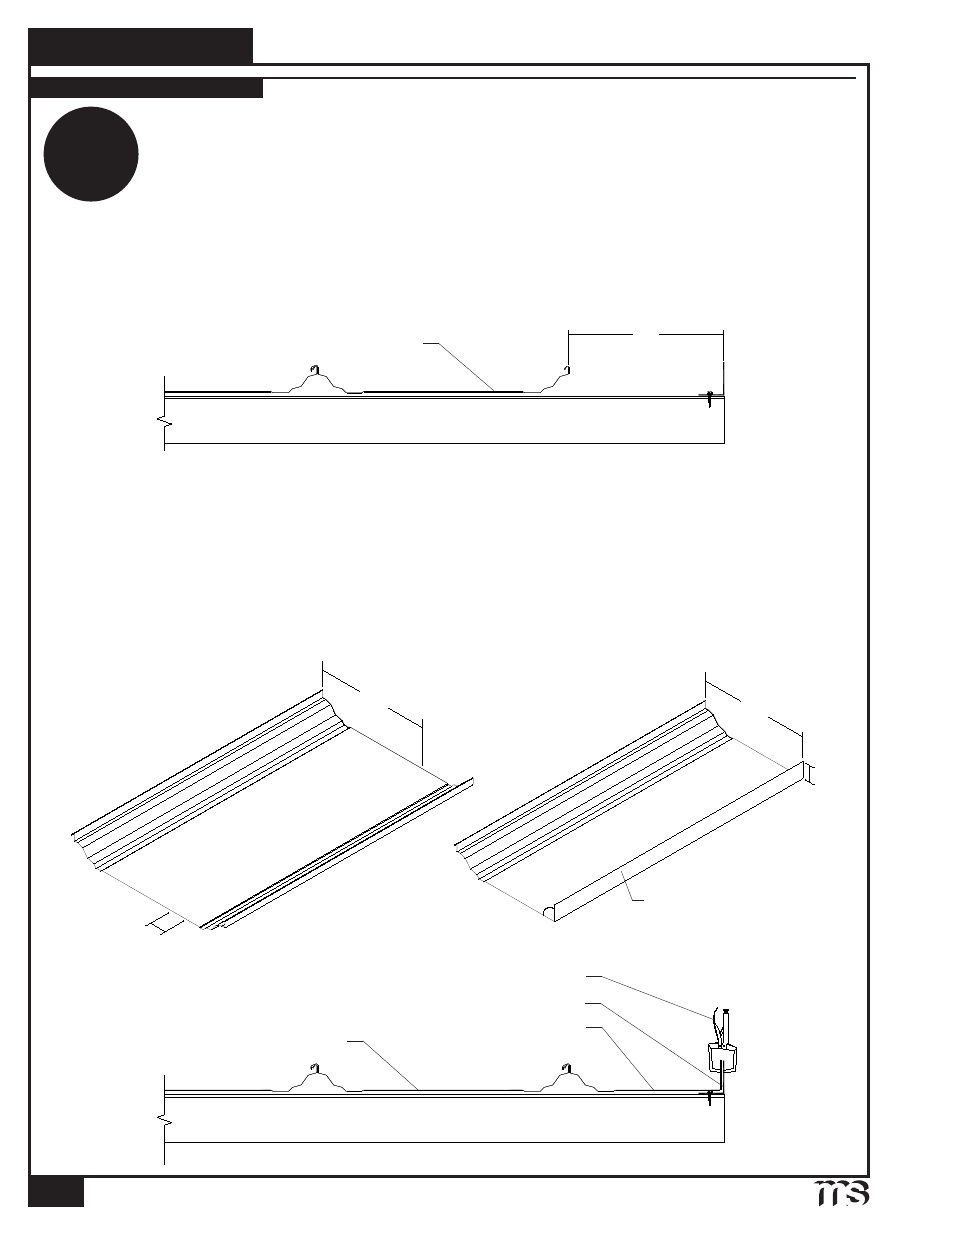
TERMINATION OF PANEL
Last Full Panel
A
A
INSTALLING
PANEL CLIP
STEP
7
"C" Clamp
Floating Rake Angle
Termination Panel
Last Full Panel
2
3
/
4
"
Field bend
simulated Male Leg
90°
4. If a full panel is too wide to fit between the last full panel run and the Floating Rake Angle, a panel will have
to be field cut and bent to simulate a male leg.
5. Use the dimension “A” and mark a line on the last panel to serve as the bend line. Mark a second line to match
rake angle height past the bend line to be the line you will cut off the excess panel.
6. Field bend the roof panel up 90 degrees to form a vertical leg.
7. Place termination panel between last full panel and vertical leg of Floating Rake Angle making sure the
panel fits properly.
8. Clamp termination panel to leg of Floating Rake Angle until Rake Detail is to be installed. (See page 41
for details.)
A
2
3
/
4
"