Apple Numbers '08 User Manual
Page 163
Chapter 8
Working with Shapes, Graphics, and Other Objects
163
4
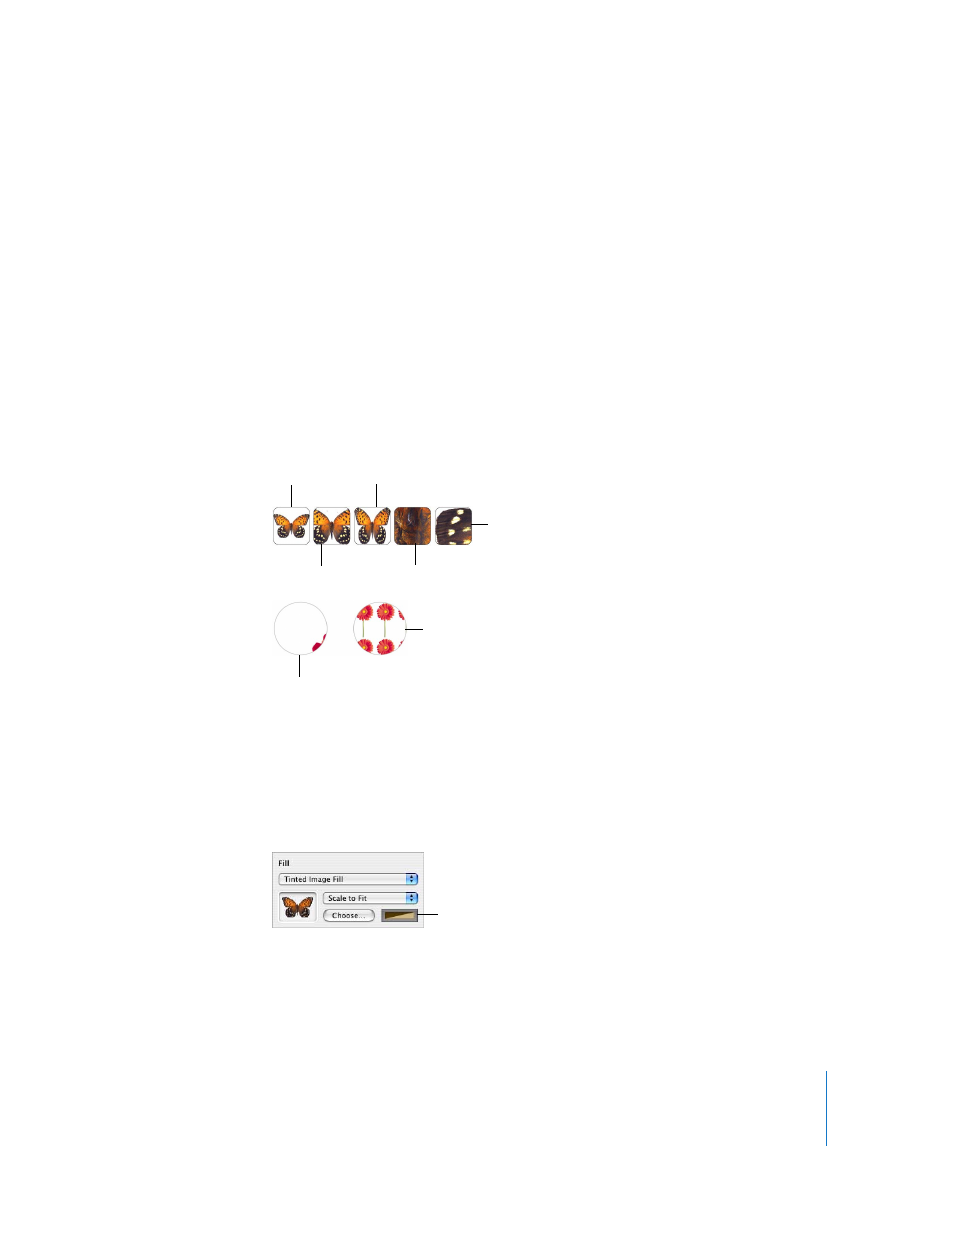
Choose an image scale from the pop-up menu.
Scale To Fit: Resizes the image to fit the object’s dimensions as well as possible. If the
object’s shape is different from the original image’s, parts of the image may not appear;
blank space may also appear around the image.
Scale To Fill: Makes the image appear larger or smaller, sizing it to leave minimum space
around the image, even if the object and image have different shapes.
Stretch: Sizes the image to fit the object’s dimensions but distorts it if the object has a
shape different from the original image.
Original Size: Places the image inside the object without altering its original
dimensions. If the image is larger than the object, you see only a part of the image in
the object. If the image is smaller than the object, there is blank space around it.
Tile: Repeats the image inside the object, if the image is smaller than the object. If the
image is larger than the object, you see only part of the image inside the object.
5
To place a transparent tint over the image, choose Tinted Image Fill from the Fill pop-
up menu.
Click the color well next to the Choose button, and then select a tint color in the Colors
window. Drag the Opacity slider in the Colors window to make the tint darker or
lighter. (If you drag the Opacity slider in the Graphic Inspector, it will change the
opacity of both the tint and the image.)
Scale to Fill
Tile (large image)
Original Size
Stretch
Scale to Fit
Tile (small image)
Tile (large image)
Click to select a tint color
for the image.