2setup – Micromod MOD: 30ML Operation and Template Setup User Manual
Page 11
MOD 30ML Operation
SETUP
2-1
2
SETUP
! CAUTION Be sure the process can be maintained in a safe condition before turning on
instrument power. The instrument may not be configured to meet the specific
requirements of the process until setup has been performed.
2.1
GENERAL PREPARATIONS
After installation is complete, begin setup by preparing the instrument as follows:
1. Set the SCRV/RUN switch under the front face to the RUN position. If a Memory Module is
present, see Using The Memory Module to load a database stored to a memory module.
2. At ac power source, turn on power to instrument. When power is on, the front panel
display illuminates showing either a default database (as shipped from factory) or some
other successfully loaded database.
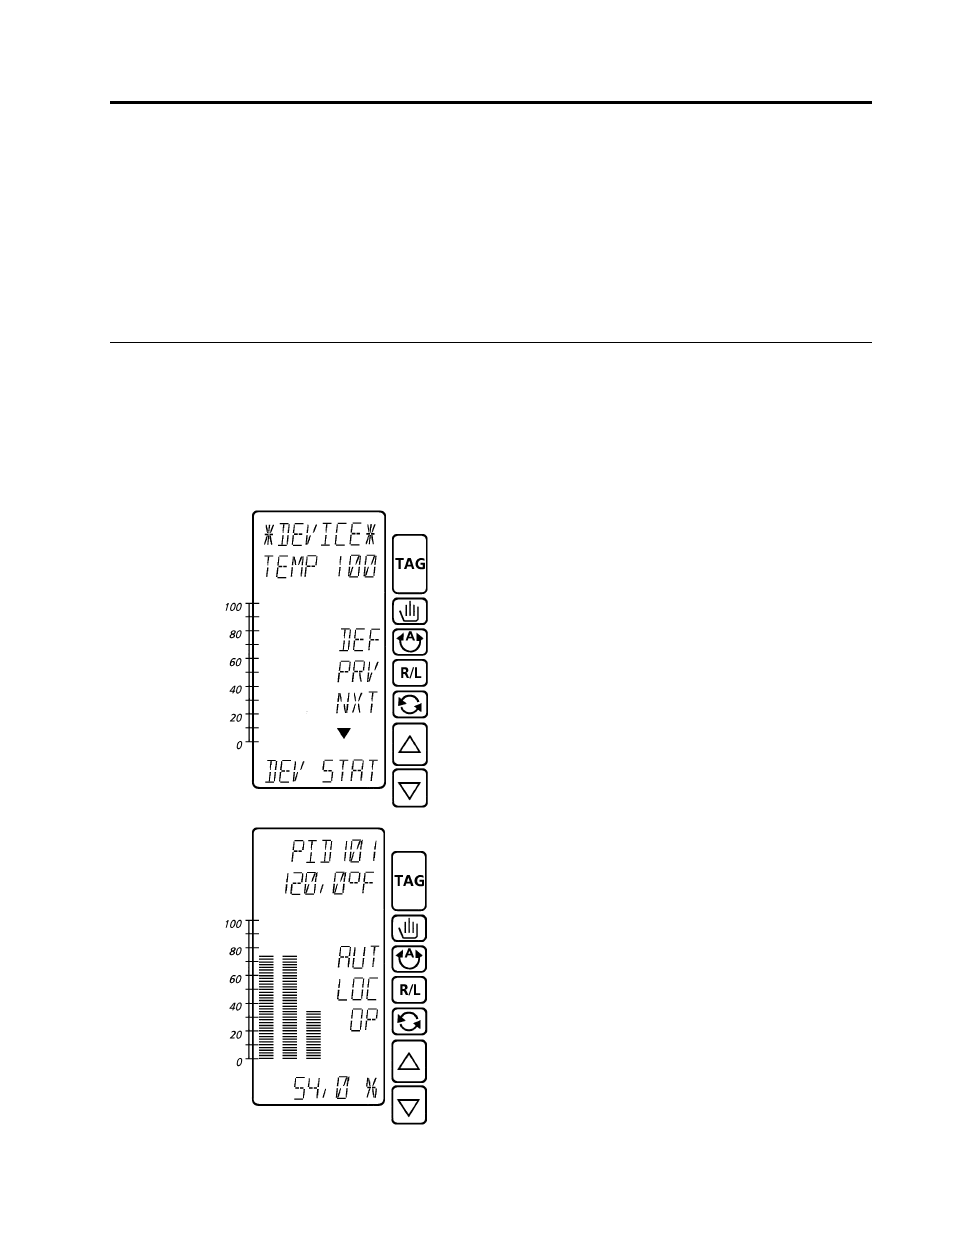
Default Database
If the instrument does not have a valid user database, the
first DEVICE display (device status entry point) will
appear and any diagnostic indications will be enabled.
The default device tag is TEMP 100.
The device display shows the state of the instrument on
line 3 (see Device States).
The keys labeled NXT (next step) and PRV (previous
step) move you through the entry points for the setup
tables while the down arrow
∇ indicates the down arrow
key can be used to enter a step
(see Device Displays). If
the instrument state is RUN, the TAG key will switch you
to the first user runtime display.
Valid User Database Loaded
If the instrument has a valid user database, the power up
display (Device, Previous or User) will appear and any
enabled diagnostics, such as for power up and power
down, will be indicated. You can prepare the instrument
for setup by acknowledging these diagnostics and
making any necessary adjustments to your operating
conditions from the user display (see Operation for
general operation).
Return to the DEVICE display by pressing and holding
the TAG key.