Set up – RIDGID NaviTrack II User Manual
Page 8
NaviTrack® II
7
Set Up
Once the NaviTrack® II is up and running the next step is to set
up the frequencies needed that match the transmitter, sonde,
or line to be located.
Frequencies that are already turned on appear in sequence by
pressing the Frequency key. (For example, the default Sonde
frequency of 512 Hz is available by pressing the Frequency
key.)
Figure 7: Sonde Frequency Selected With Frequency Key
Note that the usual Sonde Frequency, 512 Hz, is turned on
by default.
Other frequencies can be added to the set of activated, turned-
on frequencies so they will be available using the Frequency
Key.
Each is turned on for use by selecting it from a list in the Main
Menu.
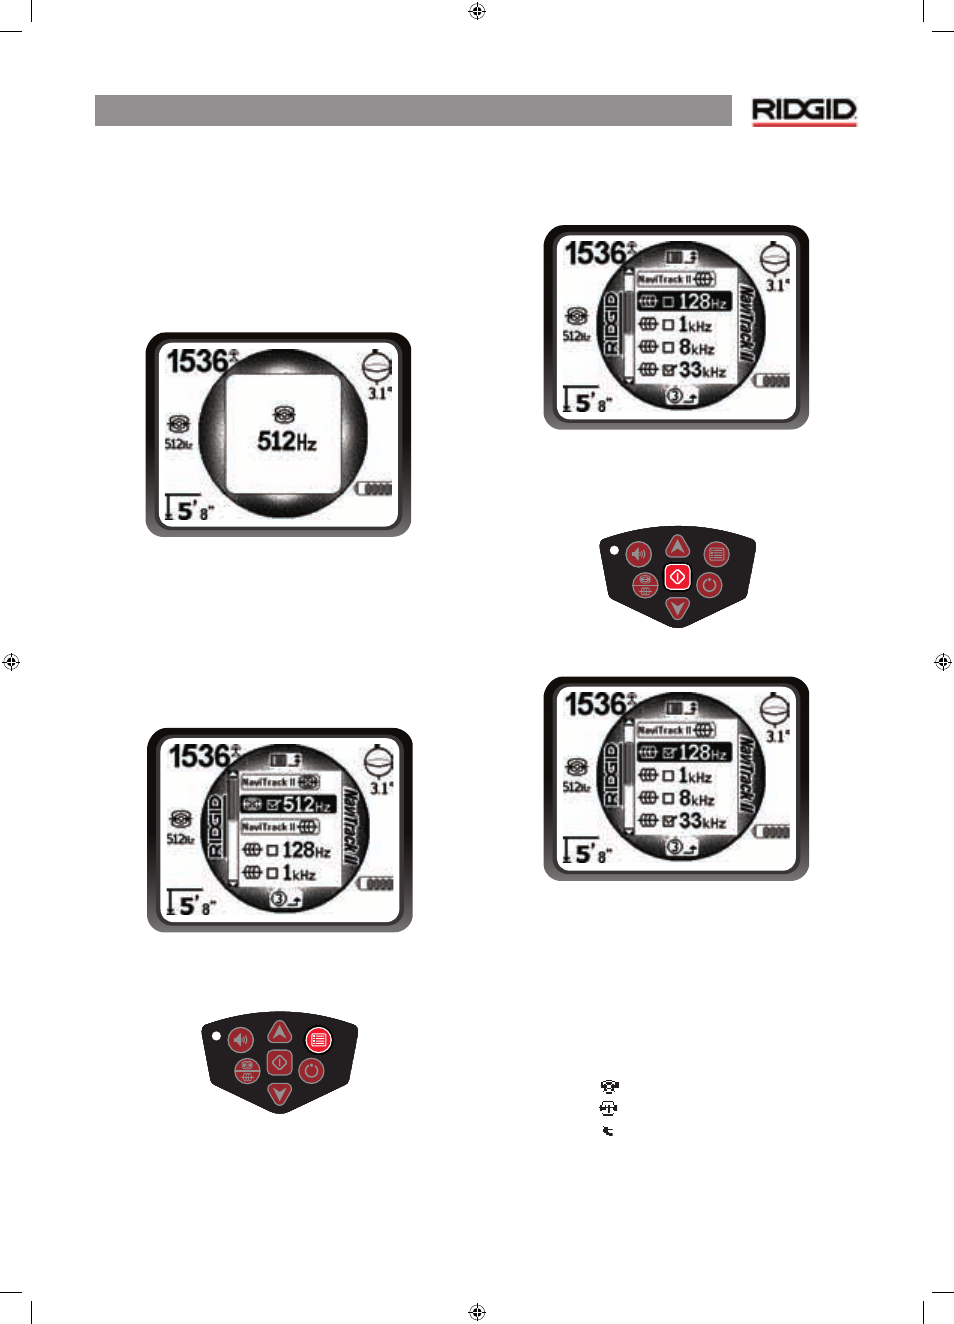
Figure 8: Main Menu
1. Push the menu key:
Figure 9: Menu Key
2. Using the up and down arrows, highlight the frequencies
desired. In this example, the operator is activating a
128 Hz frequency.
Figure 10: Highlighting a Desired Frequency (128 Hz)
3. Press the select key (shown below) to check the box for
each frequency intended for use.
Figure 11: Select Key
Figure 12: Desired Frequency Checked
4. Frequencies that have been selected for use will show a
check in the box next to them. (Menu key exits to operating
display.)
The Main Menu lists all available activated frequencies. Different
frequencies can be turned on or off for different jobs from the
activated frequencies list, by checking them or unchecking
them using the Select key.
Frequencies are grouped by category:
Sonde
Line Trace
Power