Figure 9 wall-mounting example – ZyXEL Communications ES-2108 Series User Manual
Page 40
Chapter 2 Hardware Installation and Connection
ES-2108 Series User’s Guide
40
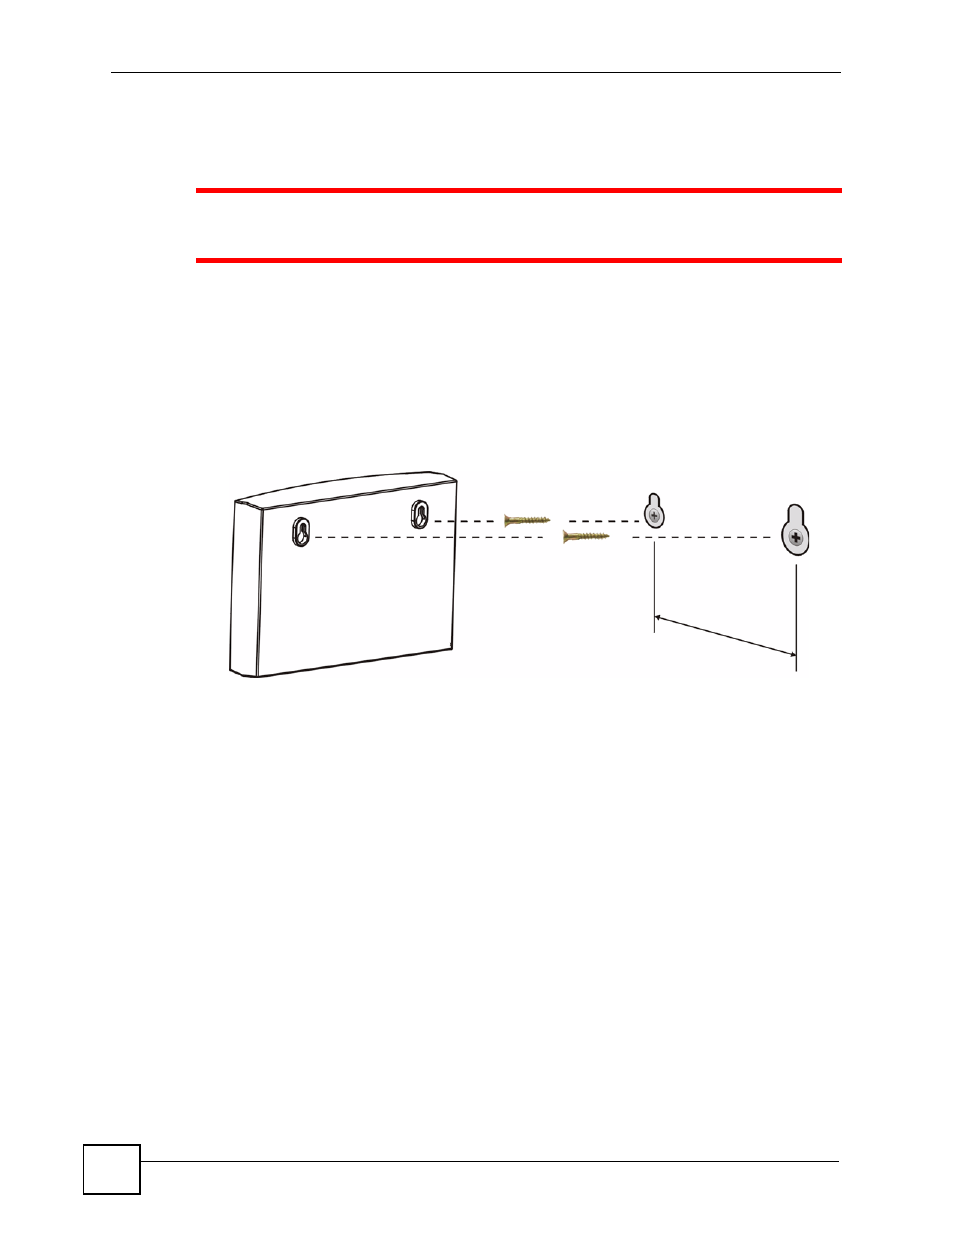
2 Drill two holes for the screws (not included). Make sure the distance between the centers
of the holes matches what is listed in the product specifications appendix.
1
Be careful to avoid damaging pipes or cables located inside the wall when
drilling holes for the screws.
3 Do not screw the screws all the way into the wall. Leave a small gap of about 0.5 cm
between the heads of the screws and the wall.
4 Make sure the screws are snugly fastened to the wall. They need to hold the weight of
the Switch with the connection cables.
5 Align the holes on the back of the Switch with the screws on the wall. Hang the Switch
on the screws.
Figure 9 Wall-mounting Example
See also other documents in the category ZyXEL Communications Computer Accessories:
- ZyXEL Dimension GS-1116A (30 pages)
- ZyXEL Dimension ES-2108PWR (4 pages)
- DIMENSION ES-4024 (4 pages)
- MI-7526F (6 pages)
- ZyXEL Dimension ES-2048 (306 pages)
- DIMENSION ES-1016A (2 pages)
- ONU-6040B-21 (19 pages)
- HOMEBOUND TRIPLE PLAY DELIVERY ES-315-F (2 pages)
- IES-708-22 (6 pages)
- Version 1.03 (242 pages)
- ZyXEL Dimension ES-1552 (43 pages)
- ES-2108 (224 pages)
- ZyXEL Dimension ES-1124 (48 pages)
- 2-Slot 10GBase-CX4 10Gigabit Module EM-412 (18 pages)
- GS-105B/108B (48 pages)
- ES-4024A (128 pages)
- ETHERNET SWITCHES ES-1016 (2 pages)
- GS-4012F/4024 (363 pages)
- ZyXEL Dimension ES-2024 (195 pages)
- ZyXEL Dimension ES-2108 (277 pages)
- ZyXEL Dimension GS-3012F (237 pages)
- VES-1000 (155 pages)
- PoE-80 (23 pages)
- ES-1124 (30 pages)
- 4500 Series (7 pages)
- ES-3148 Series (362 pages)
- GS-3012F Series (300 pages)
- Ethernet-to-Fiber Media Converter MC1000-SFP-FP (34 pages)
- GS2200-24P (4 pages)
- ES-105A/108A (2 pages)
- ZyXEL Dimension GS-1016 (32 pages)
- EES-1024AF (99 pages)
- GS-4012 (462 pages)
- IES-6000 (100 pages)
- ES-315 (166 pages)
- ZyXEL Dimension ES-2024PWR (286 pages)
- GS-3012F/3012 (314 pages)
- GS-108B (48 pages)
- GS-105 (7 pages)
- GS-4012F (462 pages)
- VES-1616 (118 pages)
- A-6000 (23 pages)
- LAYER 3 ES-3124 (337 pages)
- GS-105A (2 pages)