3 mounting the switch on a rack, 3 wall-mounting installation, Figure 8 mounting the switch on a rack – ZyXEL Communications ES-2108 Series User Manual
Page 39
Chapter 2 Hardware Installation and Connection
ES-2108 Series User’s Guide
39
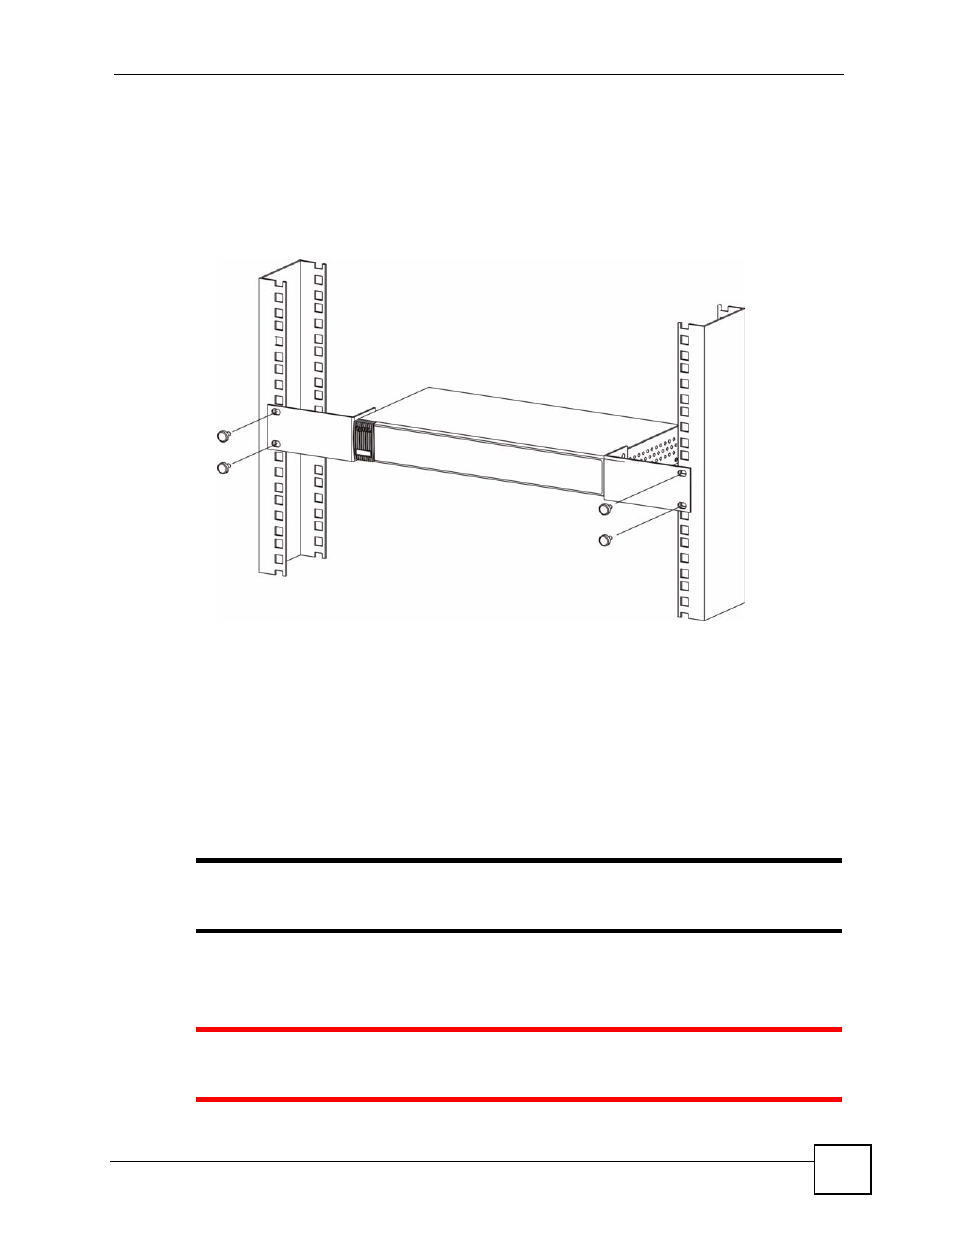
2.2.3 Mounting the Switch on a Rack
1 Position a mounting bracket (that is already attached to the Switch) on one side of the
rack, lining up the two screw holes on the bracket with the screw holes on the side of the
rack.
Figure 8 Mounting the Switch on a Rack
2 Using a #2 Phillips screwdriver, install the M5 flat head screws through the mounting
bracket holes into the rack.
3 Repeat steps
and
to attach the second mounting bracket on the other side of the rack.
2.3 Wall-mounting Installation
Do the following to hang your Switch on a wall.
"
See
for the size of screws (not included) to use and
how far apart to place them.
1 Locate a high position on wall that is free of obstructions. Use a sturdy wall.
1
Do NOT block the ventilation holes. Make sure that no objects obstruct the
airflow of the fans.