3 configuring dhcp relay – ZyXEL Communications 1 User Manual
Page 108
NetAtlas Enterprise 1.00 User’s Guide
107
Chapter 11 Switch Configuration
• System name (up to 32 bytes, this is optional)
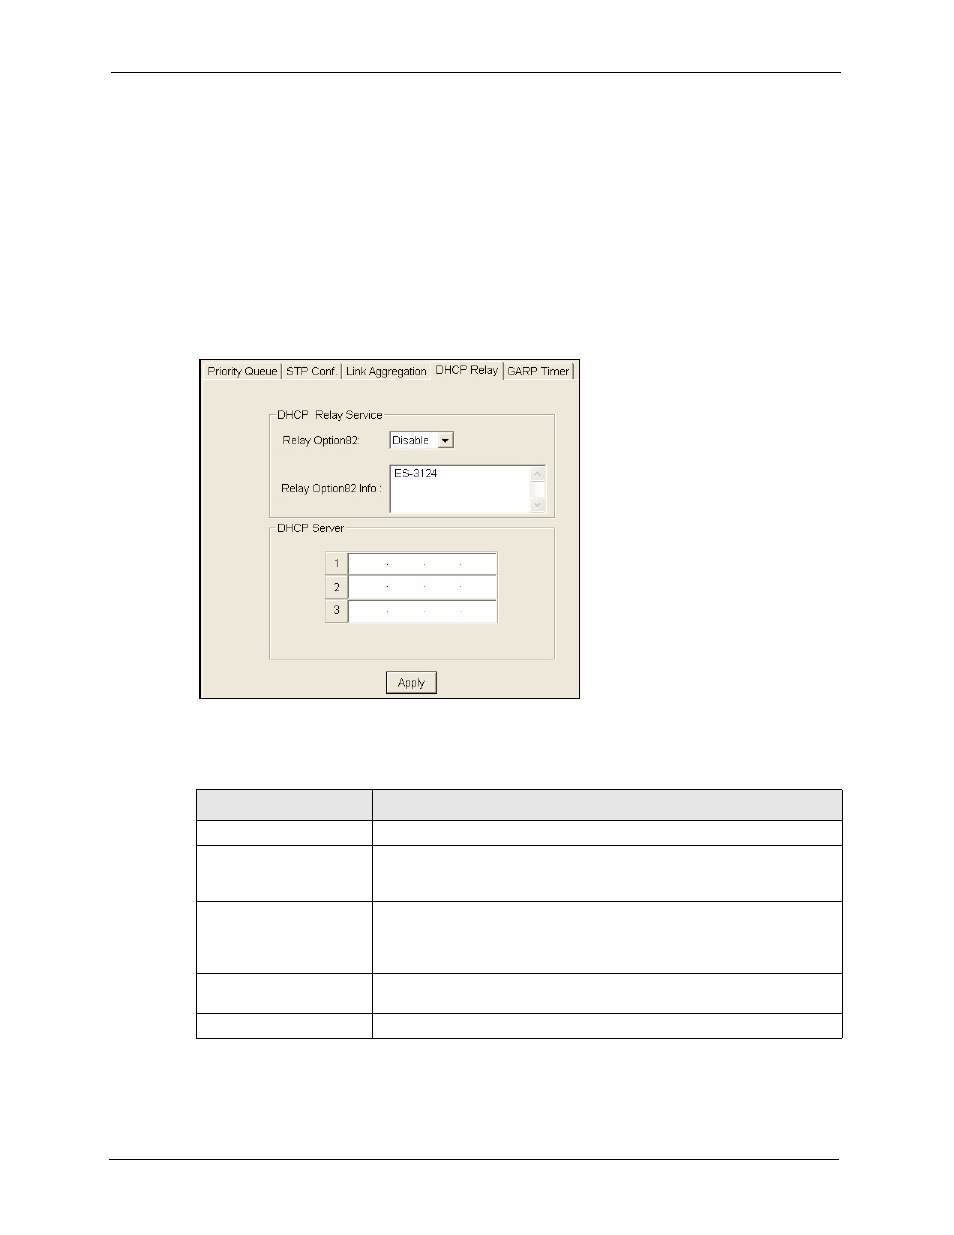
11.7.3 Configuring DHCP Relay
1 In the Device Panel list, select a device and then right-click.
2 Click Configuration, Switch Configuration and then the Switch Setup tab.
3 Select the DHCP Relay check box and then click Apply.
4 Click Configuration, Switch Configuration and then the DHCP Relay tab to display
the following screen.
Figure 78 Configuration: Switch Configuring: DHCP Relay
The following table describes the labels in this screen.
Table 37 Configuration: Switch Configuring: DHCP Relay
TABLE
DESCRIPTION
DHCP Relay Service
Configure the fields below to set the DHCP relay settings.
Relay Option 82
Enable DHCP relay info to have the switch add the originating slot and port
numbers to client TCP/IP configuration requests that it relays to a DHCP
server.
Relay Option82 Info
Use this field to specify up to 24 ASCII characters of additional information
for the switch to add to the DHCP client TCP/IP configuration requests that
it relays to a DHCP server. An example would be the casing number of the
switch or the ISP’s name.
DHCP Server
This table displays the IP address(es) and status of the DHCP servers.
You can configure up to three DHCP servers.
Apply
Click Apply to save the changes.