Forced cleaning – Epson SureLab D1070 Professional Minilab Printer User Manual
Page 92
SL-D1000 Series User's Guide
Using the Maintenance Tool (Windows)
92
If the clogged nozzles are not cleared after
repeating
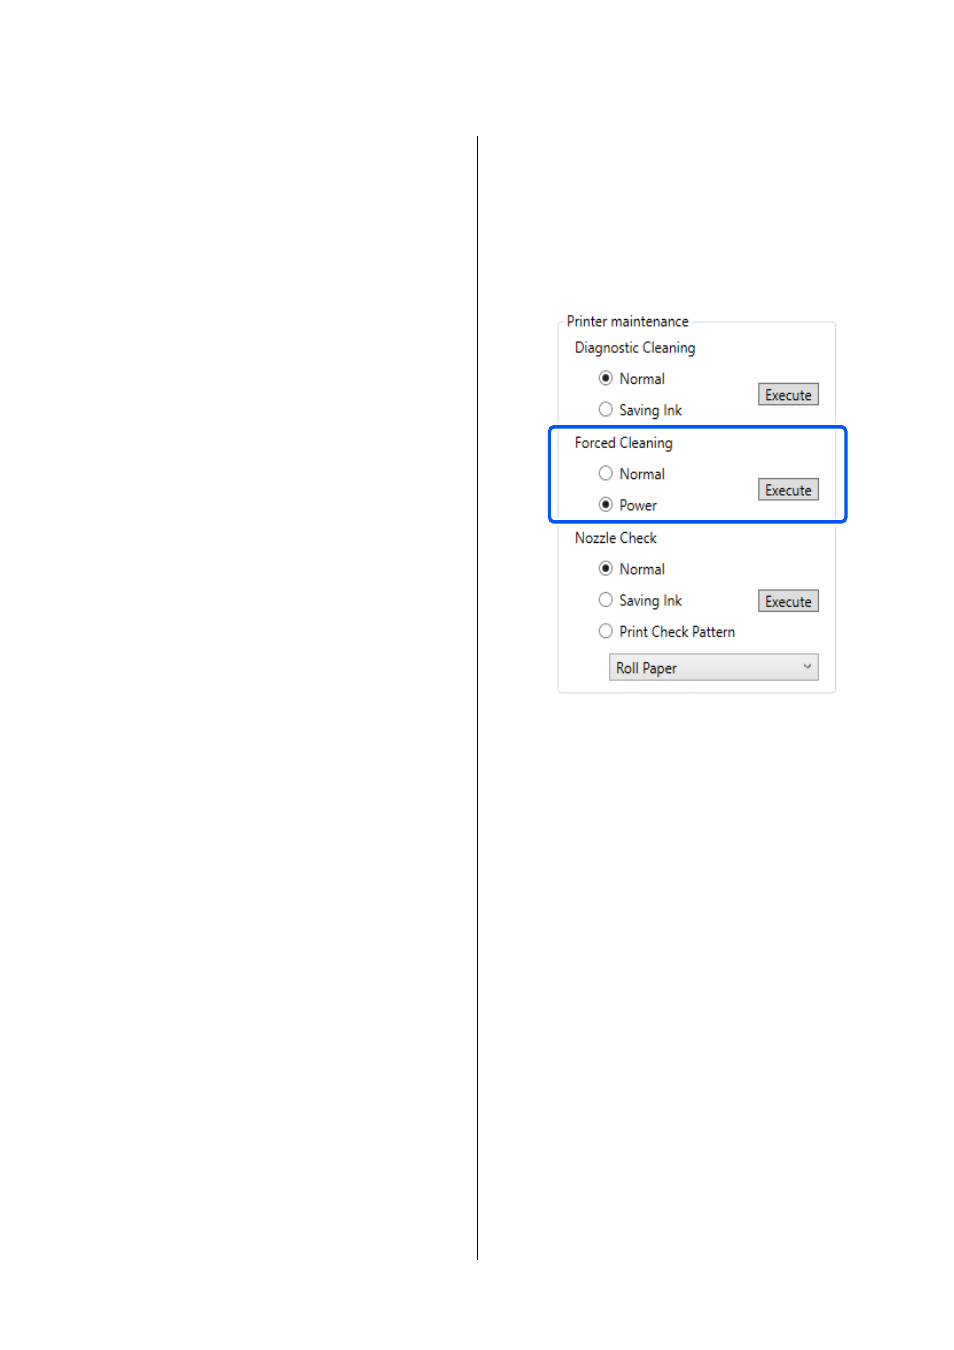
Diagnostic Cleaning
three times,
then execute
Forced Cleaning
set to
Power
.
U
Forced Cleaning
1
Select a printer, in the printer list area on the
main screen, on which to execute cleaning.
When you select multiple printers, press and
hold
Ctrl
as you select the targeted printers.
See the following for more details on the main
screen.
U
“Explanation of the Main Screen” on page
If an error is displayed for the printer you want
to select, clear the error before selecting it.
2
In
Printer maintenance
-
Forced Cleaning
,
select
Normal
or
Power
, and then click
Execute
.
Select
Normal
to clean the surface of the print
head and to clear clogged nozzles.
Power
cleans more powerfully than
Normal
.
Use this setting if the nozzles are still clogged
even after repeating
Normal
cleaning several
times.
Power
consumes more ink than
Normal
cleaning. If a message is displayed informing
you that here is not enough ink remaining,
replace the ink supply unit before continuing.
Cleaning is executed.
Cleaning may take some time depending on the
selected cleaning level.
When cleaning is complete, the results are
displayed in
Printer history
.
3
Check the results of Forced Cleaning.
There are the following two ways to check the
cleaning results.
O
Execute a nozzle check to check for clogged
nozzles.
U
“Nozzle Check Methods” on page 89
O
Print a nozzle check pattern to check for
clogged nozzles.
U