Paper feed adjustment method – Epson SureLab D1070 Professional Minilab Printer User Manual
Page 107
SL-D1000 Series User's Guide
Using the Maintenance Tool (Mac)
107
If you selected something other than
Rear
Paper Feed Slot
for
Paper Source
, then go to
step 5.
4
In
Paper Type
, select the type of paper that is
loaded in the rear paper feed slot.
5
Click
.
Adjustment patterns are printed.
6
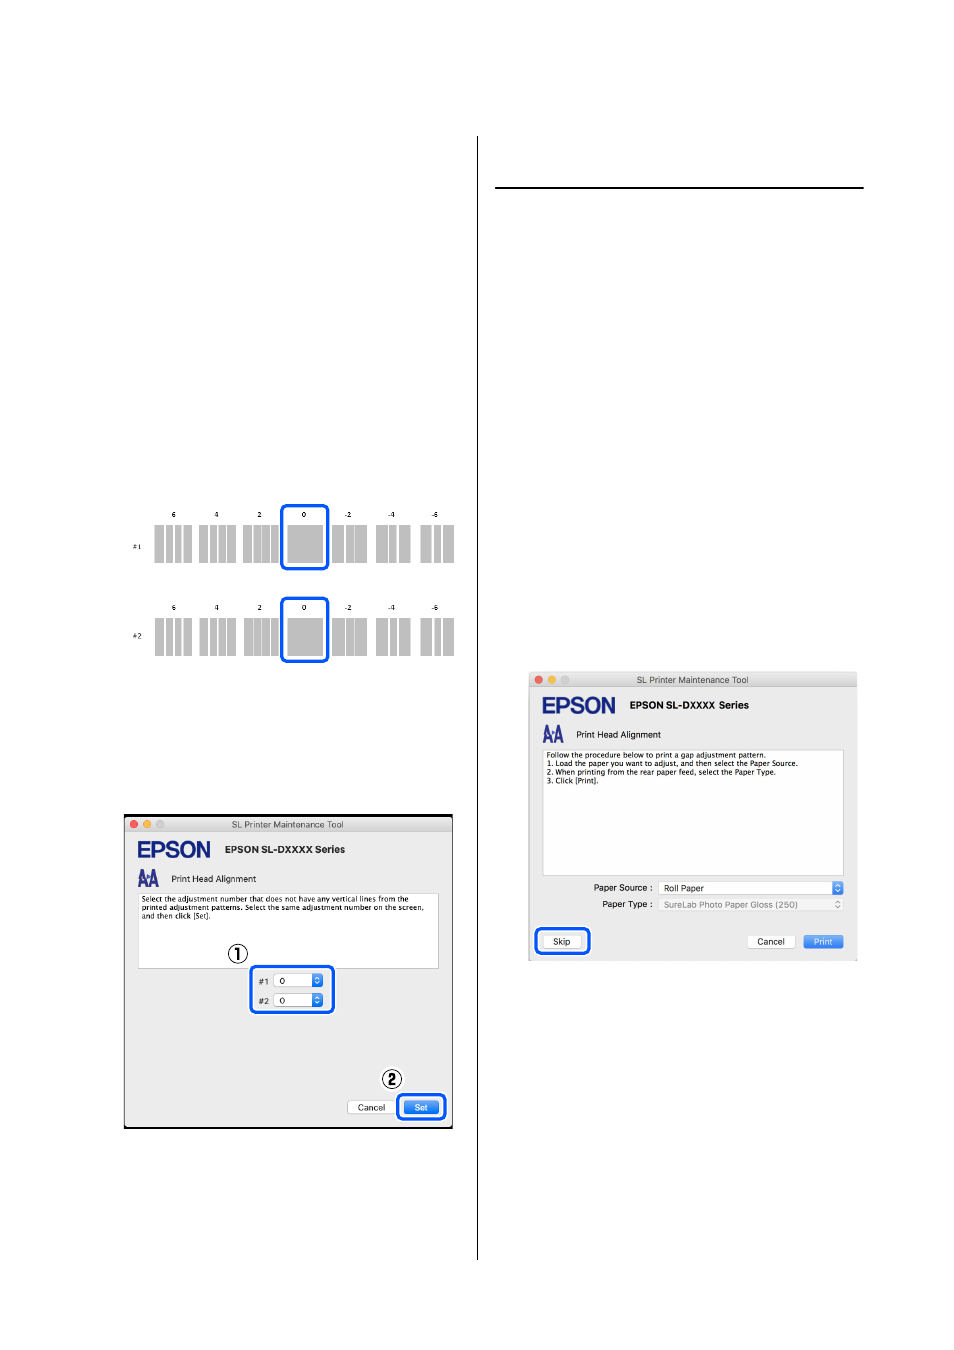
Check the printed adjustment pattern.
Two groups of adjustment patterns, #1 and #2,
are printed. Confirm which of the print pattern
numbers has no gaps between the nozzles in
each group.
7
Select the number of the print pattern you
confirmed, and then click
Set
.
Select the number of the print pattern you
confirmed individually for both
#1
and
#2
.
The adjustment values are applied.
If you are going to do Paper Feed Adjustment, then go
to step 4 in “Paper Feed Adjustment Method”.
U
“Paper Feed Adjustment Method” on page 107
Paper Feed Adjustment Method
Execute this when streaks and unevenness that occur in
print results are not improved even though print head
cleaning was executed.
1
Load paper to print an adjustment pattern.
U
2
Click
Print Head Alignment
on the main
screen.
The
Print Head Alignment
screen is displayed.
3
Click
Skip
.
If you do not click
Skip
to do this from Print
Head Alignment, see the following.
U