Welltech VoIP ATA series V.2.1 User Manual
Page 35
ATA-171/172/171P/171M/171+/172+
User’s Guide
the saving command by press [Save]. [Note Information] page will be seen which means
saving successfully. And the system will be restarted, please wait for a while.
Step 4: When an incoming call comes through FXO or FXO Port, please wait for a while
till heard the 2
nd
Dial Tone, then please dial FXS or FXO Port phone number.
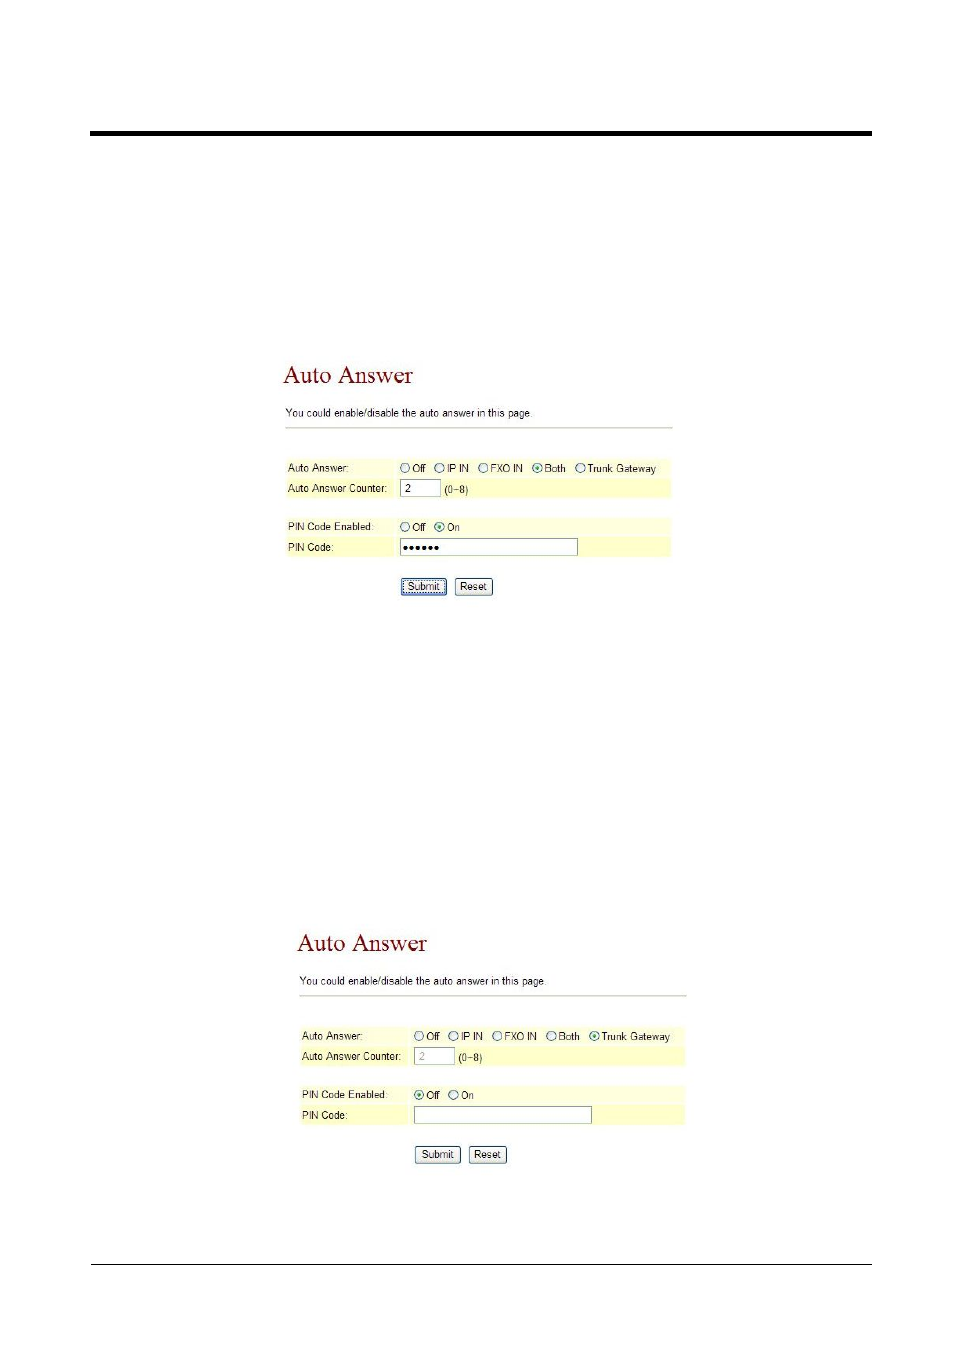
Example 2: Start Auto Answer+ PIN Code Function
Step 1
: On the main page, select [Phone SettingAuto Answer], enter [Auto Answer] page,
after revising information (e.g. Auto Answer: on, Auto Answer Counter: 1, PIN Code
Enabled: on, PIN Code: 123456) (See Figure 2), then press [Submit].
(Figure 2)
Step 2: After saving change, enter [Note Information] page, “Note Information” will be seen,
then the changing will come into effect.
Step 3: On the main page, select [Save Change] item, enter [Save Changes] page, and execute
the saving command by press [Save]. [Note Information] page will be seen which means
saving successfully. And the system will be restarted, please wait for a while.
Step 4: When dialing in through FXO or FXO Port, please wait for a while till hearing the
dialing tone, then input the PIN Code (e.g. 123456) end with “#” till hearing the
2
nd
dialing tone, then input FXS or FXO Port phone number.
Exp. 3: Activate Auto Answer to Trunk Gateway function
Step 1: In the main screen, select [Phone SettingàAuto Answer] item, enter into [Auto Answer]
screen, modify information (ex: Auto Answer: Trunk Gateway)(as of photo 3), and press
[Submit] button.
(Figure 3)
Step 2:After the saving setup function is saved, enter into [Note Information] screen, notify[must
execute saving modification setup and reactivate the system], the modification setup will be