Welltech VoIP ATA series V.2.1 User Manual
Page 107
ATA-171/172/171P/171M/171+/172+
User’s Guide
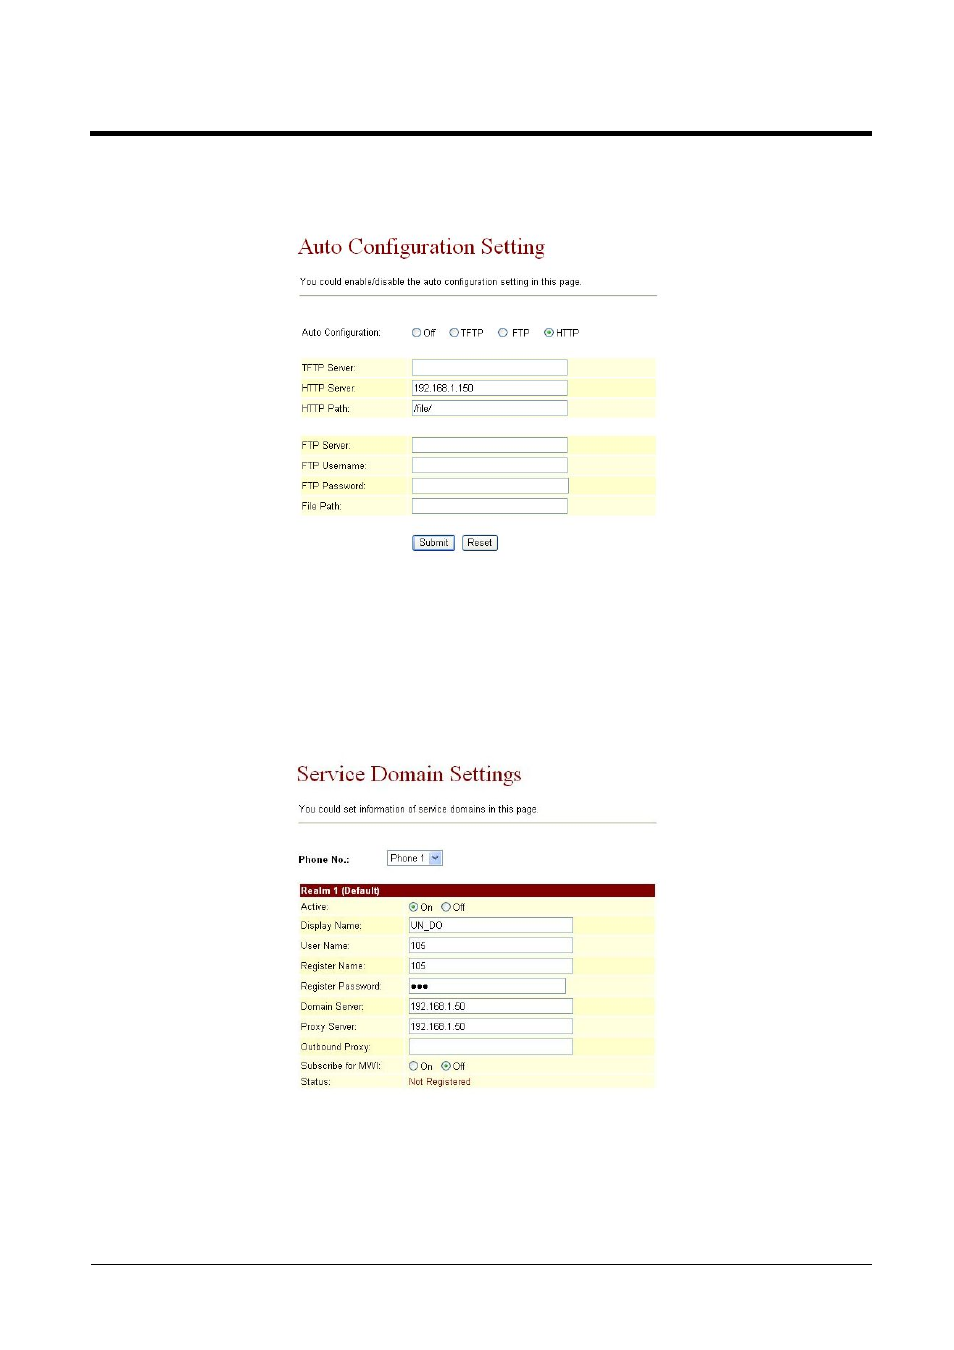
Step 1: On the main page, select [Others
Auto Config], enter [Auto Configuration Setting] page,
after revising the information (e.g.:
Auto Configuration: HTTP,HTTP Server:
192.168.1.50,HTTP Path: /file/) (See Figure 1), click [Submit] and save change.
(Figure 1)
Step 2: After saving change, enter [Note Information] page, “Note Information” will be seen, then the
changing will come into effect.
Step 3: On the main page, select [Save Change] item, enter [Save Changes] page, and execute the
saving command by click [Save]. [Note Information] page will be seen which means saving
successfully. And the system will be restarted, please wait for a while
Step 4:
After rebooting, it will connect to the file in HTTP Server, and searching the fit
information. After renew all information, the system will be rebooting again. Then
please login to check it (See Figure 2).
(Figure 2)
Example2: Using FTP to renew.
(Please build up Auto Configuration file.)
Step 1: On the main page, select [Others
Auto Config], enter [Auto Configuration Setting] page,
after revising the information (e.g.:
Auto Configuration: FTP,FTP
Server192.168.1.150,FTP Username: test,FTP Password: test,File Path: /file/)
(See Figure 3), click [Submit] and save change.