Welltech VoIP ATA series V.2.1 User Manual
Page 20
ATA-171/172/171P/171M/171+/172+
User’s Guide
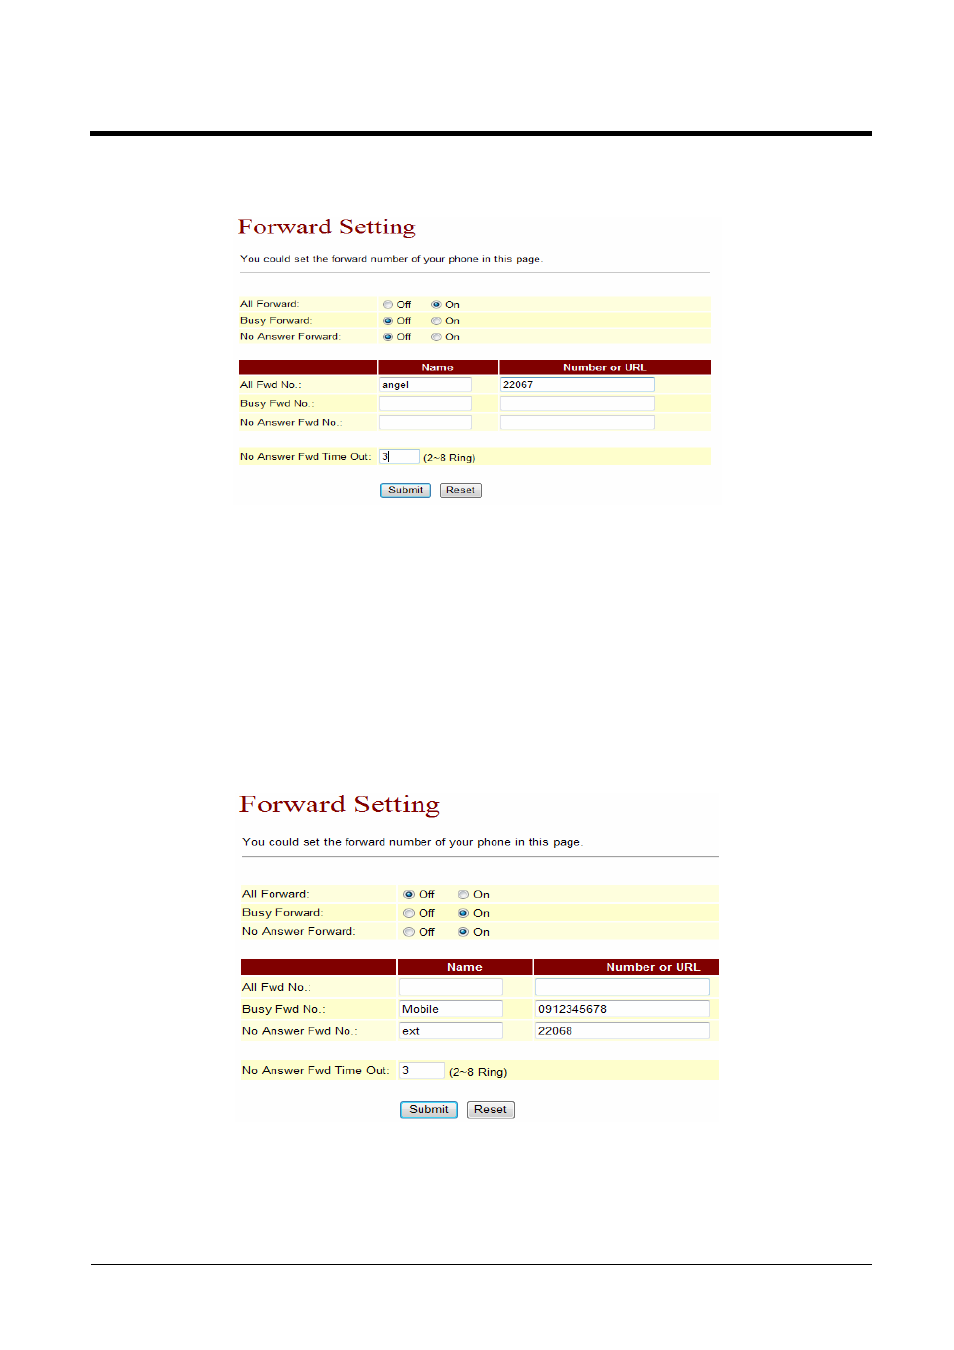
Step 1
: On the main page, select [Phone SettingForward Setting], enter [Forward Setting]
page, after revising all the information (All Forward: on, All fwd No Name: angel, URL:
22067), press [Submit]
(See Figure 1).
(Figure 1)
Step 2: After saving change, enter [Note Information] page, “Note Information” will be seen,
then the changing will come into effect.
Step 3: On the main page, select [Save Change] item, enter [Save Changes] page, and execute
the saving command by press [Save]. [Note Information] page will be seen which means
saving successfully. And the system will be restarted, please wait for a while.
Step 4: When receiving a new incoming call, and it will be forwarded to code [Register
Number: 22067] automatically.
Example 2: Busy Forward or No Answer Forward
Step 1
: On the main page, select [Phone SettingForward Setting], enter [Forward Setting]
page, after revising all the information (Busy Forward: on, No Answer Forward: on, Busy
fwd No Name: Mobil, URL: 0912345678, No Answer Fwd No Name: ext, URL: 22068) (See
Figure 2), then click [Submit].
(Figure 2)
Step 2: After saving change, enter [Note Information] page, “Note Information” will be seen,
then the changing will come into effect.
Step 3: On the main page, select [Save Change] item, enter [Save Changes] page, and execute
the saving command by press [Save]. [Note Information] page will be seen which means
saving successfully. And the system will be restarted, please wait for a second.