Servo (servo monitor), Sensor (telemetry sensor setup), Servo (servo monitoring) – HITEC Lynx 4S User Manual
Page 42: Manual, Rf-scan (radio frequency scanning cont.)
P42
MANUAL:
SECTION 3
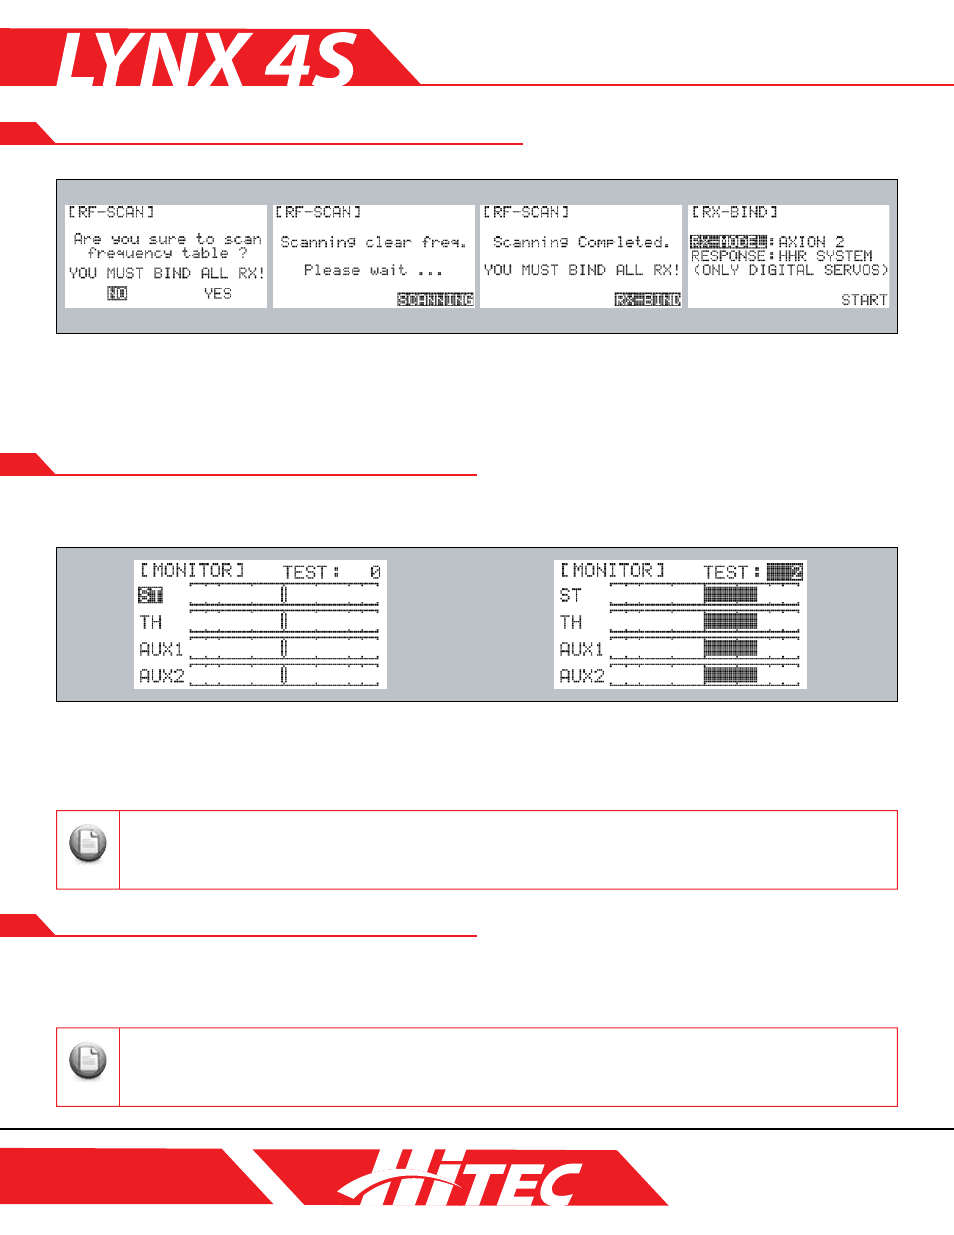
RF-Scan (Radio Frequency Scanning cont.)
Please DO NOT activate the ‘TEST’ function if the servos are already installed in the vehicle as it may cause damage to the
model or servo failure.
Note
Tip
Tip
Tip
1. Press the Main Dial button to access the function menu.
2. Select ‘RF-SCAN’ under the SYSTEM tab.
3. Press ‘YES’ to begin the scan.
4. Once scanning is complete, you will need to recreate the bind between your transmitter and any receivers.
Servo (Servo Monitor)
All servo operations can be checked by graph on-screen using the ‘TEST’ function to assess their condition.
The number assigned to the TEST value relates to test speed.
1. Press the Main Dial button to access the function menu.
2. Select ‘SERVO’ under the SYSTEM tab.
3. Move all servos connected with the receiver to check their condition.
4. You can adjust ‘TEST’ speed by changing the numbers next to ‘TEST.’
Sensor (Telemetry Sensor Setup)
Hitec’s AFHSS (Advanced Frequency Hopping Spread Spectrum) is supported by bi-directional communication
known as telemetry. With this function, users can check the data output of the telemetry sensors on-screen
and activate warnings to sound from the Lynx 4S speakers or earphone port.
The telemetry function is only compatible with a PROTON 4 receiver.
Note
Tip
Tip
Tip