Fusela ge finishing t ouches – Top Flite TOPA0300 User Manual
Page 43
❏
3. Install three hinges in the Rudder and
Fin assemb
ly
.
Do steps 4 and 5 after the model is co
vered.
❏
4. P
a
c
k
30-Min
ute Epo
xy into the tiller hole in
the Rudder
, then install the Rudder in the same
manner as the Ele
v
ators
.
❏
5. Hinge the
Ailer
ons
using the same
technique as the Ele
v
ators and Rudder
, b
u
t
without the torque rod inser
tion steps
.
THERE SHOULD BE NO HINGE GAP
❏
1. Be
v
el the 3/4” x 3” x 6” balsa
Lo
wer Aft
Fuse Bloc
k
to fit flush with F-8. Glue the Bloc
k
to the str
ingers and to F-8. Use a r
a
z
or plane
and sanding b
loc
k to shape the Bloc
k to b
lend
with the shape of the Fuse
.
❏
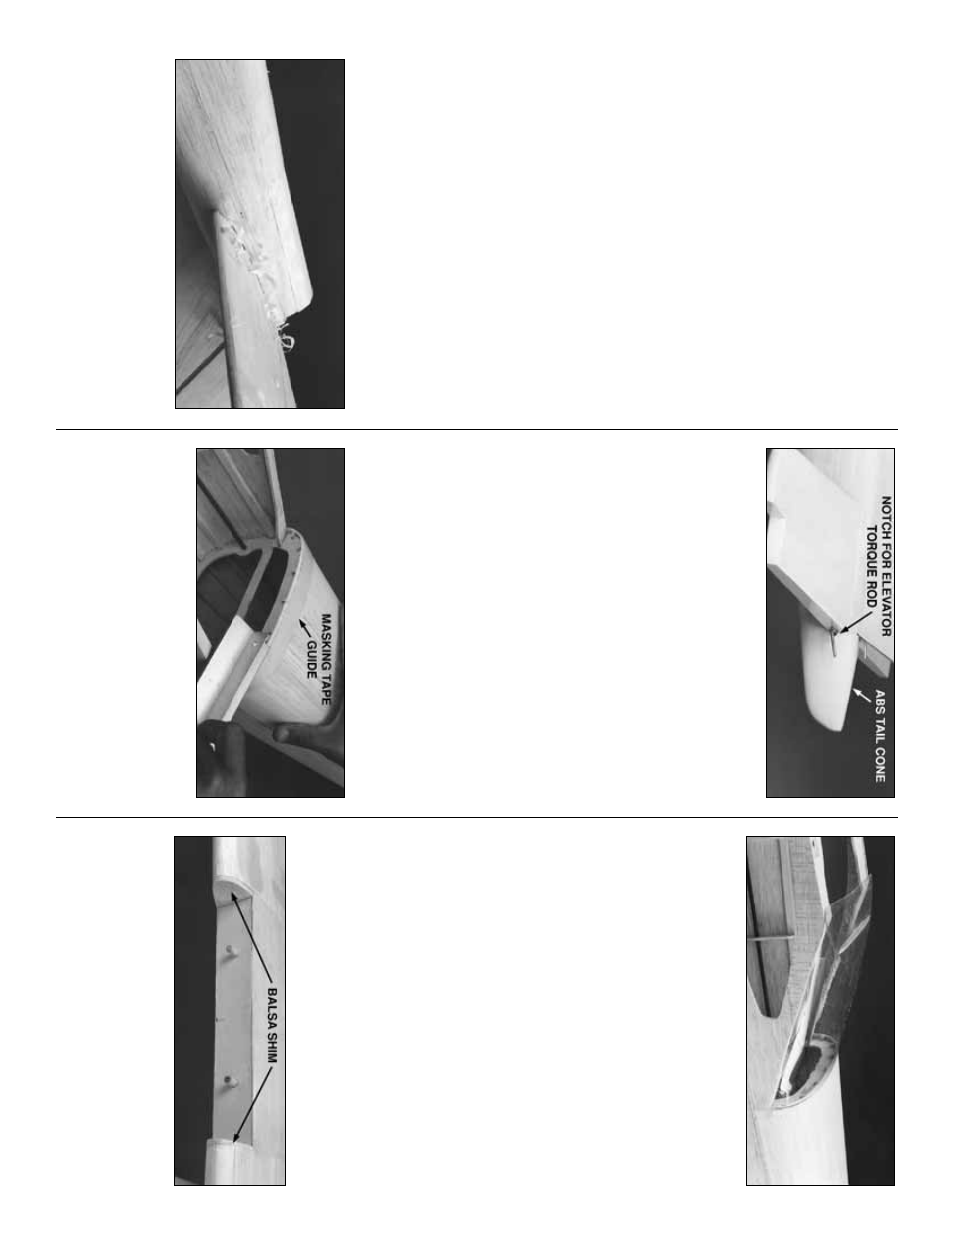
2. T
rim the left and r
ight ABS plastic
Ta
il
Cone
halv
es to the cut line
, then sand the edges
smooth. Glue the tw
o halv
es together with thin
CA. Hold the T
ail Cone up to the aft end of the
Fuse and mar
k
the location of the ele
v
a
tor joiner
wire on each side
. Notch out the T
ail Cone to
allo
w the joiner wire to fit through it. Use thic
k
CA to glue the T
ail Cone in position.
❏
3. Blend the T
a
il Cone to the Fuse b
y
roughening the plastic with coarse sandpaper
, then
applying balsa filler around the joint. When the filler
is dr
y, f
eather the edges with a sanding b
loc
k.
❏
4. Sand a 1/32” recess around the protr
uding
top sheeting at F-5B so that the Butyr
ate Rear
Windo
w will fit flush with the fuse top
.
Se
v
e
ra
l
la
y
ers of masking tape wr
apped o
v
er the top
sheeting mak
es a handy guide f
or sanding e
v
en
channels such as this
.
❏
5. T
rim the Butyr
ate Rear Windo
w to the
embossed cut lines
. T
est fit the Rear Windo
w
and mak
e
adjustments as needed with a
sanding b
loc
k and 220-g
rit sandpaper
.
❏
6. Roughen the inside edges of the Rear
Windo
w where it will contact the fuse
, then glue
it in position with RC-56 glue or 6-Min
ute Epo
xy
.
❏
7. Use balsa filler to f
eather the Rear Windo
w
into the fuse after the glue has cured. (See
directions f
o
r Step 3.)
❏
8. Install the wing then fit a 1/4" x 1-5/8" x
1-5/8" balsa shim on each inboard wing root to
fill the gap betw
een the Wing and the Cabin
Sides
. Lea
v
e
about a 1/16” gap on both sides
, to
allo
w f
or the thic
kness of the F
ront Windshield.
FUSELA
GE FINISHING
T
OUCHES
43