Wing completion – Top Flite TOPA0300 User Manual
Page 25
❏❏
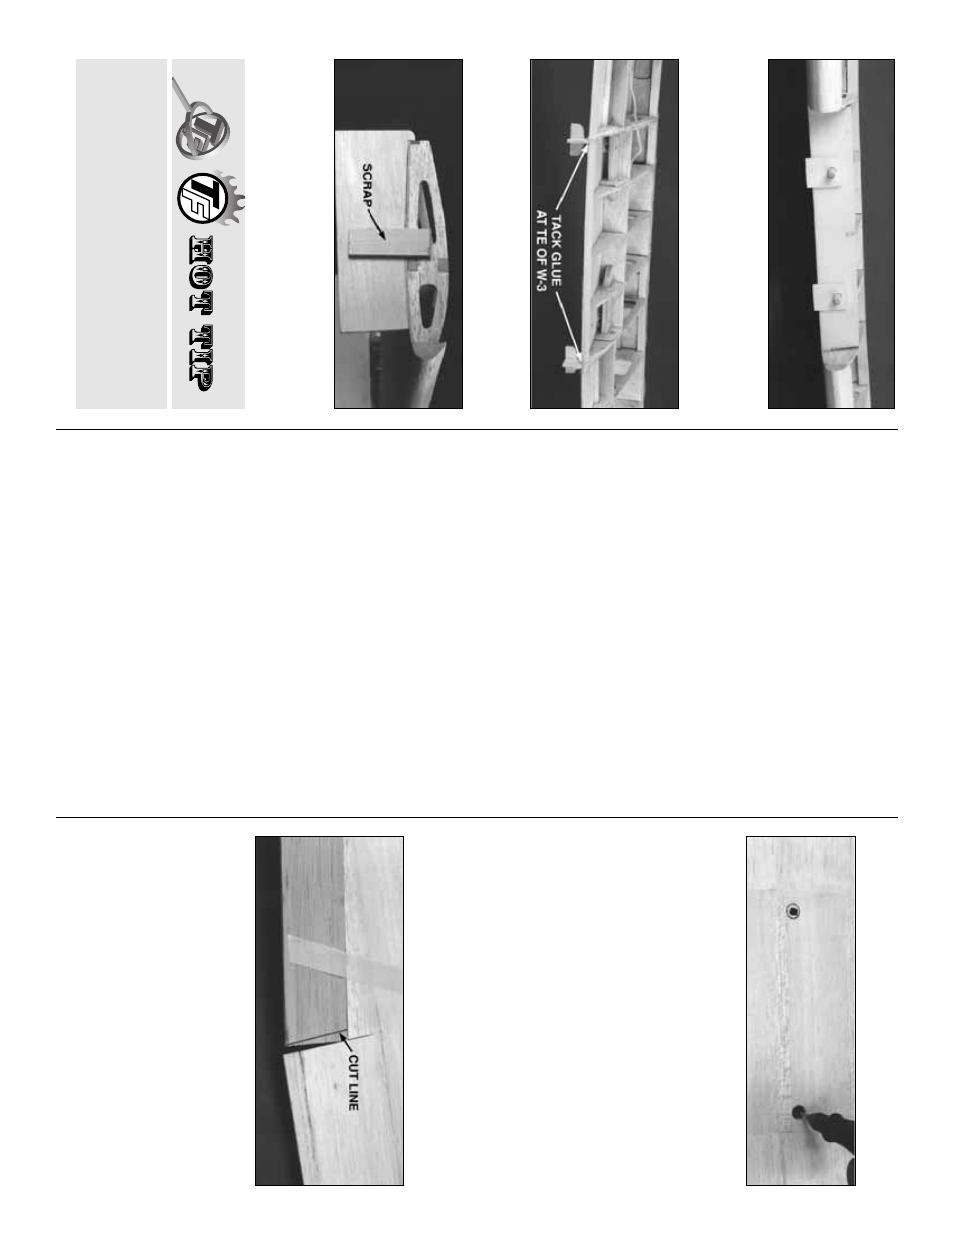
2. Slide the die-cut 1/8” ply
LE Jigs
ov
e
r
the do
w
els
, with the flat edge to
w
ards the
sheeted (bottom) side of the wing.
❏❏
3. T
a
c
k
glue the die-cut 1/8” ply
TE Jigs
to
the sheeting at the TE of W
-3.
❏❏
4. Place a die-cut 1/8” plyw
ood
Tip Jig
under each W
-14 r
ib with the r
aised tip of the jig
b
utting up to the TE spar
. T
a
c
k
glue it in place
.
NO
TE: Use the same pr
ocedure to sheet the
top of the wing as y
ou used f
or the bottom.
❏❏
5. Cut the top
Center P
anel Skin
from the
skin y
ou made ear
lier
. Remember that it should
line up with the dividing line betw
een r
ibs W
-3
and W
-4. When satisfied with the fit, glue it in
place with thic
k CA.
❏❏
6. Chec
k the fit of an outboard skin to the
wing str
ucture
. Mak
e adjustments if required to
fit flush with the LE and Center P
anel. Sand a
slight be
v
el to the edge of the skin that will
contact the LE to allo
w f
or a better gluing
surf
ace
. Use thic
k CA to glue the skin in
position. Hold the skin fir
mly in place while the
CA cures
.
Magazines mak
e good w
eights
.
Wic
k
thin CA along the LE seam, wiping off an
y
e
xcess CA bef
ore it hardens
.
❏❏
7. Repeat step 6 f
or the other outer panel.
❏❏
8. Measure
, cut and glue a 1/16” x 3” x 36”
balsa sheet to fit o
v
er the Flaps and the
openings at the aft edge of the wing skins
, as
y
ou did f
or the bottom of the wing.
At this point y
ou should ha
v
e
the main wing
str
ucture fully sheeted. Y
ou ma
y no
w remo
v
e
all
Jig par
ts from the wing and sand off an
y
glue mar
ks
.
❏❏
1. T
rim the sheeting where it protr
udes past
the edge of the str
ucture
.
❏❏
2. Sand the wing
Leading Edg
e
until it
b
lends w
ell with the sheeting to f
o
rm
a
smooth airf
oil.
❏❏
3. Square off the wing tips with a T
-bar
.
❏❏
4. Use a pointed piece of wire to mar
k the
holes f
o
r the wing bolts from the bottom,
thr
ough
the top wing skin. Use a hob
b
y
knif
e to
carefully cut a 1/4” hole in the sheeting around
the points y
o
u mar
k
ed. Inser
t one of the 1/4”
n
ylon wing bolts through the wing from the top
,
and tr
ace around the head with a pen. Enlarge
the holes to the circles y
ou just dre
w to allo
w the
wing mounting bolts to seat against the wing
mounting plates
. Use a round file or Moto-T
ool
and g
rinding dr
um to a
v
oid tear
ing the sheeting.
IMPOR
T
A
NT
: The Ailer
ons m
ust be fitted to
the wing and the hing
e be
vels sanded
bef
ore installing the wing tips or cutting the
flaps loose
.
❏❏
5. T
ape a tapered 2-3/32” x 21” balsa
Ailer
on
to the
Outer Aft Spar
with one end
against W
-7.
Don’t be alar
med if the Aileron TE
is higher than the TE at W
-7; this will be tak
en
care of when the aileron LE is tapered.
Dr
a
w
a
line on the Aileron, par
allel to the edge of W
-7.
Remo
v
e
the Aileron, then cut and sand it to this
line
. Chec
k the fit and mak
e an
y minor
corrections as needed.
WING COMPLETION
Glue a piece of scr
ap ply to the side of the jig
and also to the W
-14 r
ibs (as sho
wn here) to
pre
v
ent the jig from mo
ving or ha
ving to glue it
to the sheeting.
25