Sheet the bottom of the wing – Top Flite TOPA0300 User Manual
Page 22
❏❏
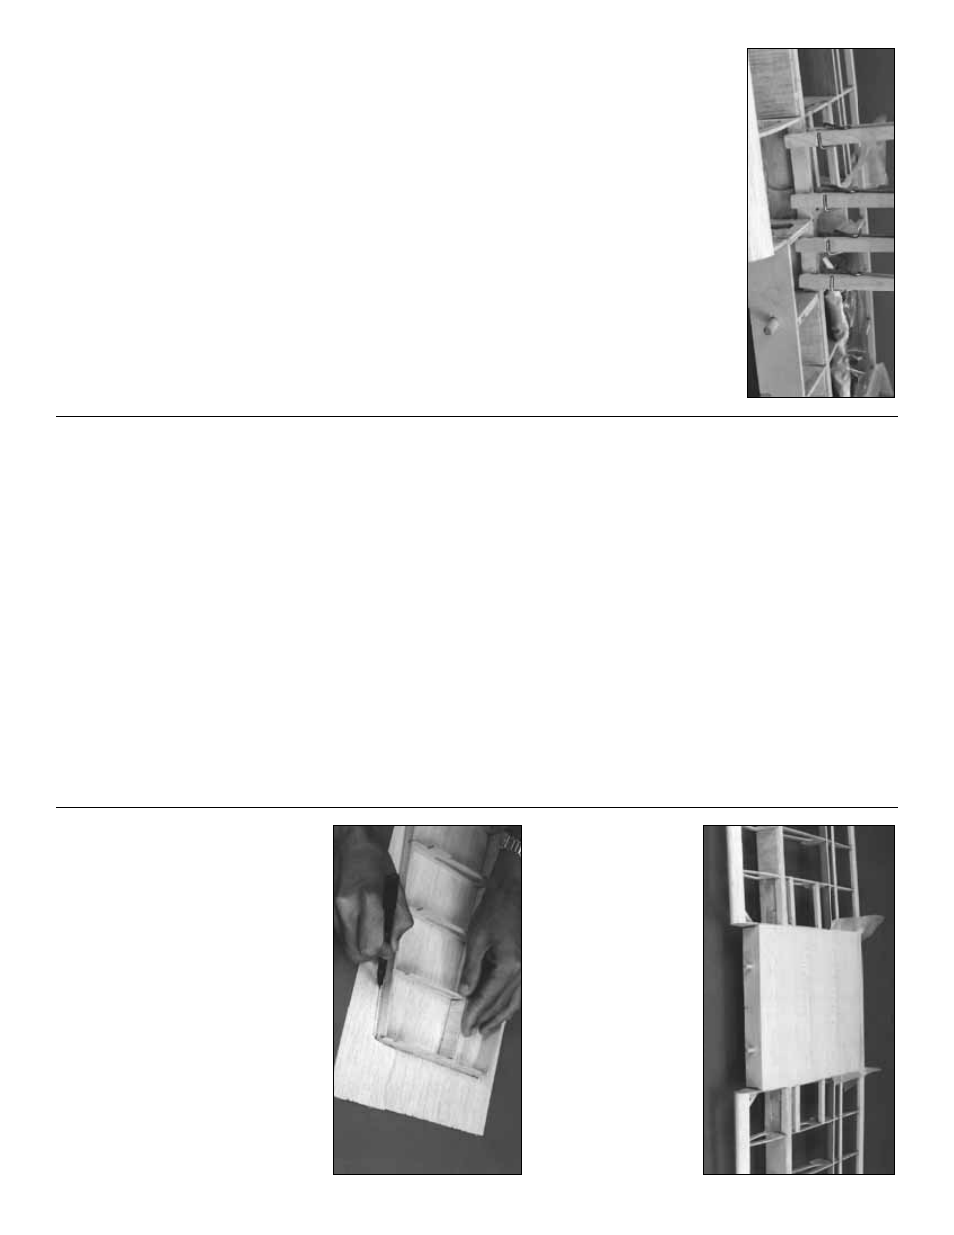
6. T
est fit the 1/16” die-cut ply bottom
Spar
Joiner
in the slots
. J
ust lik
e the P
olyhedr
al
Br
aces
, the Spar Joiners ha
v
e
one end that is
longer than the other
. The longer end points
to
w
ards the wing tip
. Equally sand the ends if
needed f
or a good fit betw
een the r
ibs
. Use 6-
min
ute or 30-Min
ute Epo
xy to glue the Spar
Joiners in position.
Clothes pins mak
e
handy
clamps while the epo
xy cures
.
❏❏
7. T
u
rn
the wing o
v
er and repeat the
process of installing the Spar Joiners on the top
wing spars
.
Our suggested wing sheeting process allo
ws
y
ou to sheet each of the wing panels with one
skin per side — plus a little e
xtr
a f
or the flaps
.
This technique is better than sheeting the wing
with individual sheets
, and allo
ws y
ou to
pre-
sand
all of the seams that will be o
v
er open
str
ucture
.
All balsa sheeting will usually bend when it’
s cut
from the log since inter
nal stresses are relie
v
ed.
F
or the best results
, tr
im the edges of the wing
sheeting with a long metal str
aightedge and a
sharp
knif
e bef
ore joining them. Y
ou ma
y also
tr
y tur
ning the sheets diff
erent w
a
ys to see if the
edges will line up e
v
enly
. If the bend is only
slight, use 150-g
rit sandpaper on a long sanding
b
loc
k to smooth out the cur
v
ature
.
For more
inf
ormation on making wing skins ref
er bac
k
to pa
g
e
10 f
or the
Hot Tip.
NO
TE: Do the f
ollo
wing steps f
or both the
right and left wing panels.
❏
1. Sor
t through the remaining 1/16” x 3” x 36”
balsa sheets and pic
k out the 6 best sheets to
be used f
or the top surf
aces of the outboard
wing panels
. Pic
k the best three sheets from the
1/16” x 3” x 21” sheeting to use f
or the top
Center Section skin
❏
2. La
y w
a
x
e
d paper o
v
er a flat,
smooth
w
o
rk
surf
ace
.
❏
3. Mak
e
f
our outboar
d wing skins
b
y
edge
gluing
three
1/16” x 3” x 36” balsa wing sheets
together to mak
e
(f
our) 9” x 36” skins
. Mak
e
one
center section
skin using
four
sheets of 1/16” x
3” x 21” balsa. This skin will be cut in half
after
sanding
to mak
e
tw
o 12” x 10-1/2”
skins
. Ref
er
to page 10 f
or tips on making skins
.
NO
TE: When sheeting, be sure that the
wing is resting squarel
y on the center
section Jig Bloc
ks, weighted do
wn on a flat
surface
, and that the W
-14 jig tabs are in
solid contact with the b
u
ilding surface
.
❏
4. Hold a 1/16” x 12” x 10-1/2” center section
skin on the bottom surf
ace of the wing with one
edge b
utted up to the LE. Mar
k
the per
imeter of
the skin. The
side edg
es of the skin
should be
centered on the joint
betw
een r
ibs W
-3 and W
-
4. Cut the skin close to the correct siz
e then
sand
it f
o
r an e
xact fit.
❏
5. Glue the center skin in position using
medium or thic
k CA. Hold the skin in contact
with the fr
ame until the glue has cured.
❏❏
6. Fit one of the 9” x 36” skins in place on
an outboard wing panel, with one long edge
b
utted tightly against the inner LE. The inboard
edge should o
v
er
lap the center section. T
ape the
skin in place
. With a fle
xib
le r
u
ler
, mar
k the edge
that mates with the center panel. Flip the wing
o
v
er and mar
k the tip and TE from the bac
k side
.
Allo
w an e
xtr
a 1/4” around these tw
o edges
.
Remo
v
e
the skin and cut it to the mar
k
ed siz
e
. If
necessar
y,
use 220 g
rit sandpaper to
fine tune
the inboard edge f
or an
e
xact
fit.
The photo at
step #9 sho
ws appro
ximately what y
our sheet
should look lik
e when it’
s tr
immed.
Sheet the bottom of the wing
22